Summary
- Buy a 12-14 pound USDA Prime whole brisket.
- Watch the videos linked in this article to see how Aaron Franklin trims brisket before cooking and slices it after cooking.
- Remove any fat and silverskin from the lean side, trim the fat side down to 1/4″ thick. Make the brisket “aerodynamic” per Franklin’s videos.
- Apply a 50/50 kosher salt and coarse ground pepper rub 1 hour before cooking.
- Cook the brisket fat-side down at 250-275°F to an internal temperature of 170°F.
- Wrap in butcher paper and continue cooking fat-side up until 205°F and probe tender.
- Rest in paper for 10 minutes on kitchen counter, then move into an empty cooler and rest for 2-3 hours before slicing.
I’ve had the pleasure of visiting Franklin Barbecue in Austin, Texas on two occasions, once during SWSX in 2012 and again in 2015 during the TVWB Central Texas Barbecue Crawl. Both times the brisket was fabulous, and each time I remember thinking, “Can I make brisket like this on my Weber Smokey Mountain Cooker?”
Well, the short answer is “No”. Even when I buy the same brand of brisket that Aaron Franklin uses, trim it as shown in his numerous videos, use the same kosher salt and 16-mesh black pepper he uses, and wrap the meat in the same pink butcher paper he uses, I cannot exactly replicate Franklin Barbecue brisket. Why? Because I don’t have Franklin’s offset pit, I don’t have his seasoned post oak split logs, and most importantly, I don’t have his many years of experience barbecuing thousands upon thousands of briskets.
Still, it was fun trying and mine turned out pretty good, if I do say so myself. My wife says it was my best brisket ever…and I don’t pay her to say that.
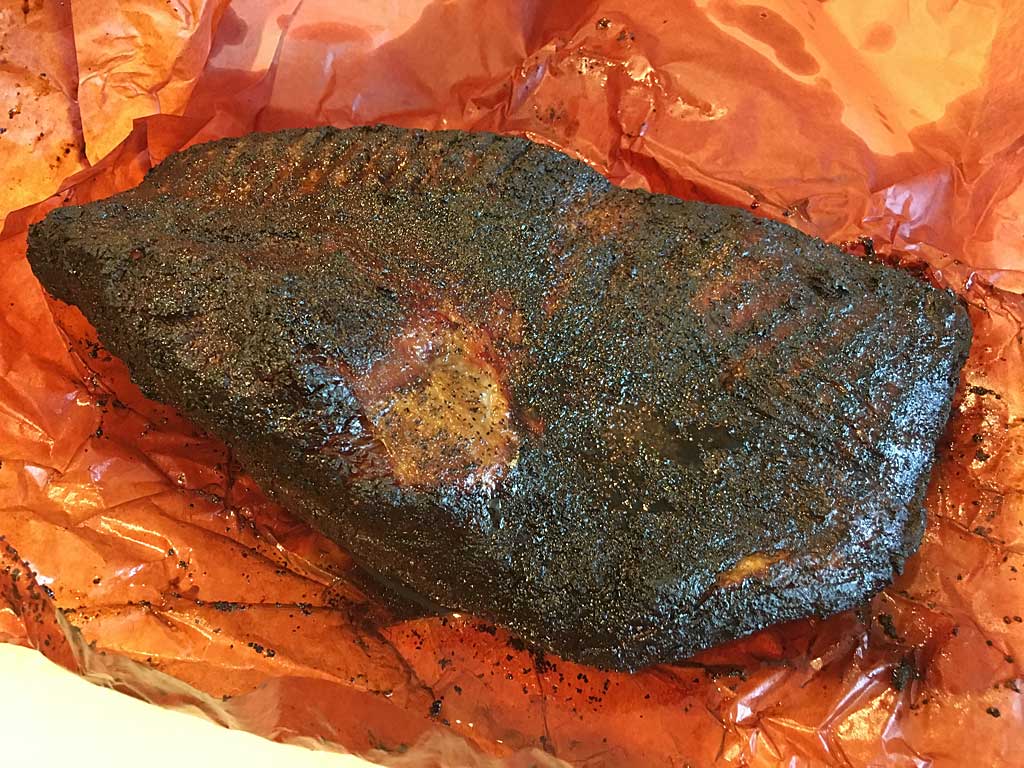
Here are some photos I took when I tried my hand at Central Texas style whole beef brisket on September 24-25, 2017.
Source For Pink Butcher Paper
Brisket is wrapped in butcher paper part way through the cooking process to keep the meat from getting too much smoke, to help retain moisture, and to slightly accelerate the cooking process. The paper “breathes” more than aluminum foil, also known as the “Texas Crutch”, and some people think that’s an advantage over foil.
Why pink butcher paper? Because that’s what Aaron Franklin of Franklin Barbecue in Austin, Texas uses on the whole briskets he cooks at his famous restaurant. Franklin has single-handedly done more to boost sales of pink butcher paper than anyone in the history of…well, butcher paper. If you don’t know who Aaron Franklin is, you must be living in a cave without Internet service. Stop and read this article and this article right now.
OK, welcome back.
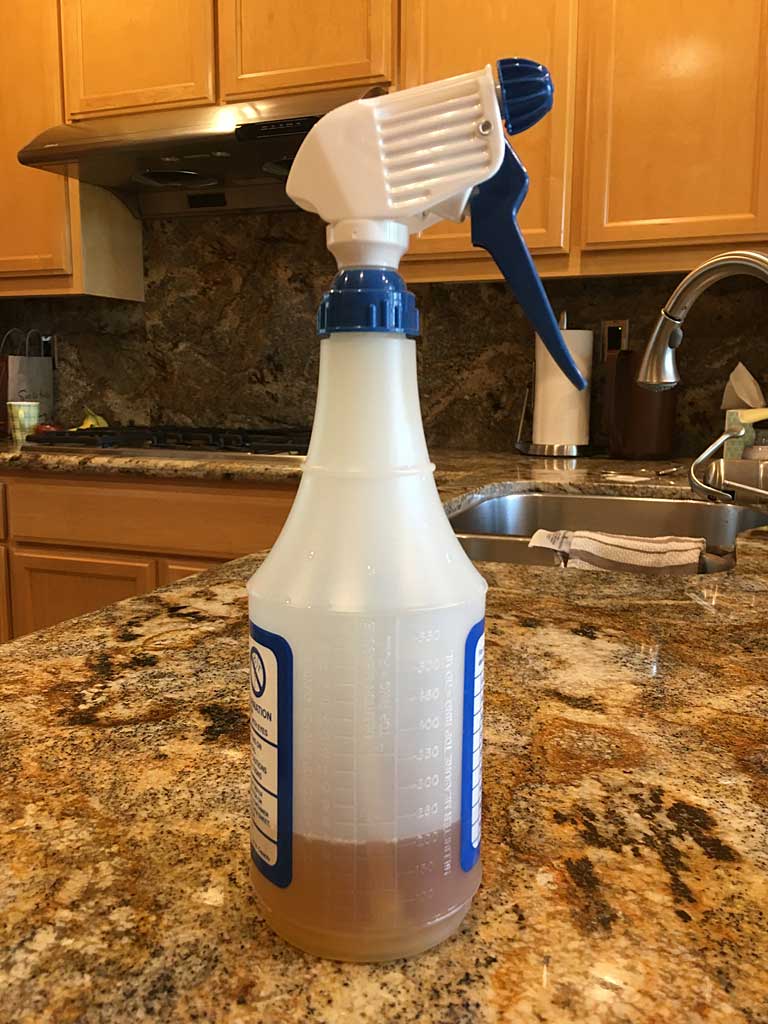
One downside to butcher paper is you cannot add beef broth or other liquids to it toward the end of the cooking process like you can when using aluminum foil. That’s OK for Central Texas style brisket because they’re not big on adding liquids to brisket. Franklin just lightly sprays the surface of the paper and the meat with apple cider vinegar, wraps the meat, and puts it back in the smoker to finish cooking.
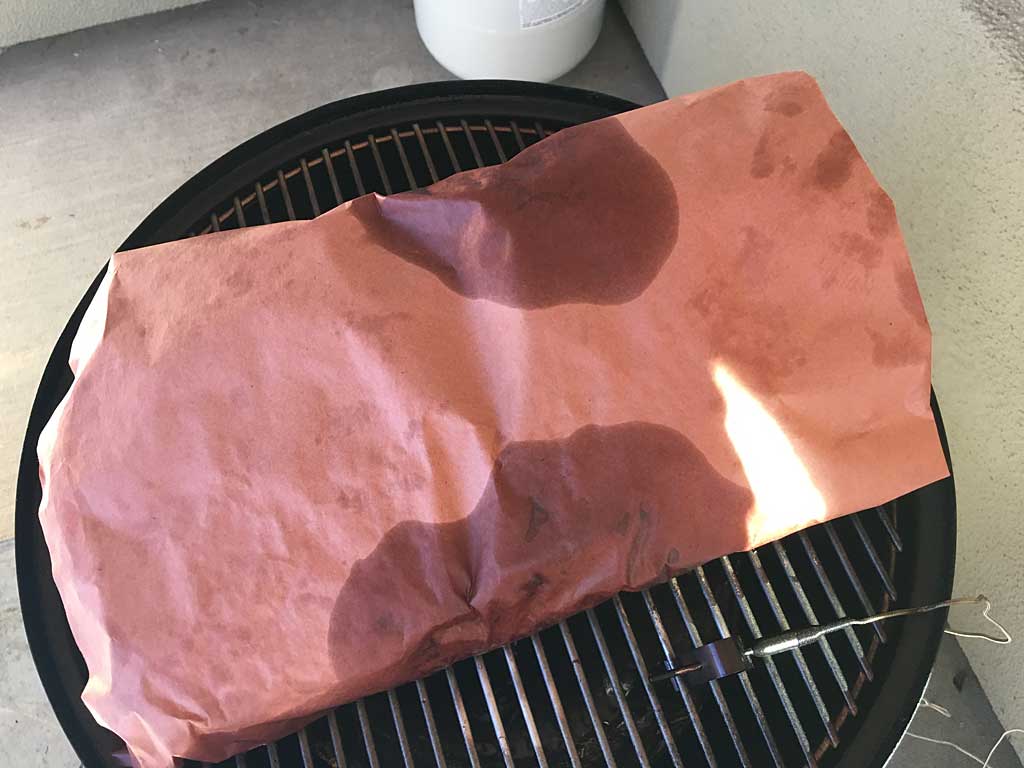
Despite what you might think, butcher paper does not catch fire in the Weber Bullet as long as you run the cooker at normal barbecuing temperatures up to about 300°F. I haven’t tried cooking above that temp, so if you do you’re on your own. To be safe, keep a fire extinguisher nearby at all times.
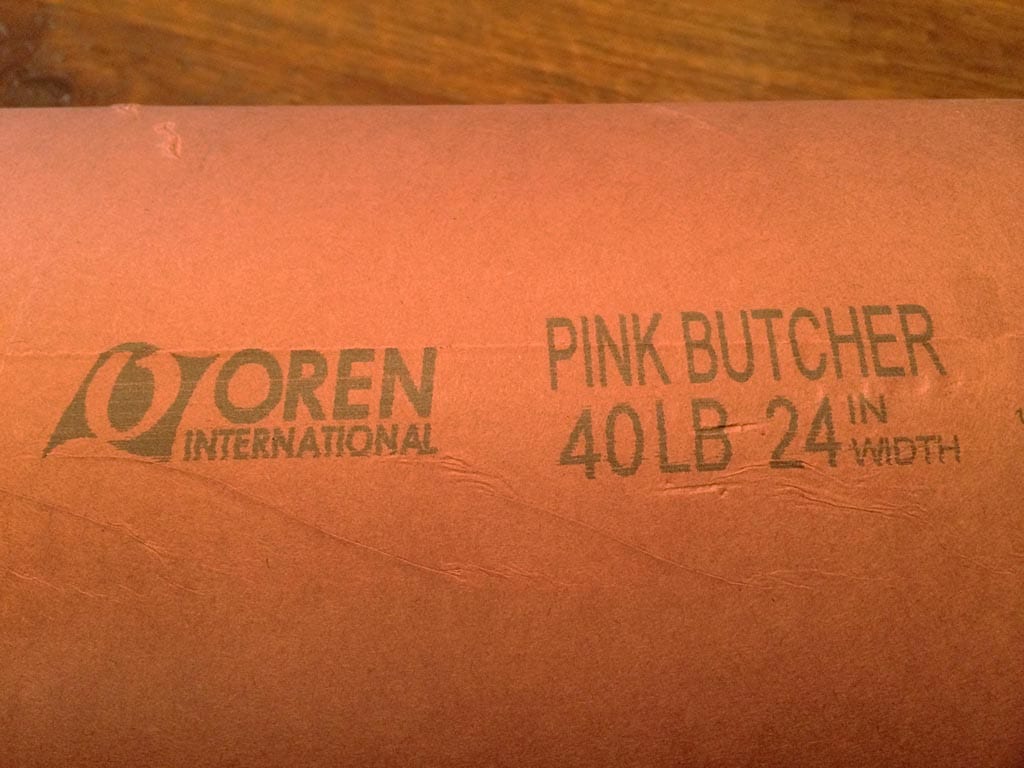
What kind of butcher paper to buy? Look for 40 lb. paper (that’s a measure of thickness) that is at least 18″ wide, but 24″ wide is better. It costs a bit more, but it’s easier to wrap briskets using wider paper. You want an uncoated paper—no wax or plastic on one side. As for color, it’s not important, but if you want to make authentic Aaron Franklin brisket, you can order pink butcher paper from a number of suppliers.
What about using brown kraft paper or grocery bags instead of butcher paper? I wouldn’t. Who knows how it’s made or where it’s been? Paper suppliers say that butcher paper is made from USDA/FDA approved kraft paper, so there is a “food safe” aspect to butcher paper that is not guaranteed when using other papers.
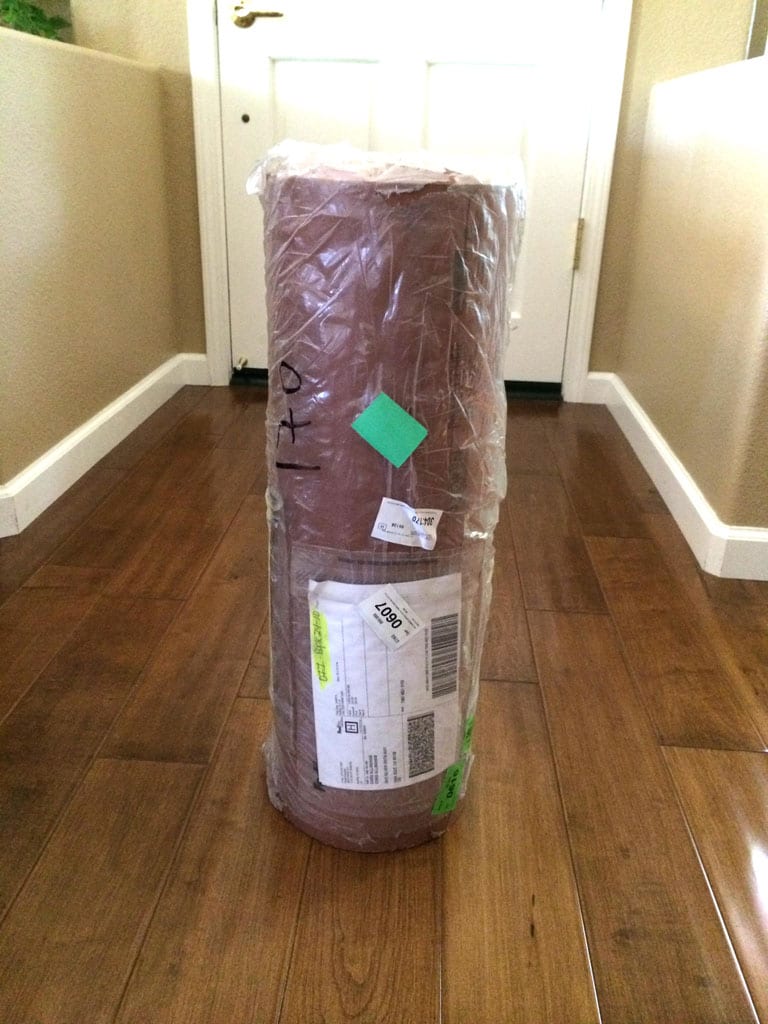
I ordered this roll of 24″ wide pink butcher paper from ABCO Paper in Austin, Texas. It’s hard to find on their website; it’s best to call them at 800-556-2677 to check on availability and pricing. The nice lady on the phone knew exactly what I wanted and was happy to take an order for a single roll.
It’s a lot of paper…1,000 feet, to be exact, and it doesn’t come cheap. This roll cost me $69 delivered, but it will last me forever. I learned later that you can buy smaller quantities of 24″ pink butcher paper at Amazon.com.
Order The Brisket

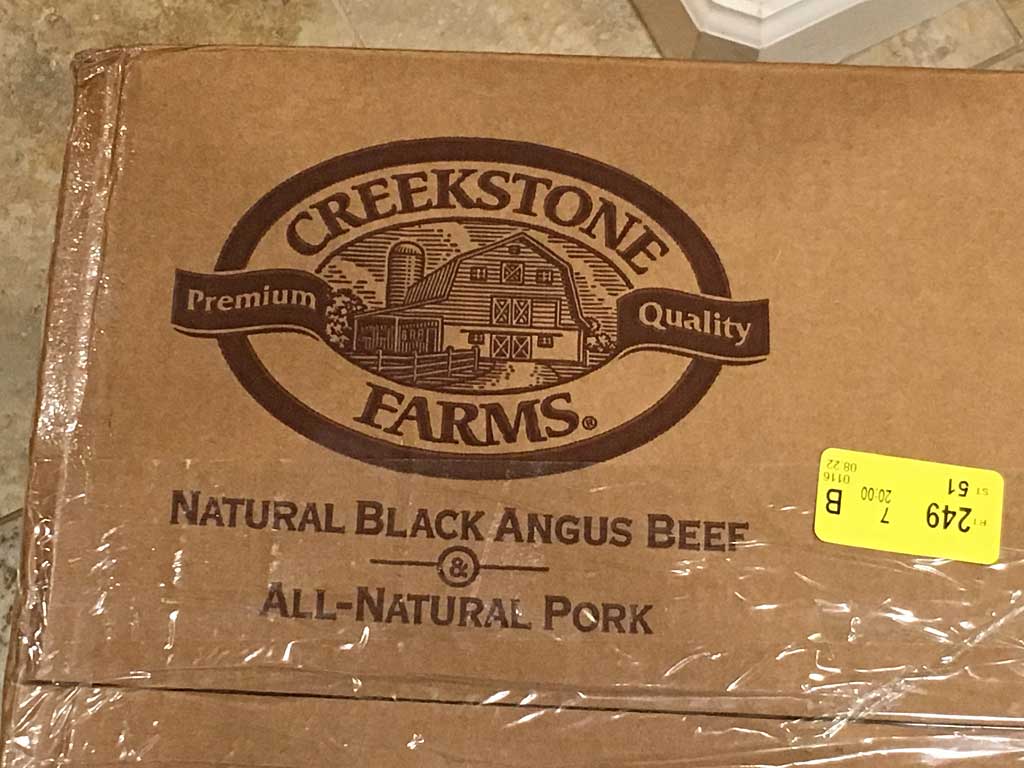
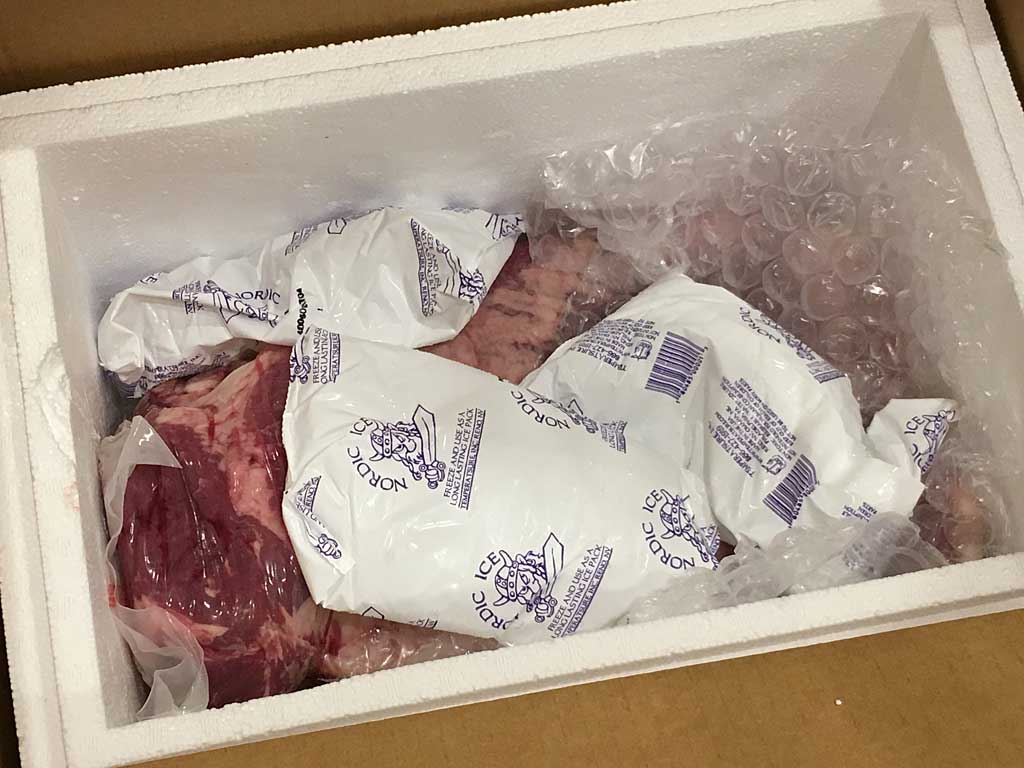
Franklin Barbecue is known to use Creekstone Farms USDA Prime grade briskets, so I ordered a 14-16 pound specimen for $129.99 less a 10% KCBS member discount for a total of $116.99 delivered. The fresh, never frozen brisket arrived a few days later, packed in a Styrofoam cooler filled with dry ice and frozen ice gel packs, nice and cool. The actual weight of the brisket was not indicated on the package—something I think Creekstone Farms should do—and it exceeded the 11 pound capacity of my kitchen scale. By adding together the weight of the trimmed brisket and the removed fat, I came up with 13.7 pounds—close, but not 14 pounds. Bad dog, Creekstone Farms!
The photos above show how the brisket was boxed and delivered by Creekstone Farms.
Watch Franklin Videos On Trimming Brisket
Aaron Franklin has appeared in several videos demonstrating how he likes to trim briskets. I watched these two videos before trimming my brisket and I suggest you do the same.
Franklin says he likes a trimmed brisket to have an “aerodynamic shape” without sharp edges or ragged bits that will burn during cooking. He also removes thin areas of the flat that will overcook and can’t be served to customers. After watching these videos, it’s up to you to decide how to interpret his method and apply it to your particular brisket.
Trim The Lean Side Of The Brisket
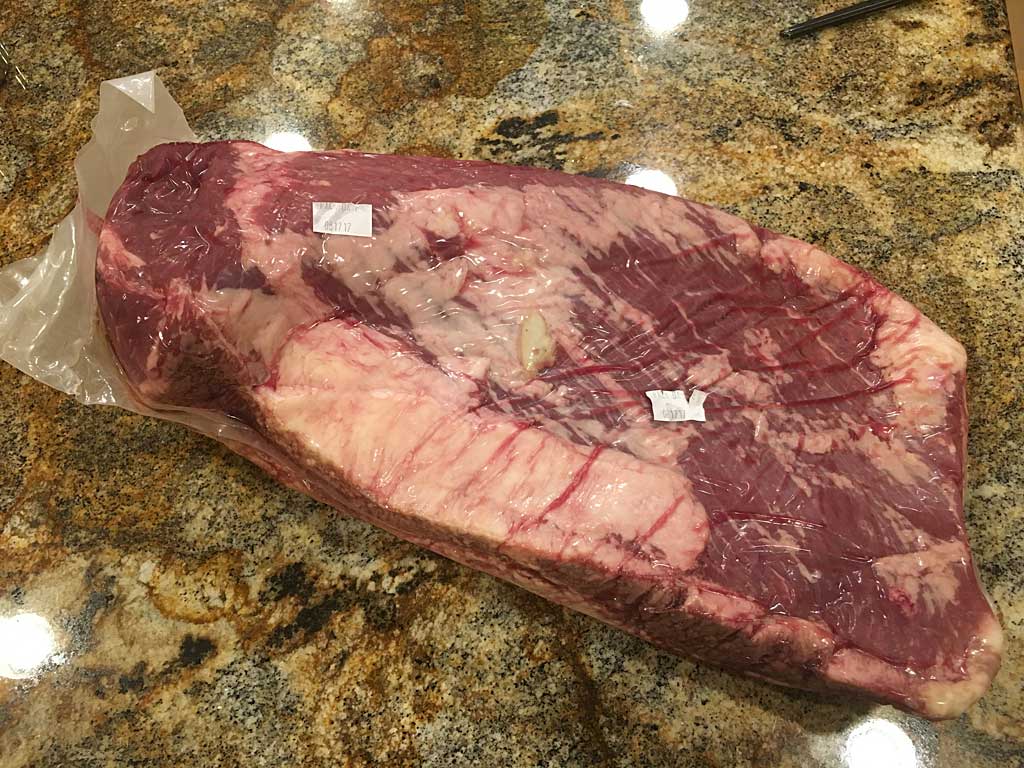
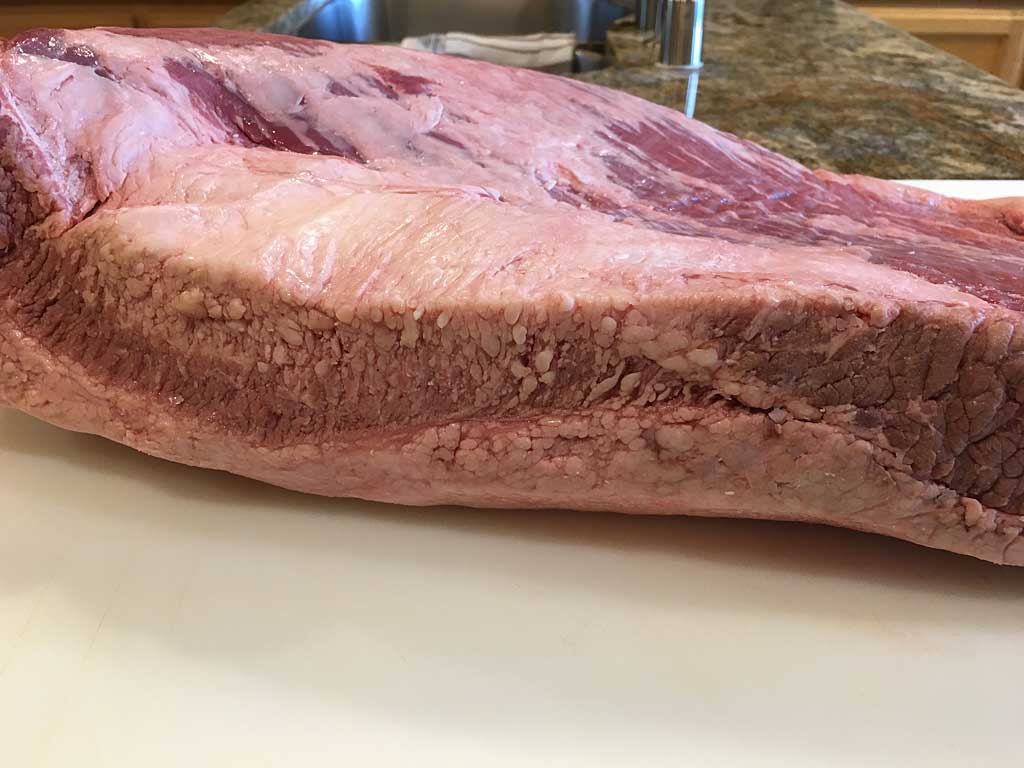
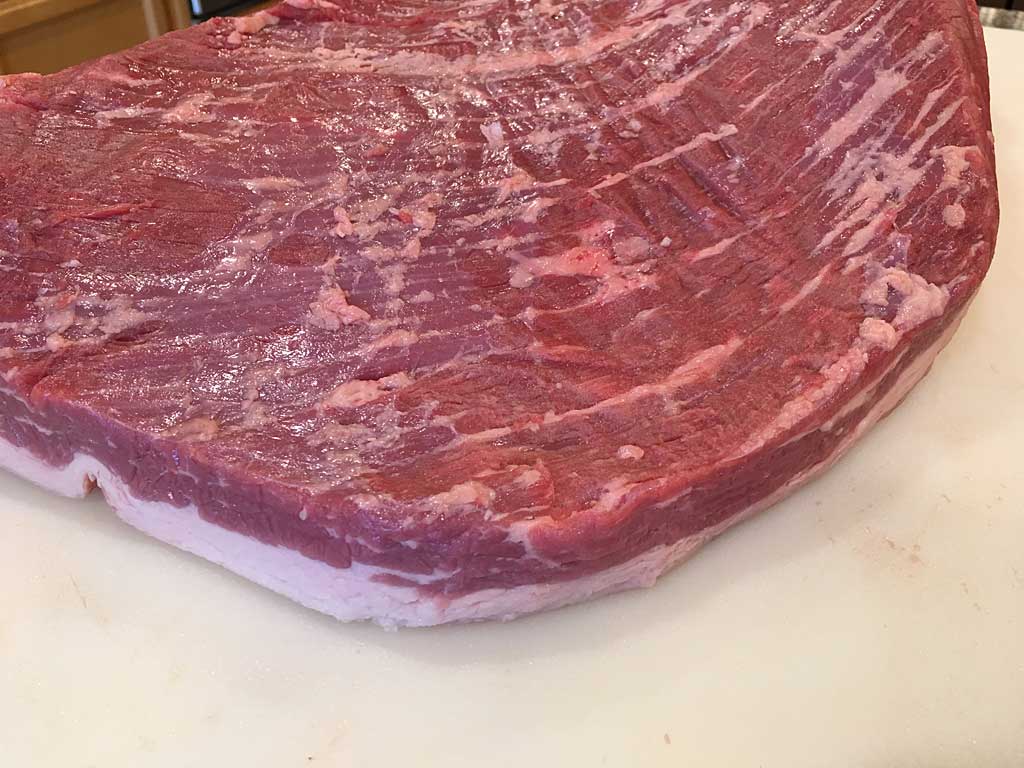
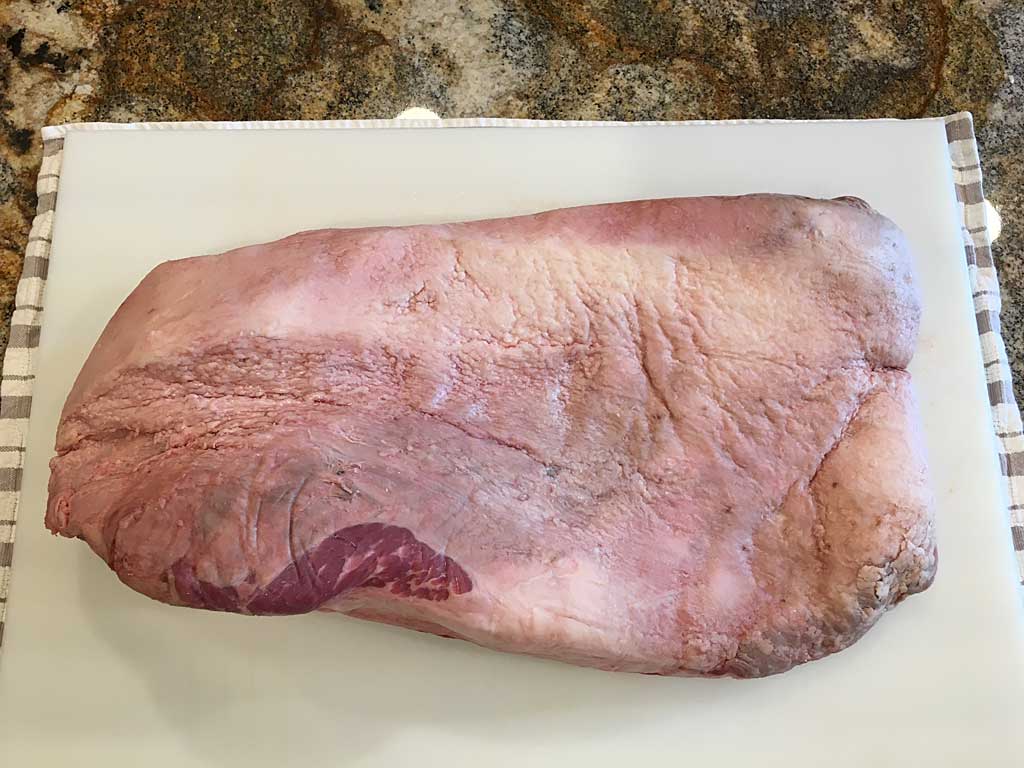
What follows are a series of photos showing how I trimmed my brisket, starting with the lean side. Most of these photos are in pairs; the first photo shows before I trimmed, the second photo shows after I trimmed.
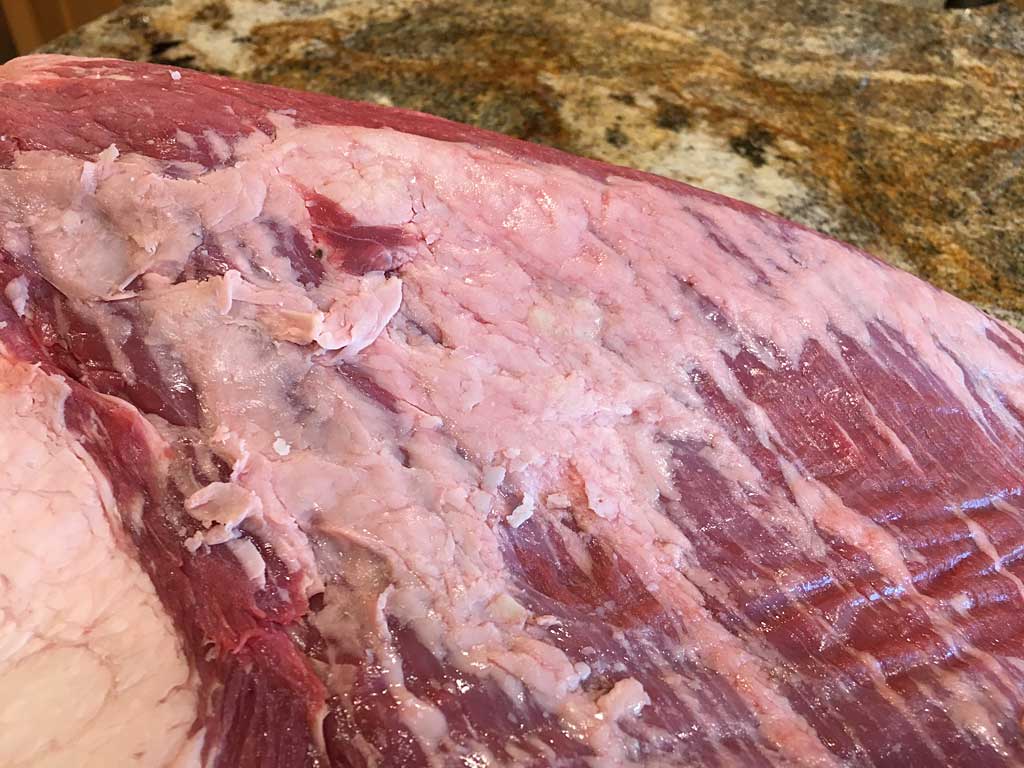
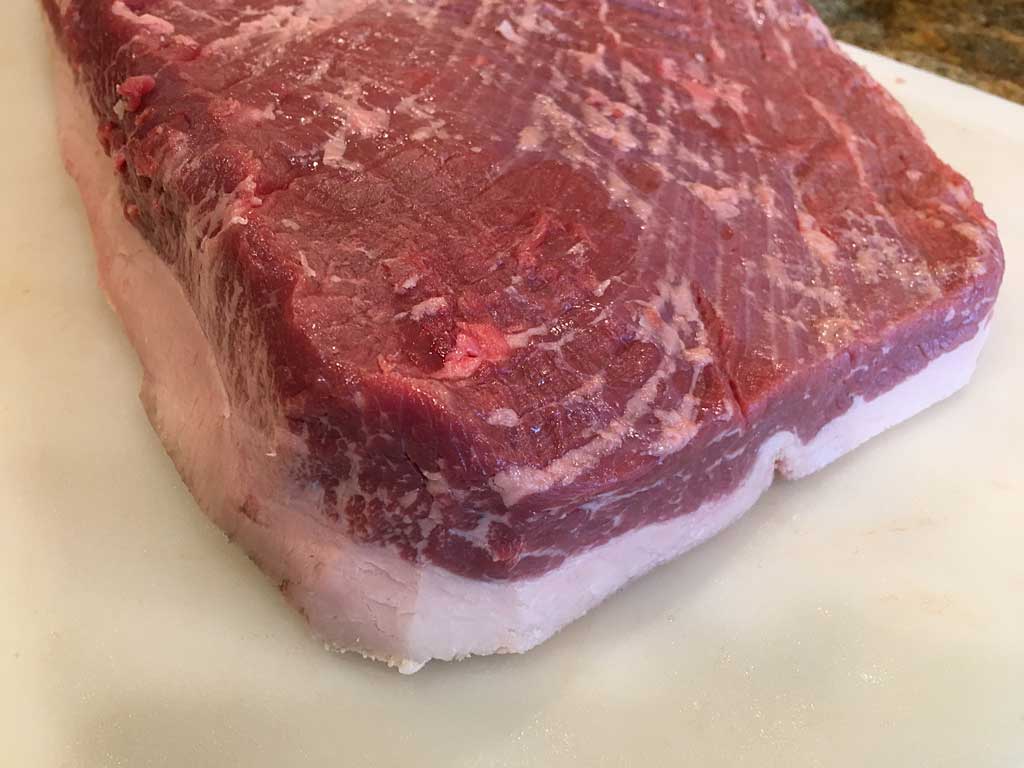
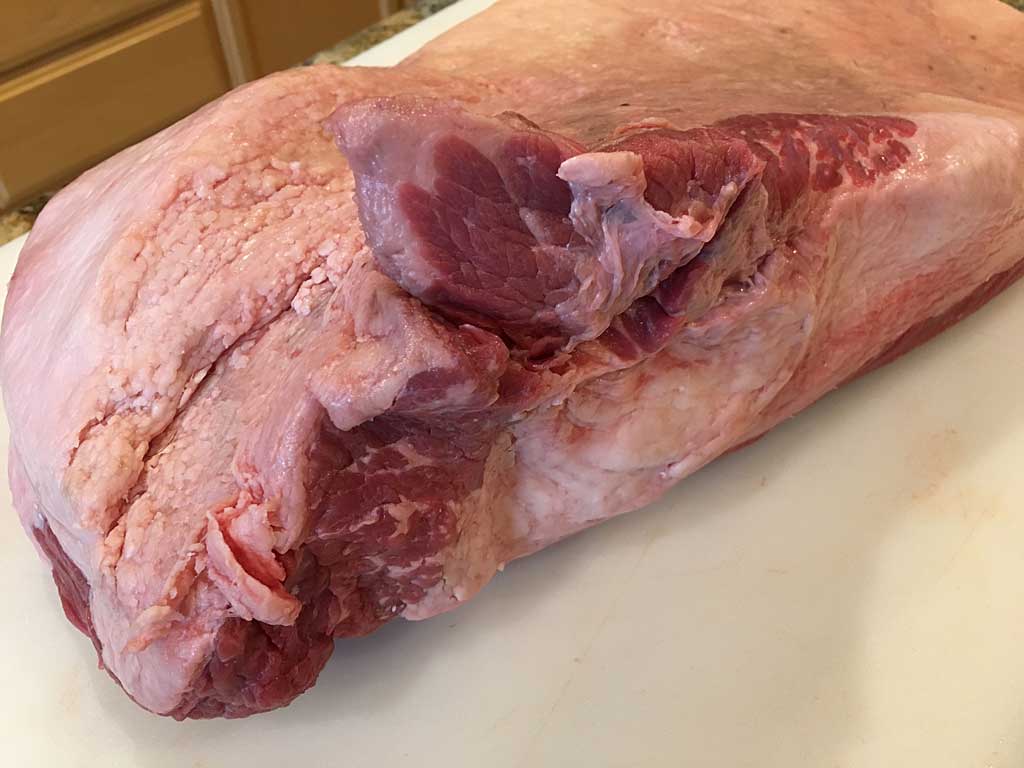
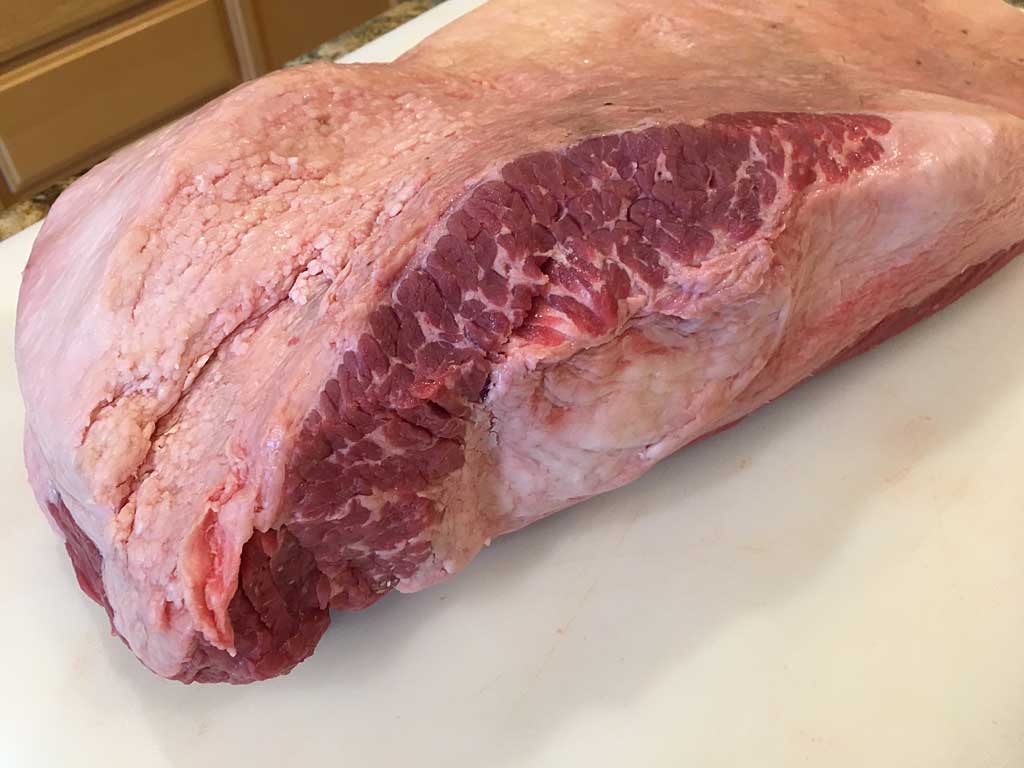
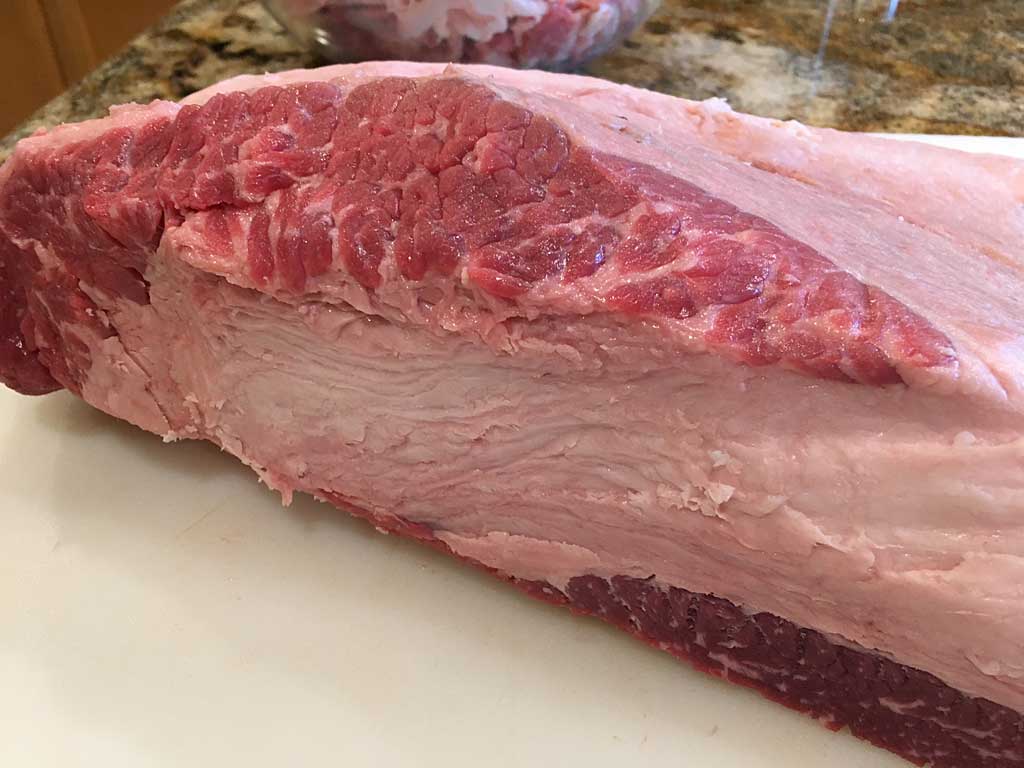
In this first group of photos, the first photo shows the lean side of the brisket before trimming. The next two photos show the discolored edge of the brisket that occurs when the side of beef receives its antimicrobial treatment during processing and how I trimmed off this edge.
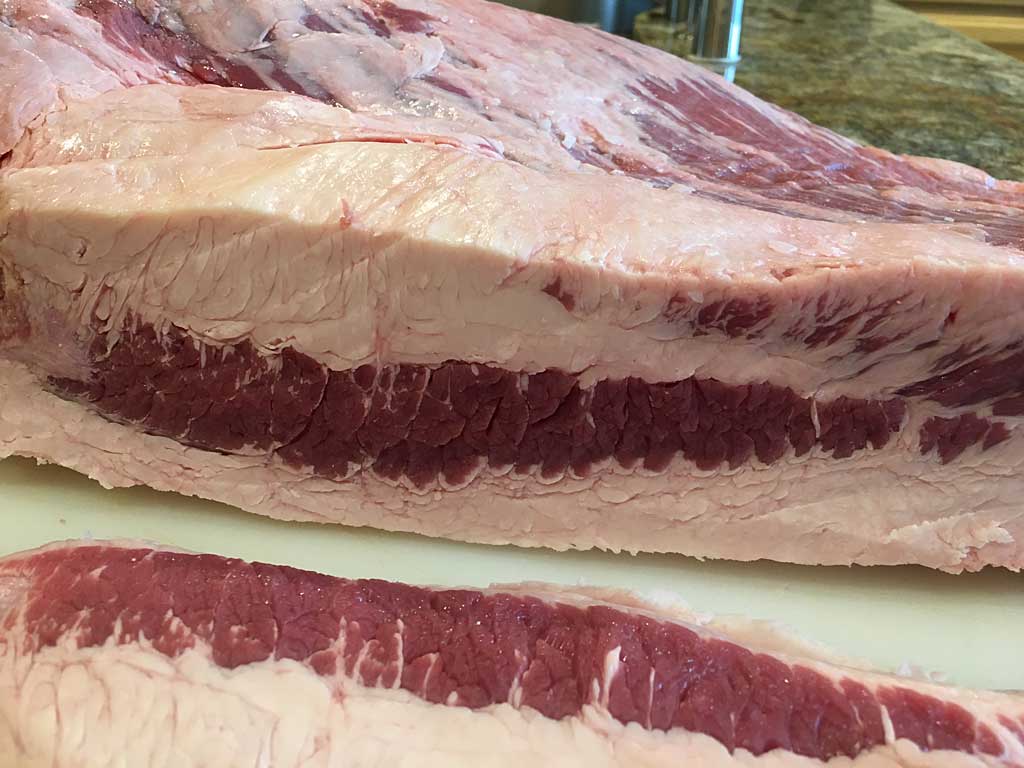
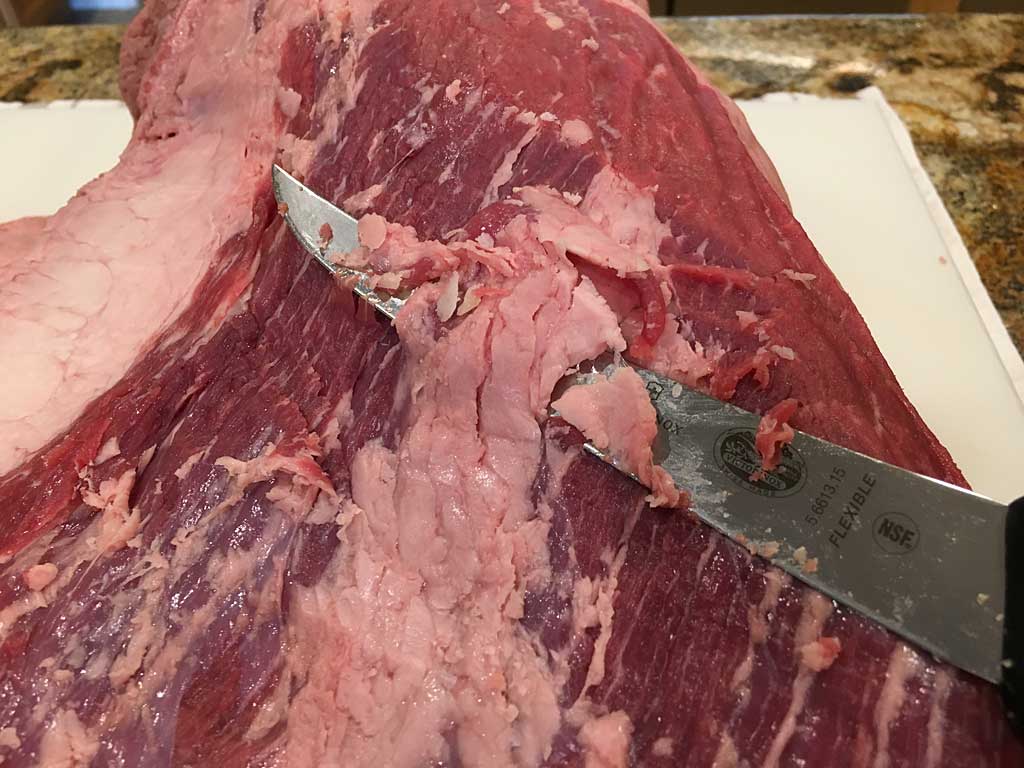
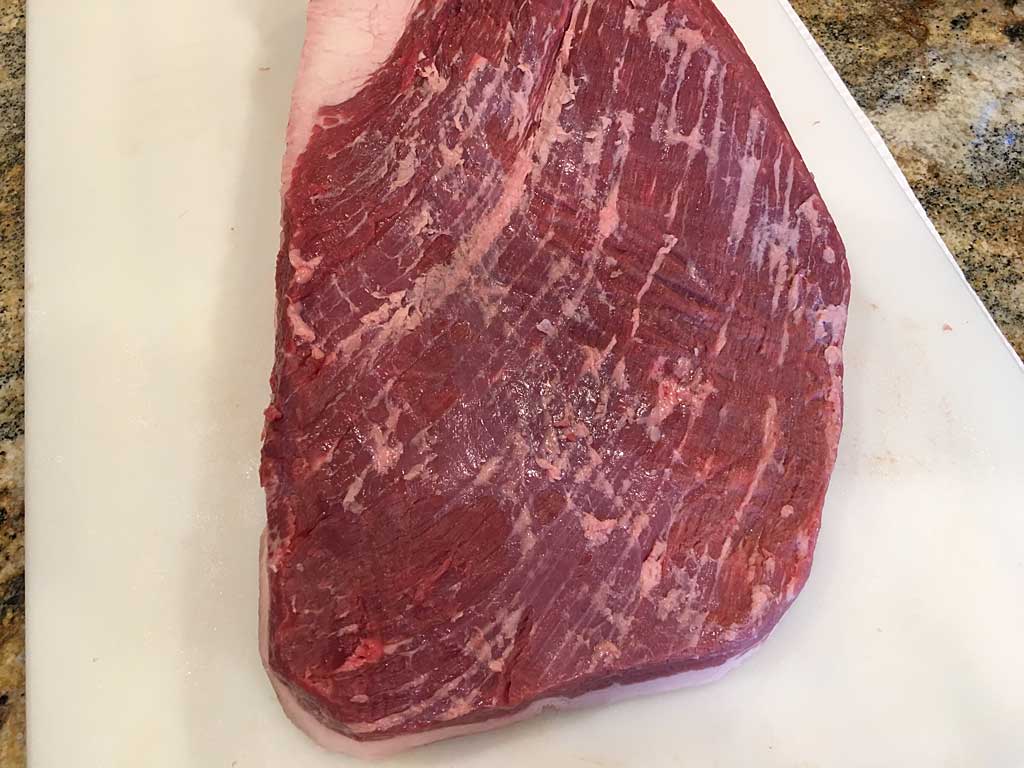
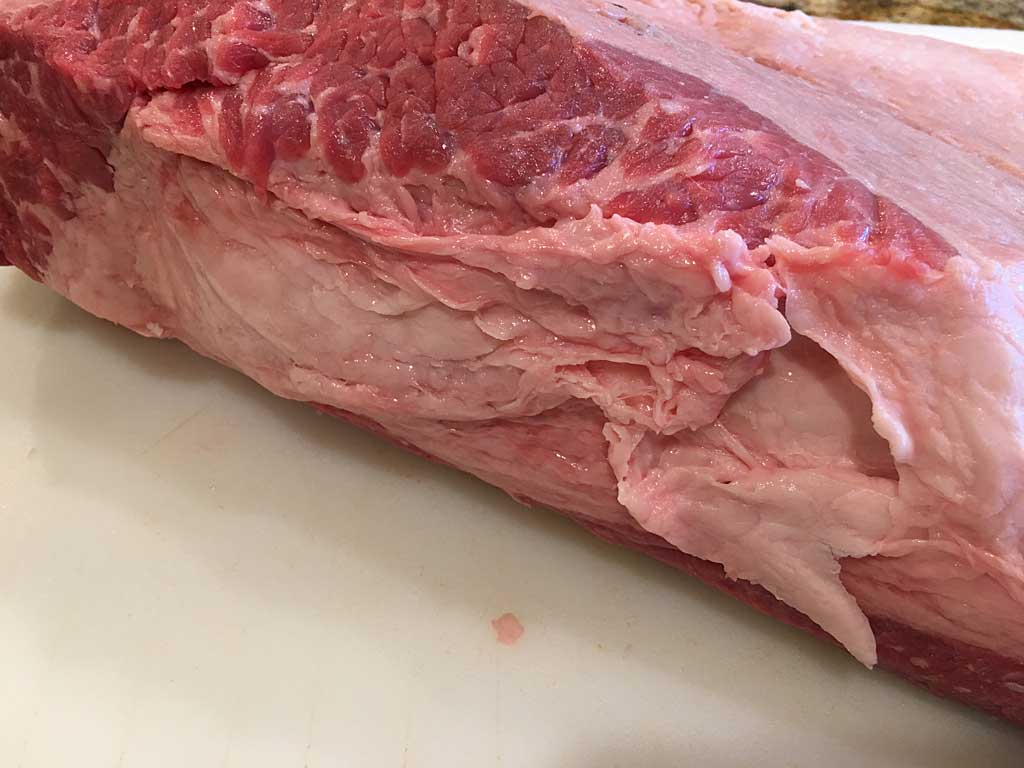
In the next group of photos, the first two photos show the seam of hard fat between the flat and point sections and how I trimmed it down. The last three photos show some of the surface fat and silverskin that I removed from the brisket.
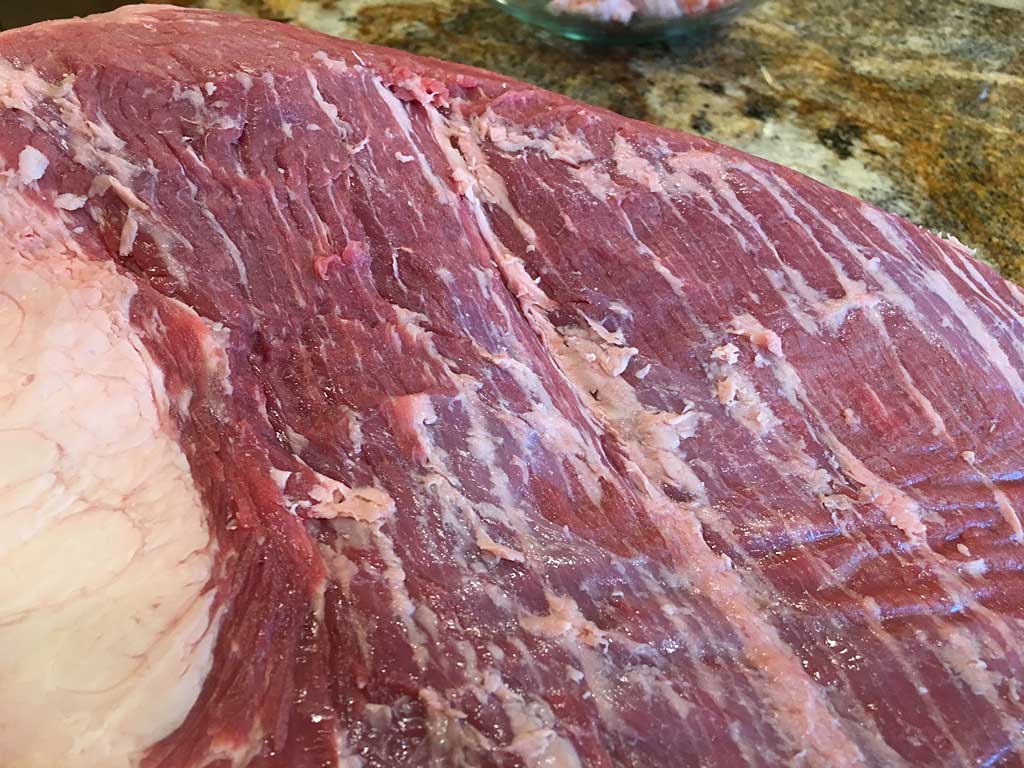
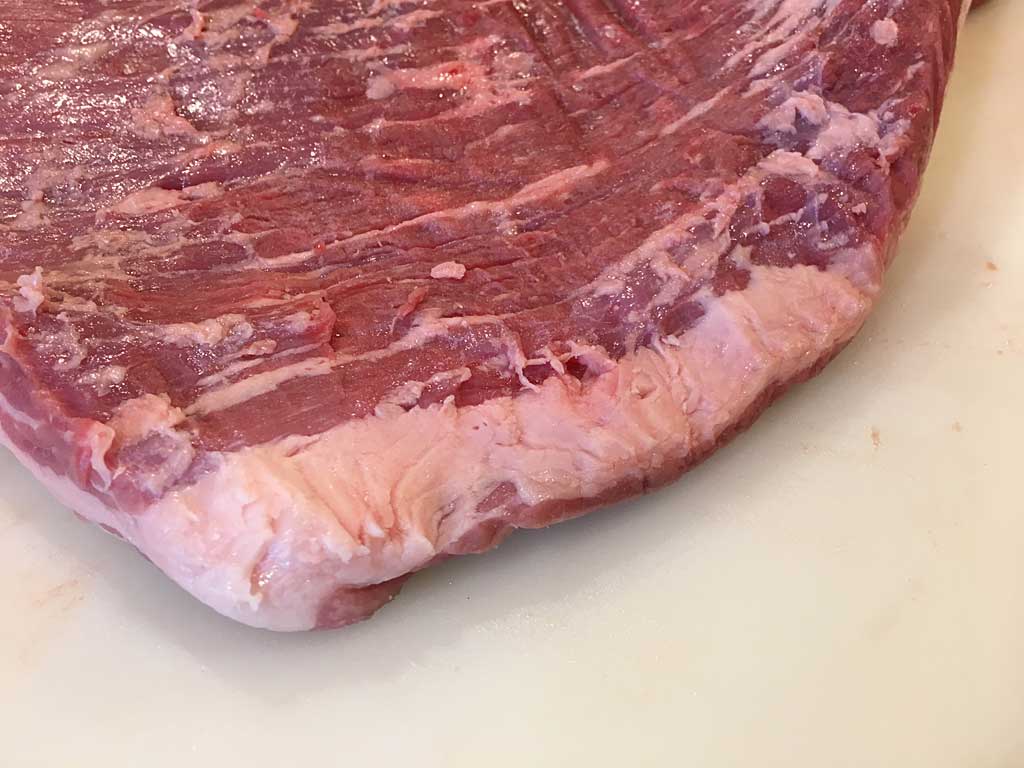
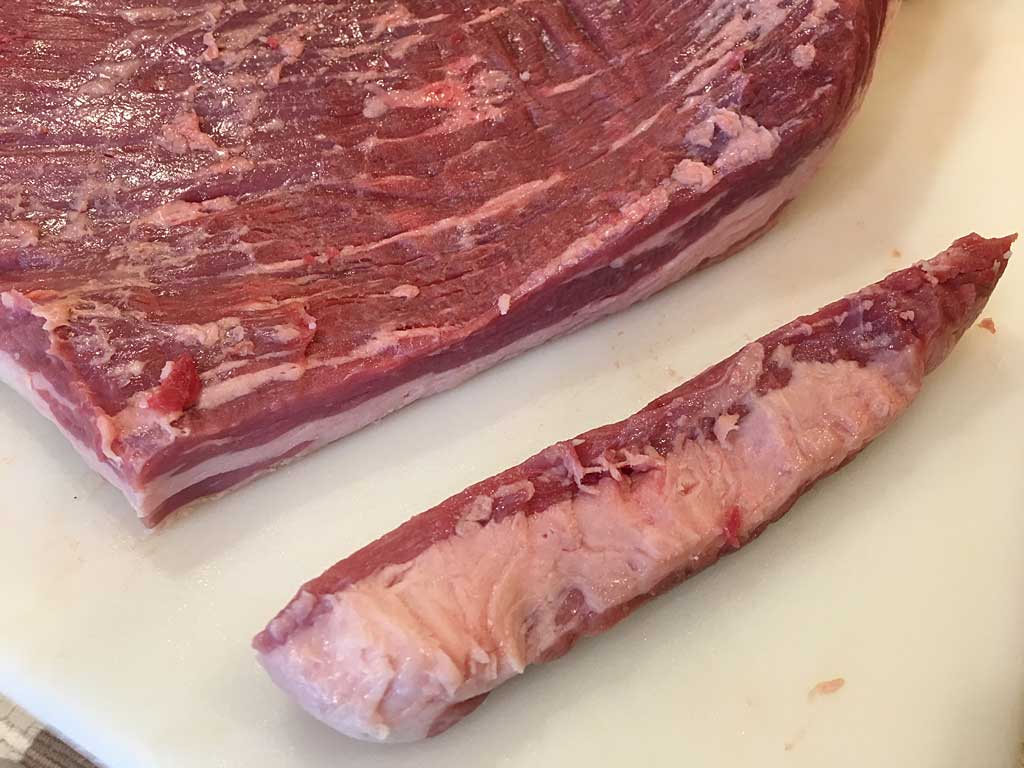
In the next group of photos, the first three photos show how I trimmed up the thin edge of the flat end of the brisket. I started by removing the surface fat, and upon further inspection realized most of the edge was fat and cut it off completely. The last two photos show how I squared up the end of the brisket flat.
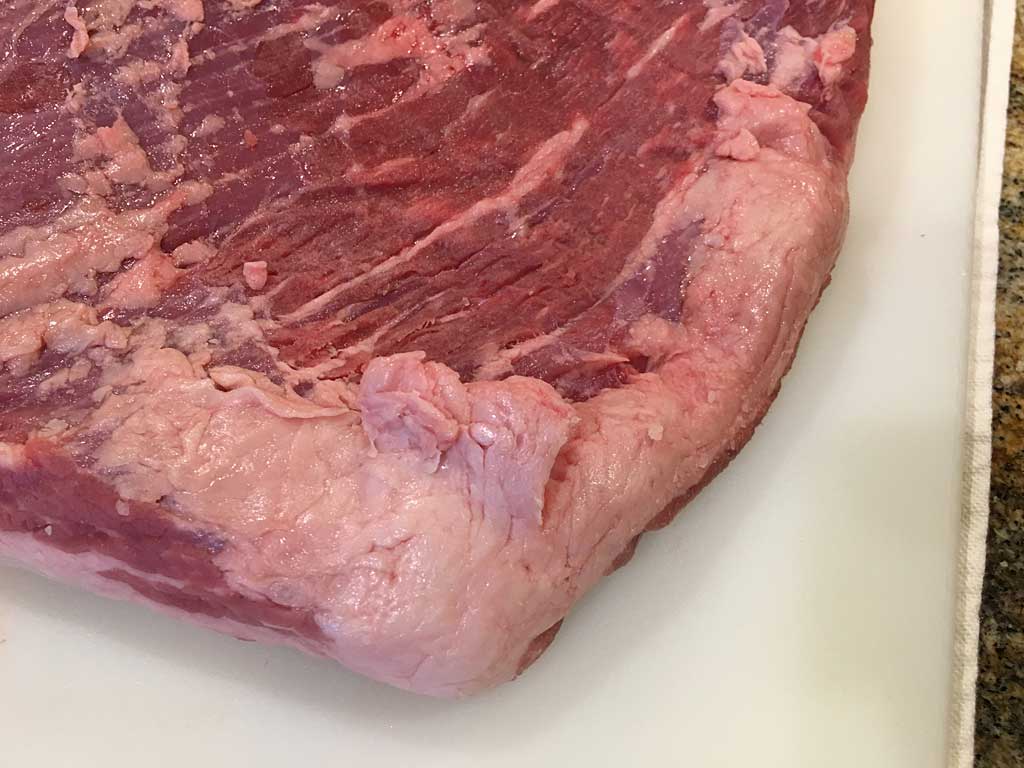
In this last group of photos, the first three photos show how I rounded both corners of the brisket flat to give the brisket the kind of aerodynamic shape that Franklin talks about in his videos. The last photo shows how the lean side of the brisket looked after I finished trimming it.
Trim The Fat Side Of The Brisket
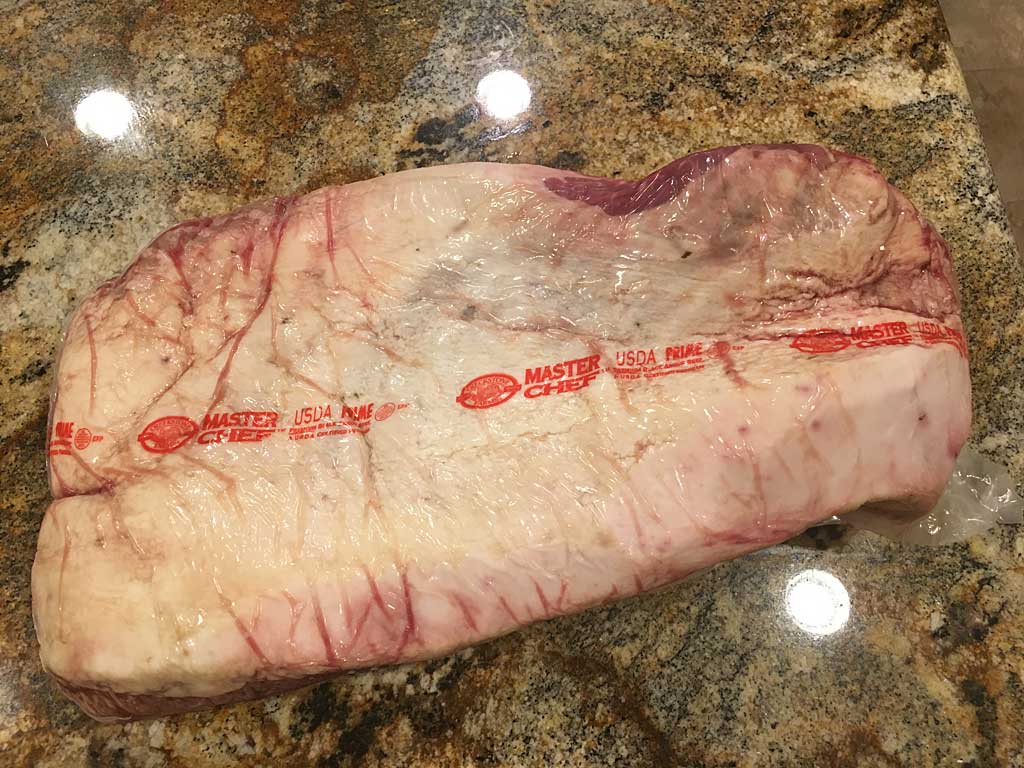
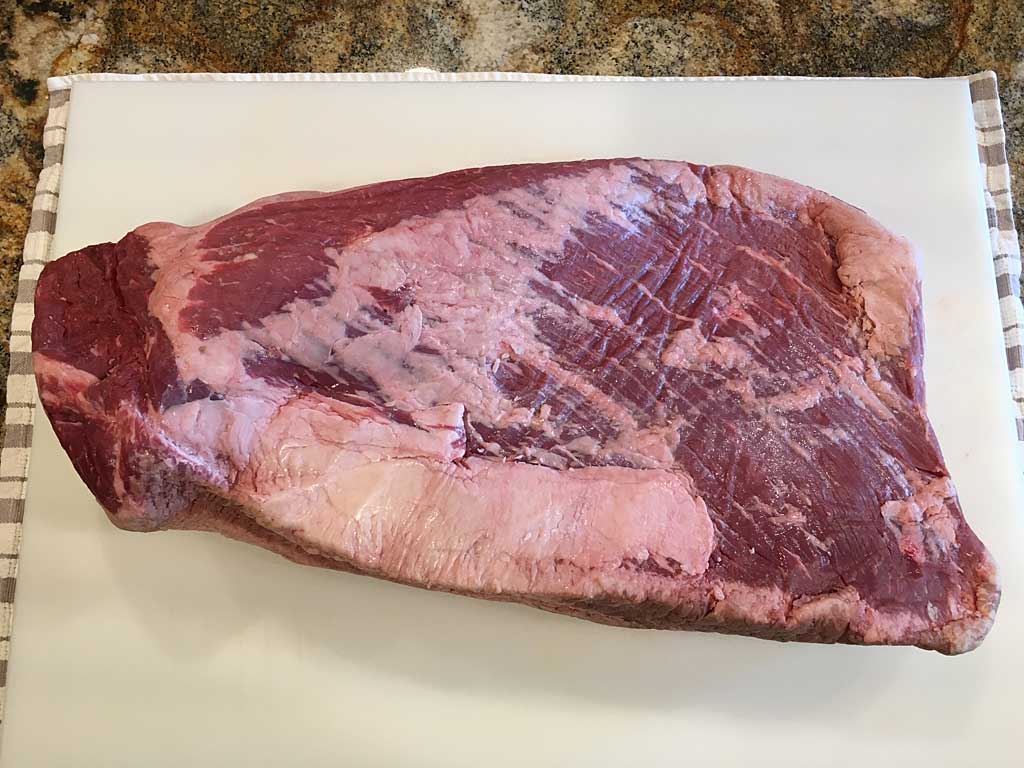
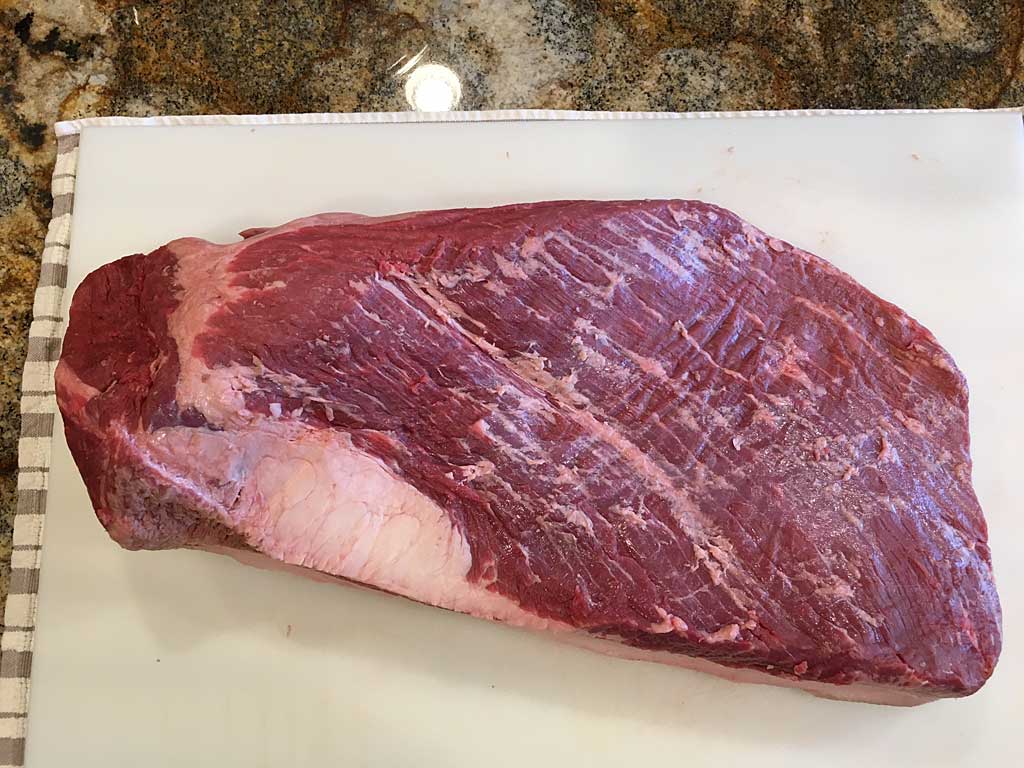
Now it’s time to flip the brisket and work on the fat side.
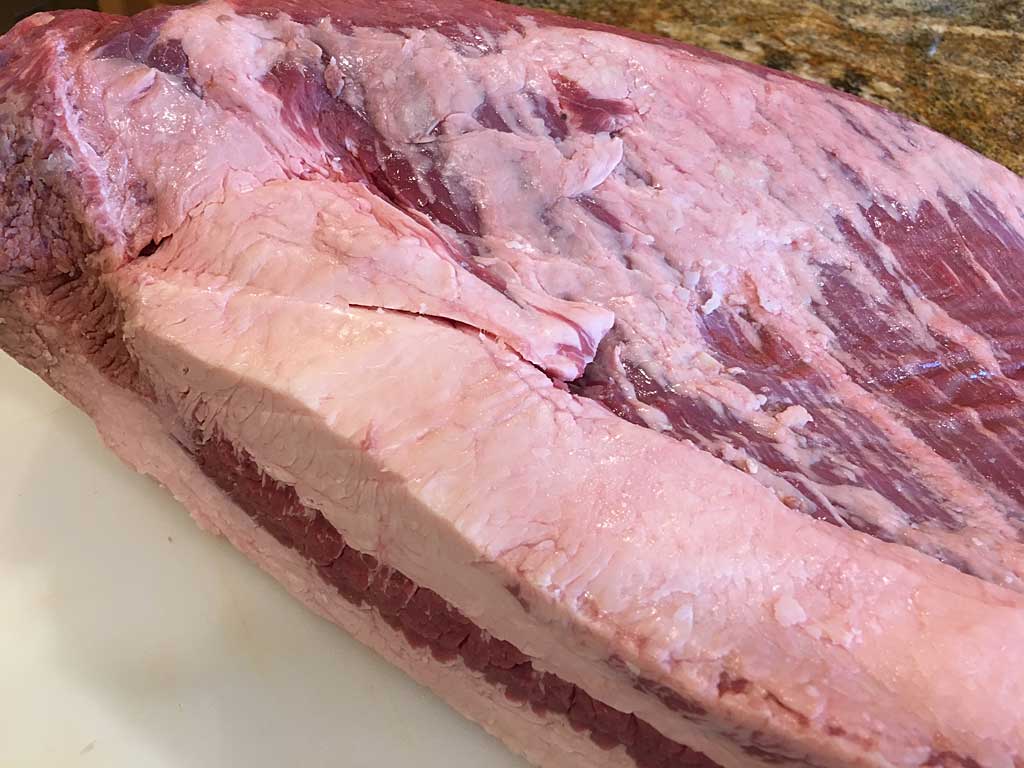
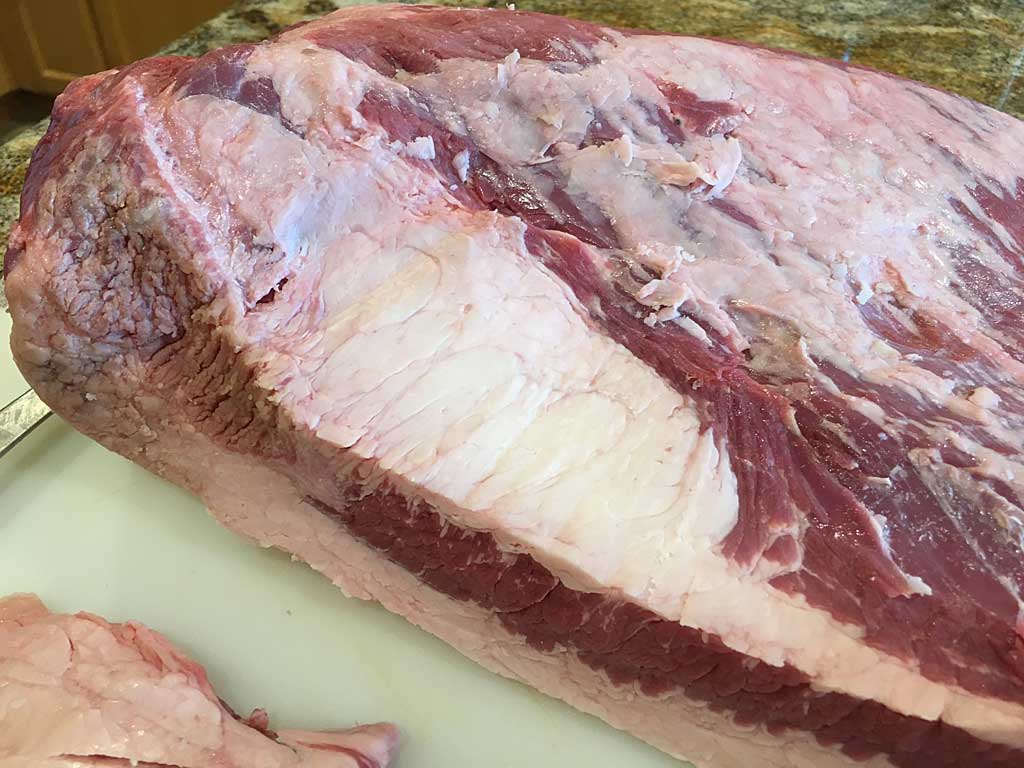
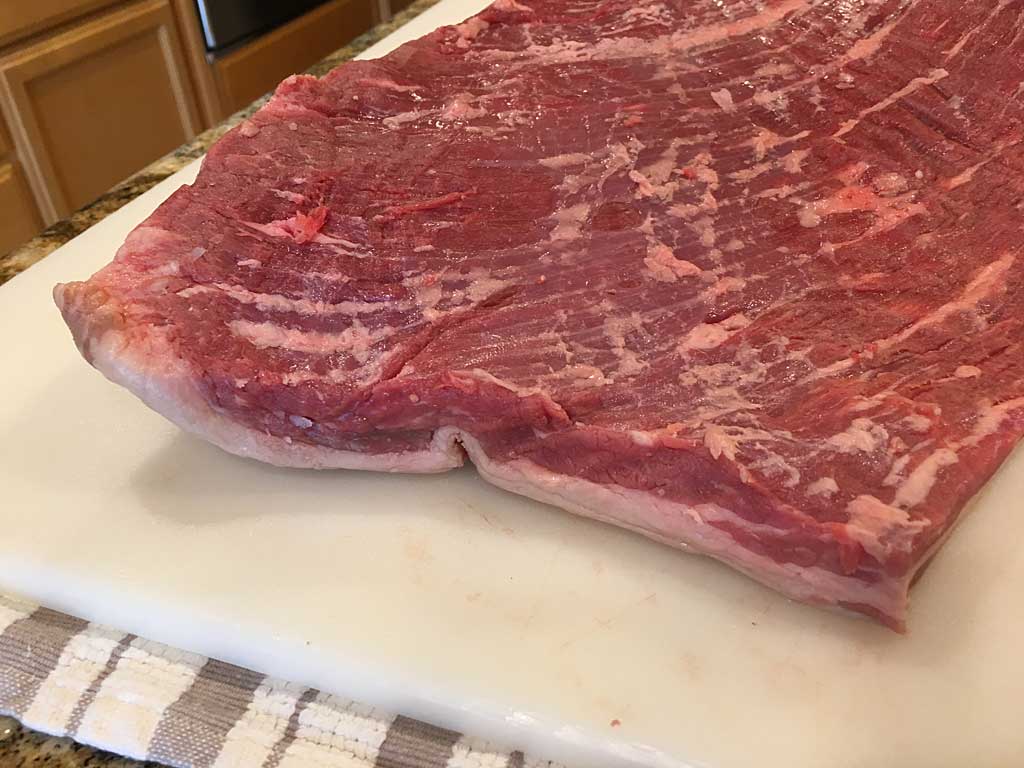
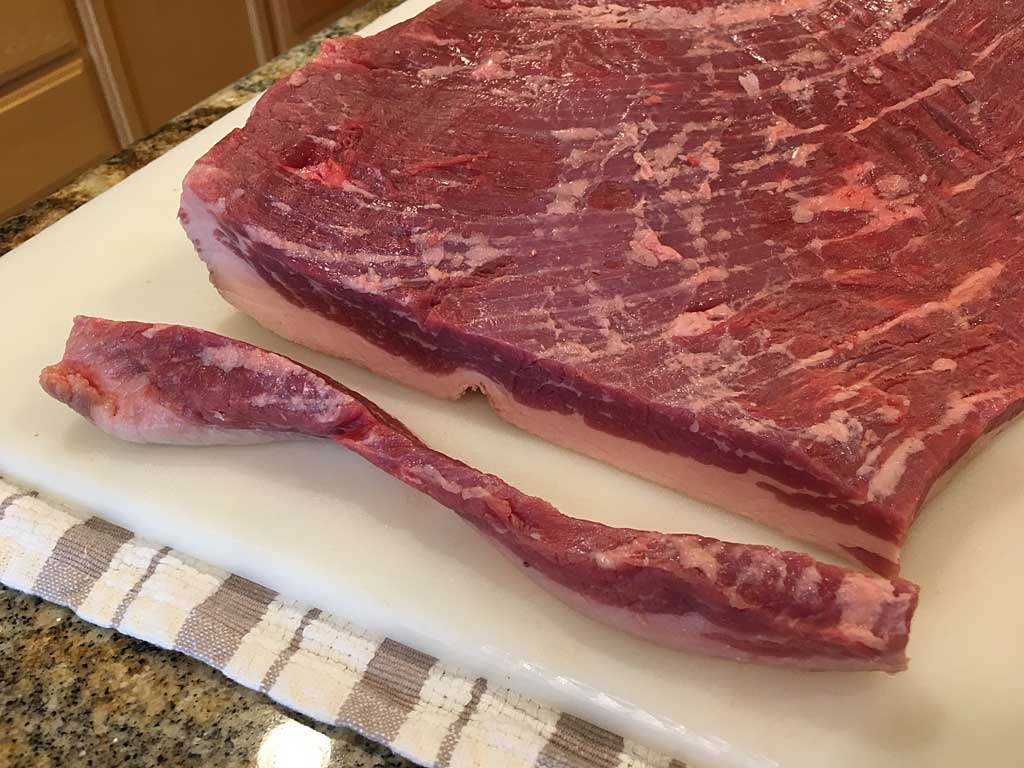
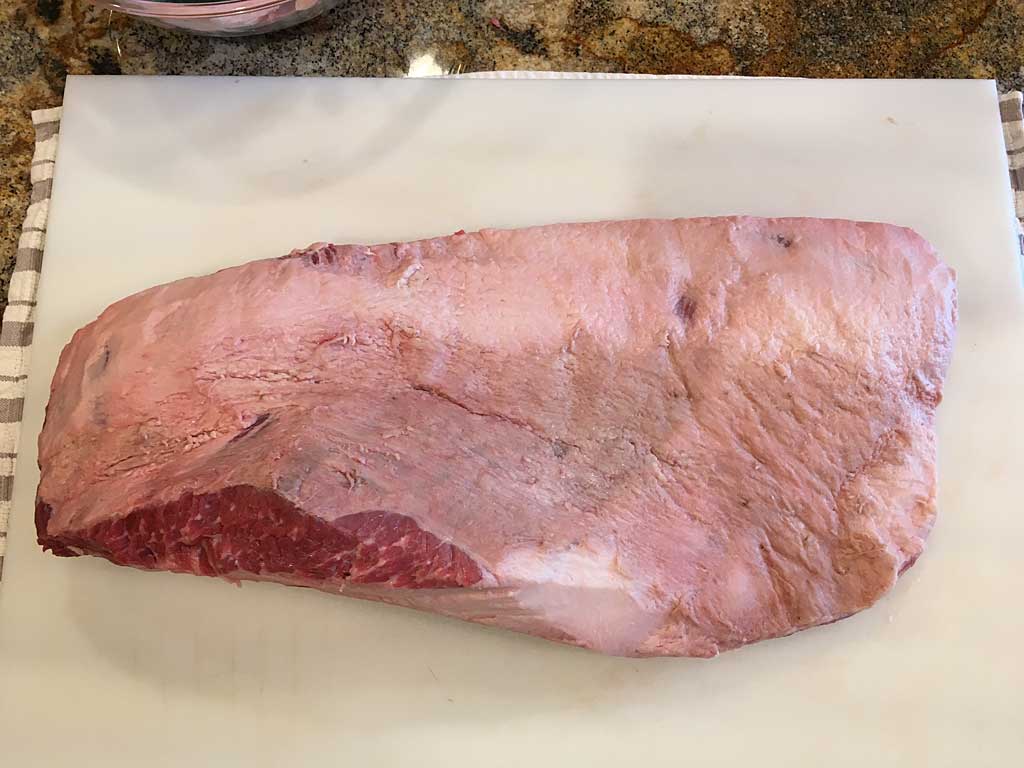
In this first group of photos, the first photo shows the fat side of the brisket before trimming. The next two photos show a flappy portion hanging off the edge of the point section that I trimmed off. The last two photos show an area of loose fat just below that flappy portion that I also trimmed off the side of the brisket.
At this point, I got a bit lazy with my photography and didn’t take any more photos as I trimmed the fat side to about 1/4″ thick as best I could, as shown in the first two photos below. The last photos shows the 3-3/4 pounds of fat and meat I trimmed off this brisket, about 28% trim loss.

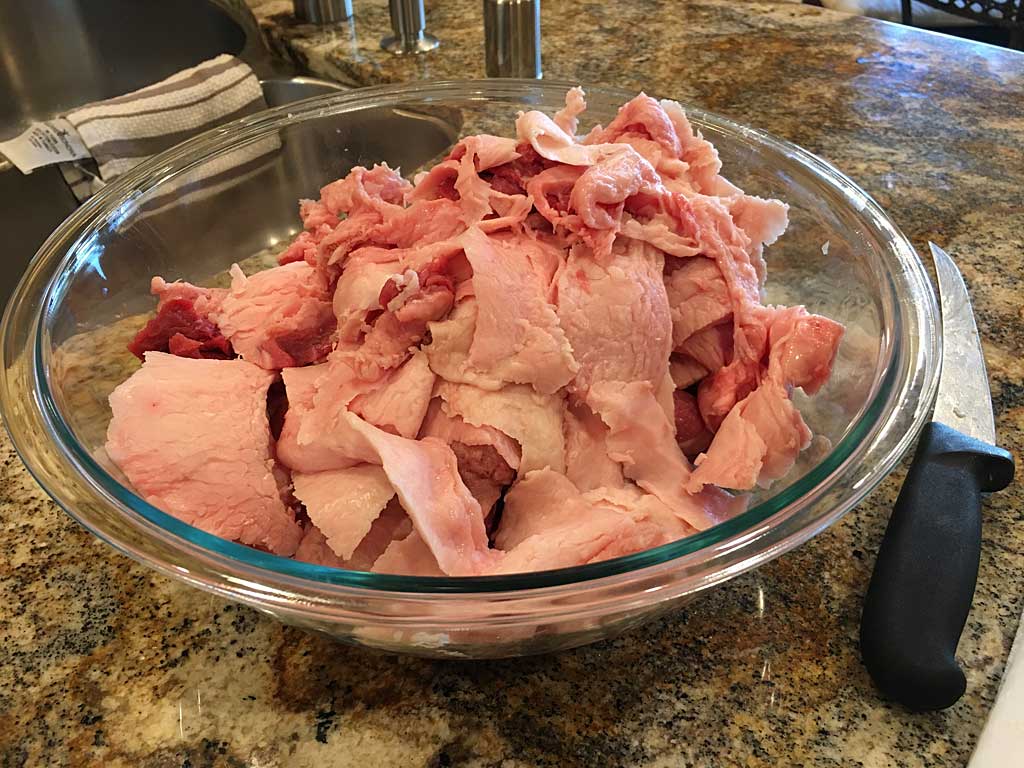
This brisket now weighed just under 10 pounds and was ready for the application of rub.
Rub The Brisket
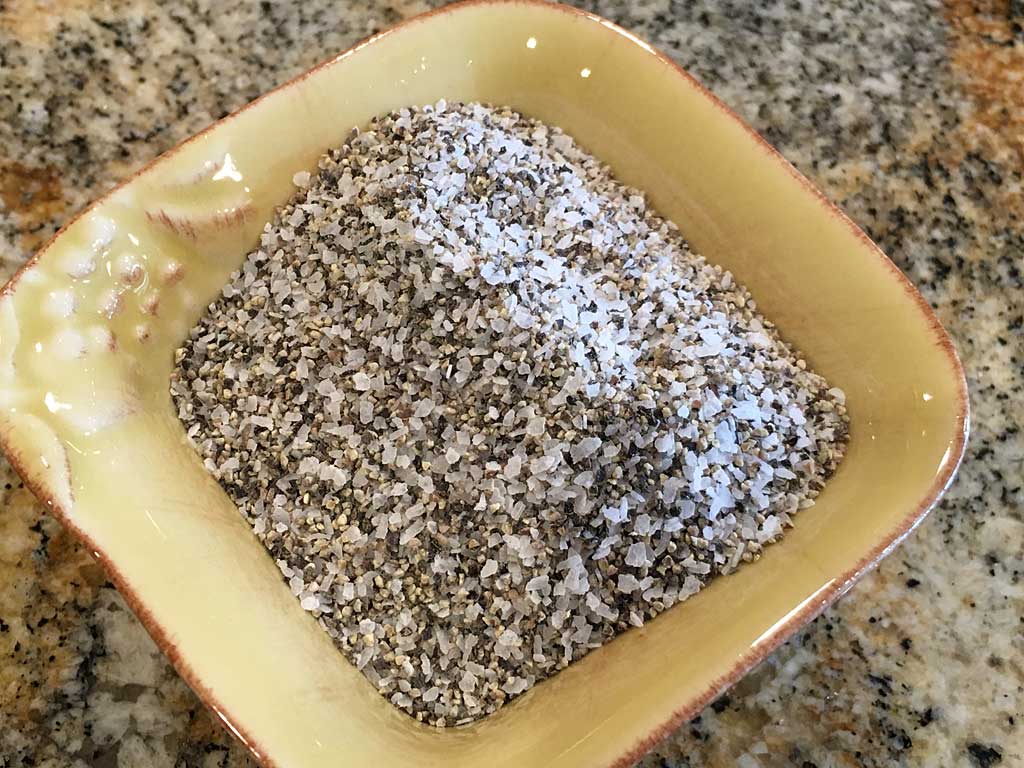
Apply a salt & pepper rub evenly to both sides of the brisket and let it sit at room temperature for 1 hour before going into the Weber Bullet. The rub recipe could not be simpler.
Franklin Barbecue Salt & Pepper Rub
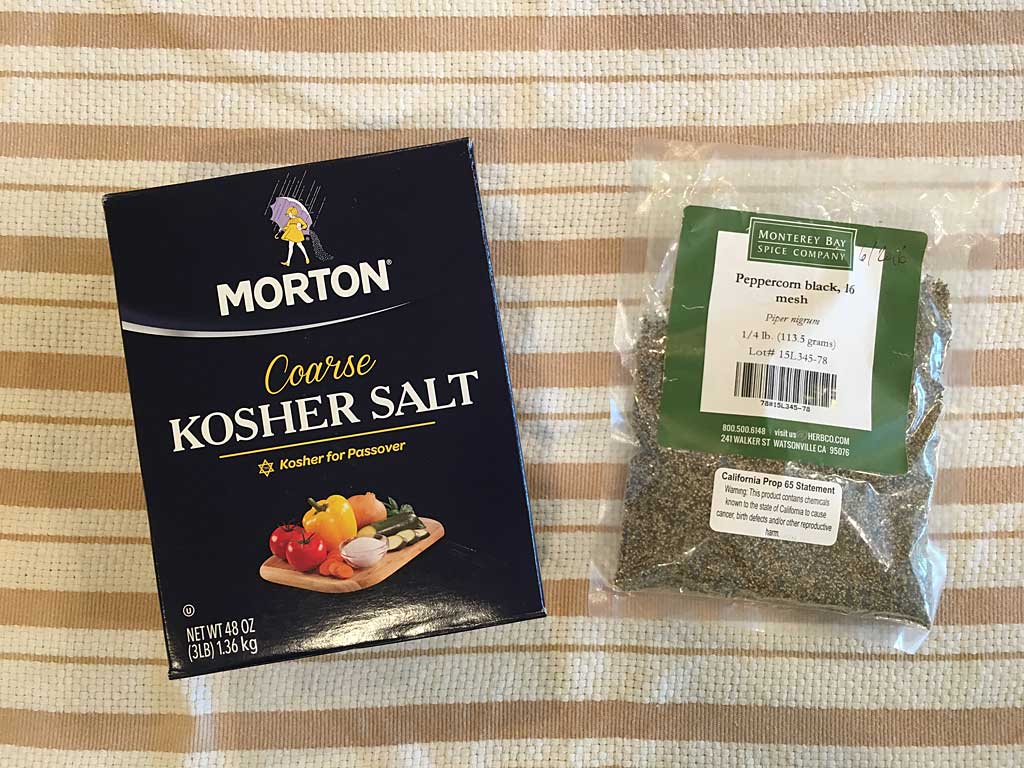
- 1/4 cup Morton Kosher Salt
- 1/4 cup 16 mesh coarse ground black pepper
Franklin says that Morton Kosher Salt and 16-mesh ground black pepper are the only seasonings he uses for Central Texas style brisket. In Franklin Barbecue: A Meat-Smoking Manifesto, he writes, “I use only Morton Kosher Salt. I like it because all the granules are consistently the same size.” As for the black pepper, he says, “I like 16 mesh. The mesh number refers to the size of the pepper particles. The pepper has been sifted through a screen that has 1/16 by 1/16-inch openings. It ends up being the right size to mix with its companion, kosher salt.”
Franklin indicates you’ll need about 1/2 cup or 4 ounces of rub for a 12 pound brisket—I found this amount of rub perfectly adequate for my slightly larger brisket, with a little bit left over. Franklin describes it as “equal parts” of kosher salt and black pepper and specifically says about the salt, “I use roughly 1/4 cup (which is about 2 ounces with Morton brand) per brisket.” So you’ll complete the rub with 1/4 cup or about 2 ounces of 16 mesh black pepper.
The Great American Spice Company sells the 16 mesh coarse ground black pepper that I used here.
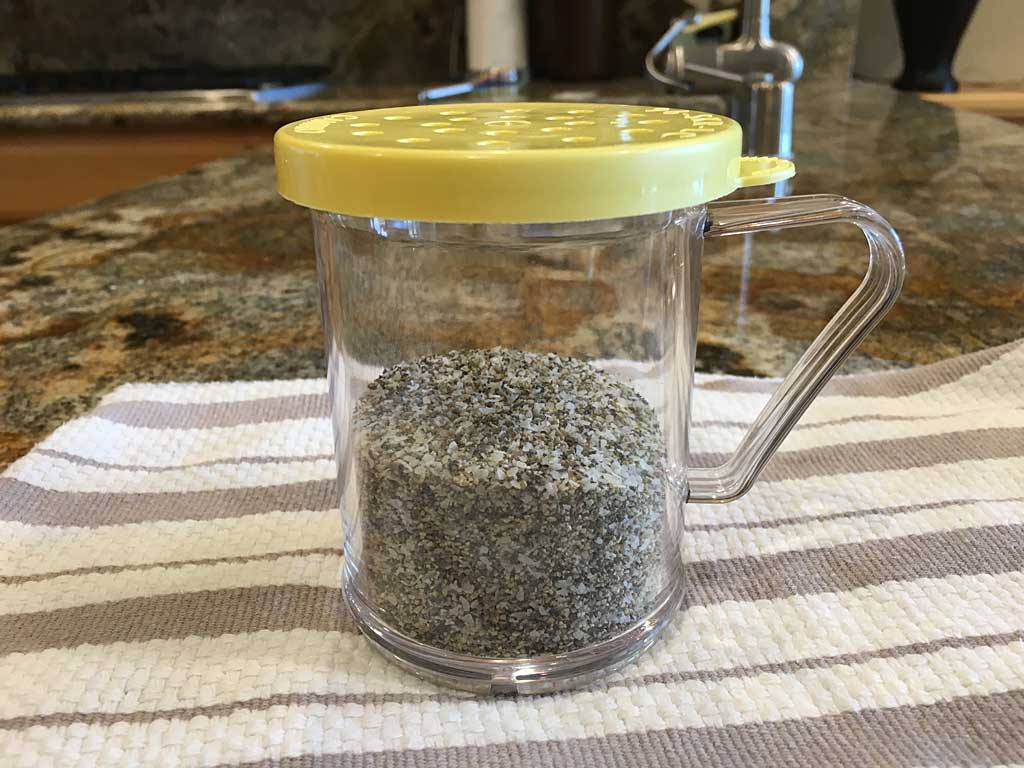
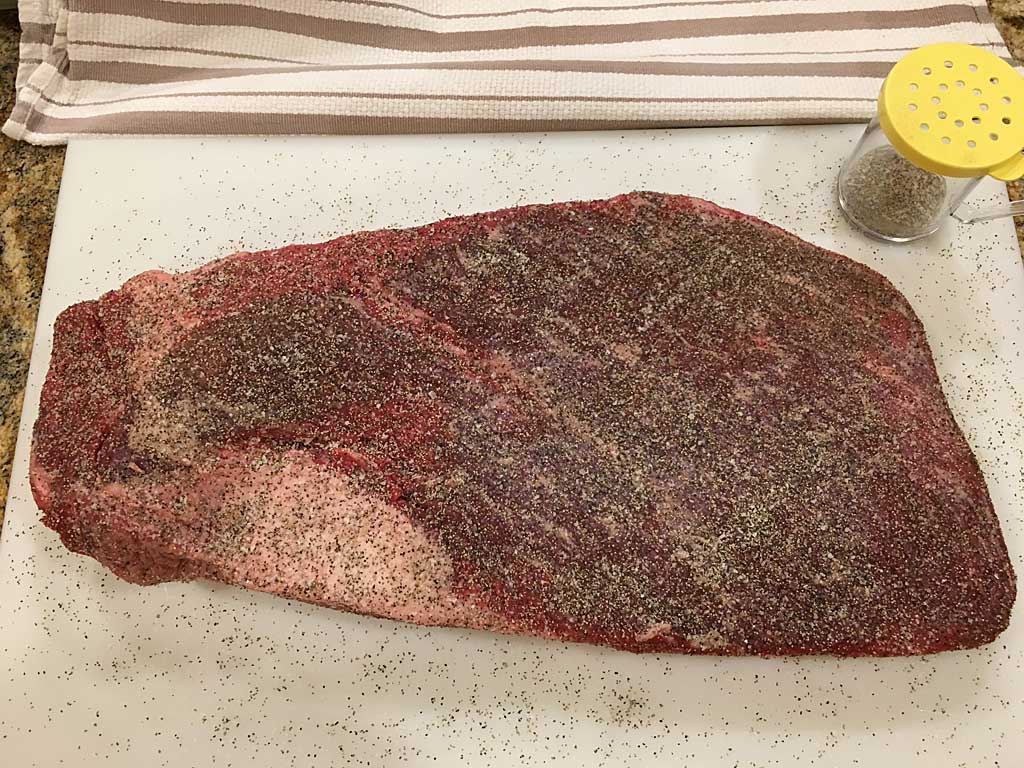
I mixed the salt and pepper together and applied it using a shaker. As you may have noticed in the photo of the rubbed meat, the pepper is a bit uneven because it did not stay evenly mixed with the salt as I shook the shaker. Not a huge deal, but an improvement for next time might be to apply the salt and pepper separately. This is what Franklin does in his video, but he does it using a Styrofoam cup, something I’m not about to try myself.
How To Squeeze In A Large Brisket
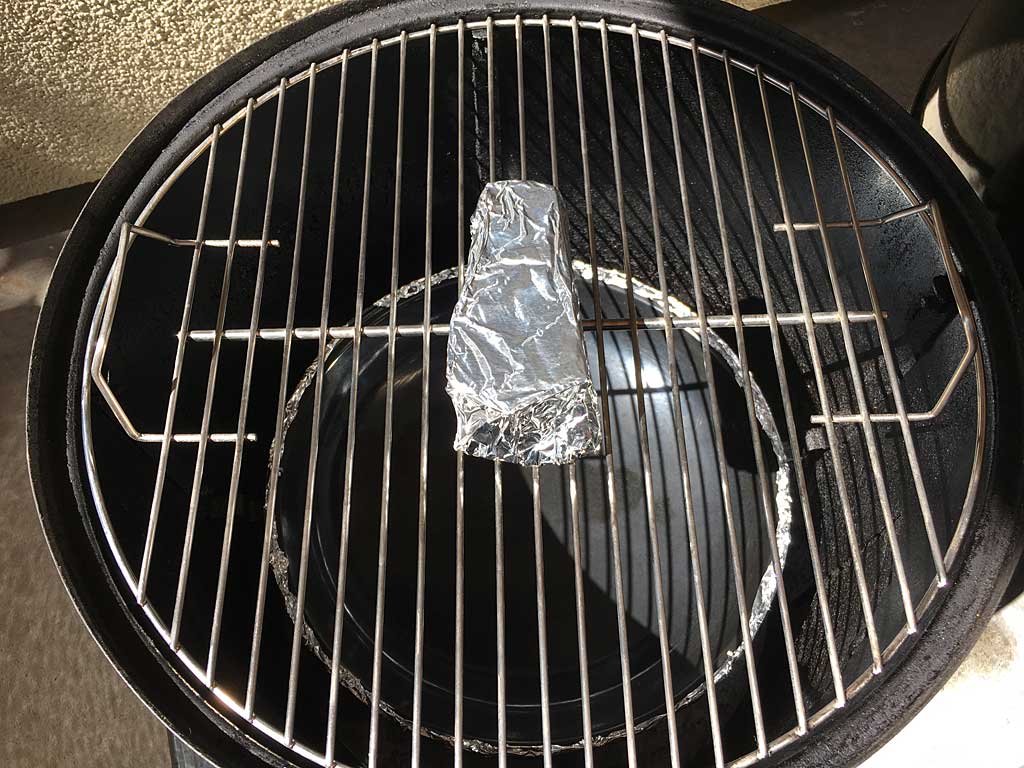
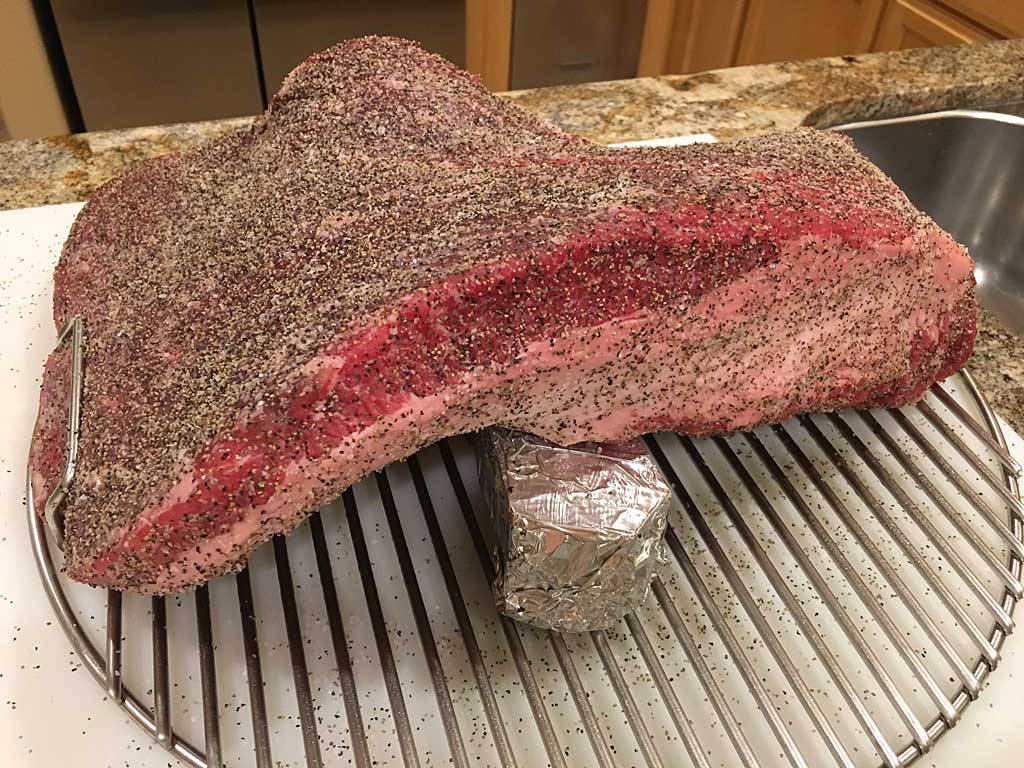
Have you noticed that meat processors are cutting briskets longer and narrower than they used to? This can make it hard to fit a whole brisket into the 18.5″ Weber Bullet. Large briskets can be “shoehorned” between the handles on the cooking grate and will shrink during cooking. Other approaches include folding a portion of the flat section under itself, or “draping” the brisket over a large chunk of foil-wrapped smoke wood, as shown here, or over a foil-wrapped brick so it fits on the grate. In any case, the brisket can be repositioned later once it starts to shrink during cooking.
Fire The WSM
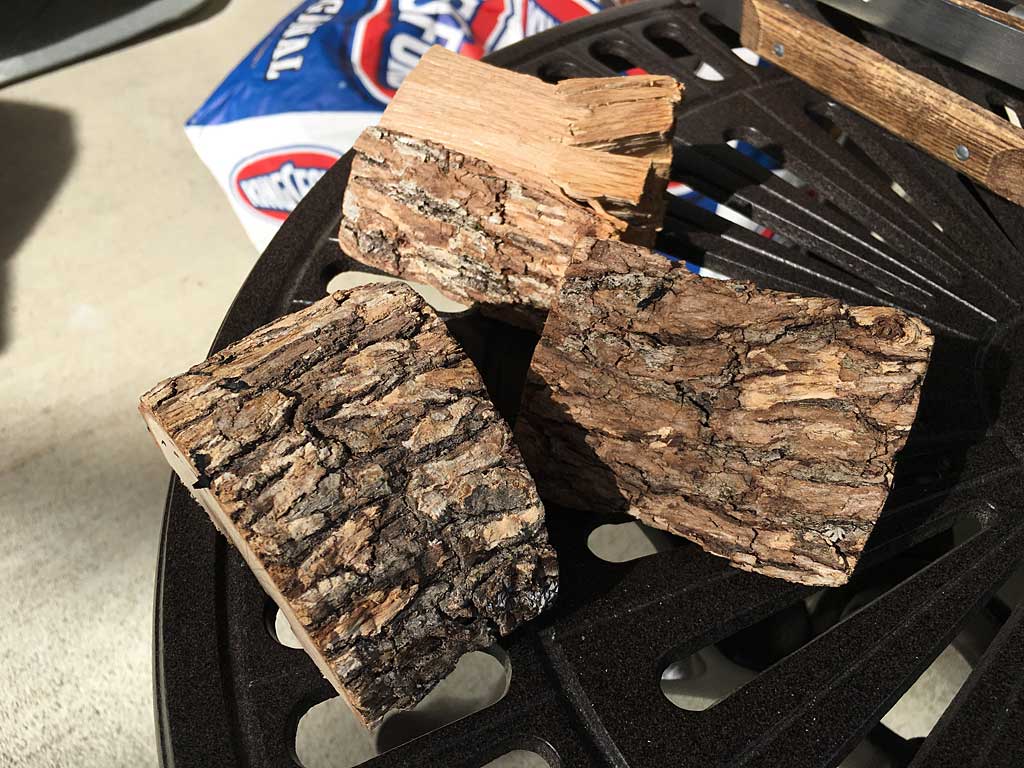
Select 3 fist-sized chunks of dry smoke wood. I used 3 chunks of oak wood. There’s no need to soak the wood before using it.
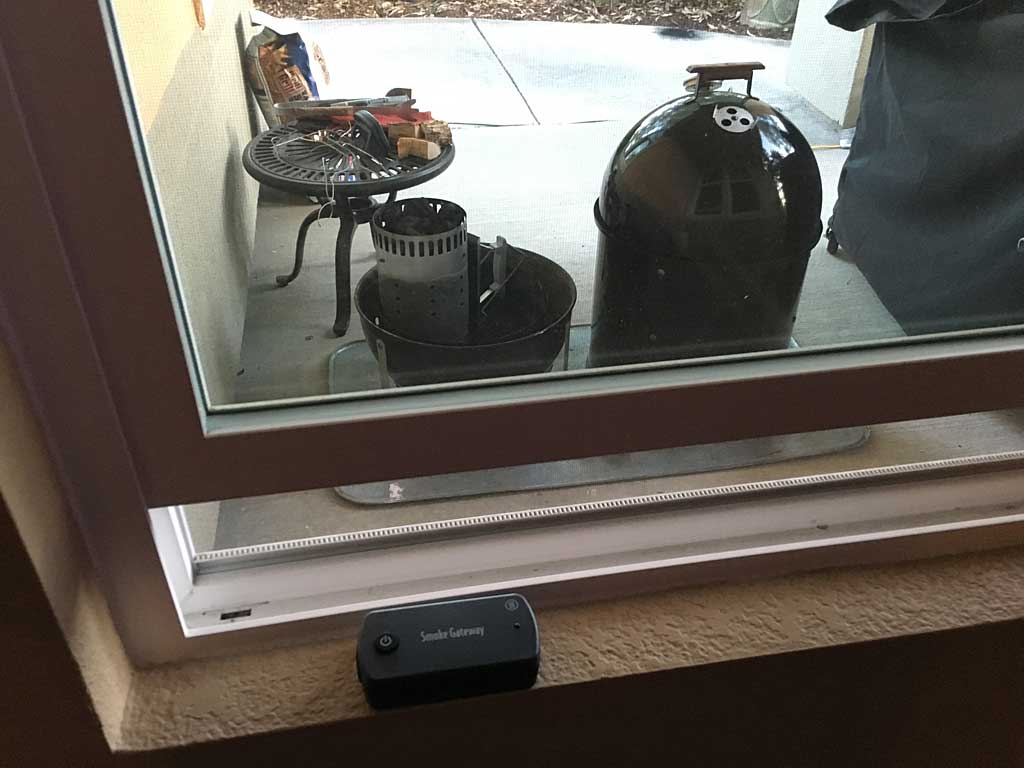
Earlier in the day, I set up a ThermoWorks Smoke dual-channel probe thermometer with WiFi gateway so I could monitor cooker and internal meat temp using an app on my iPhone. In the second photo, you can see the Smoke base unit sitting on the small table next to the charcoal bowl, and sitting in the window sill inside the house is the WiFi gateway that transmits temp readings from the base unit to a server at ThermoWorks that feed into the Smoke smartphone app.
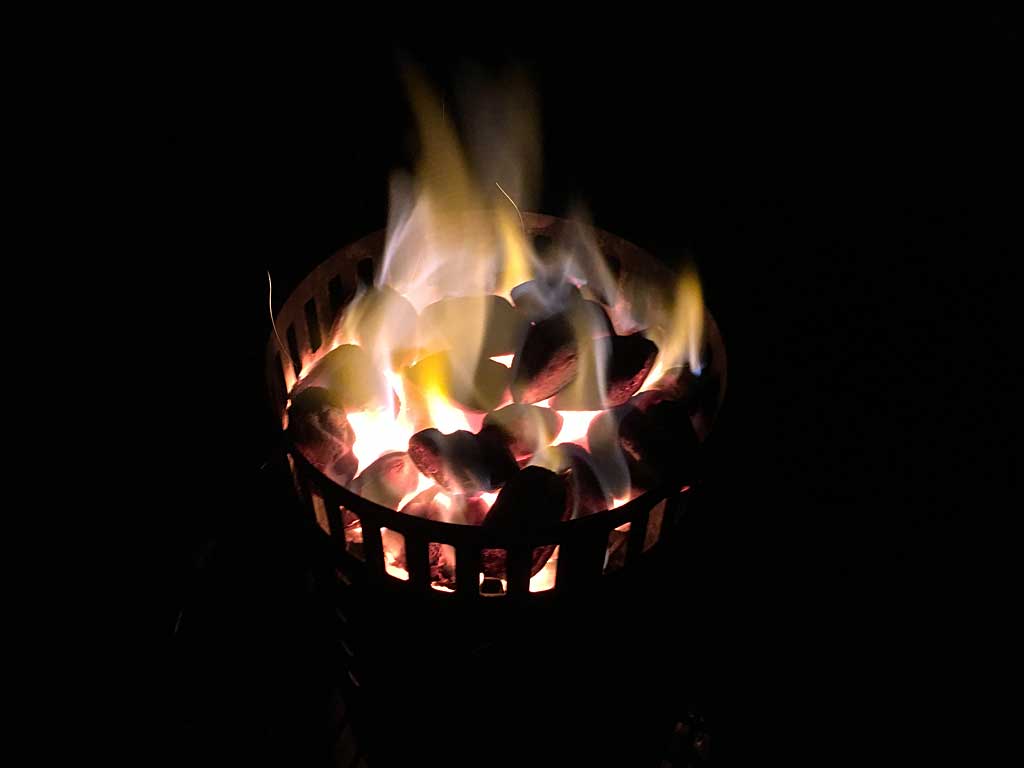
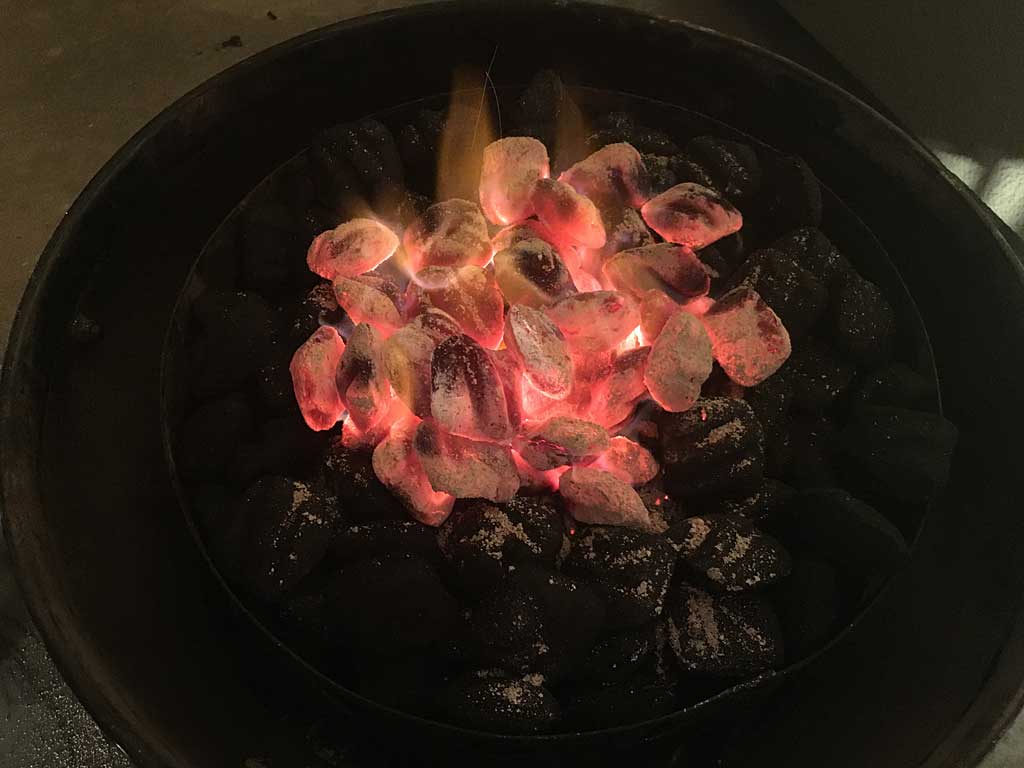
Fire-up the WSM using the Minion Method. Fill the charcoal chamber to the top with Kingsford charcoal and add 20-40 lit briquettes started using a Weber chimney starter, spreading them evenly over the unlit charcoal.
In the third photo above, you can see the 40 briquets I lit in an upside down chimney starter. The last photo shows them dumped on top of the unlit charcoal, right before I spread them out…just a cool photo of hot coals in the dark.
Barbecue The Brisket
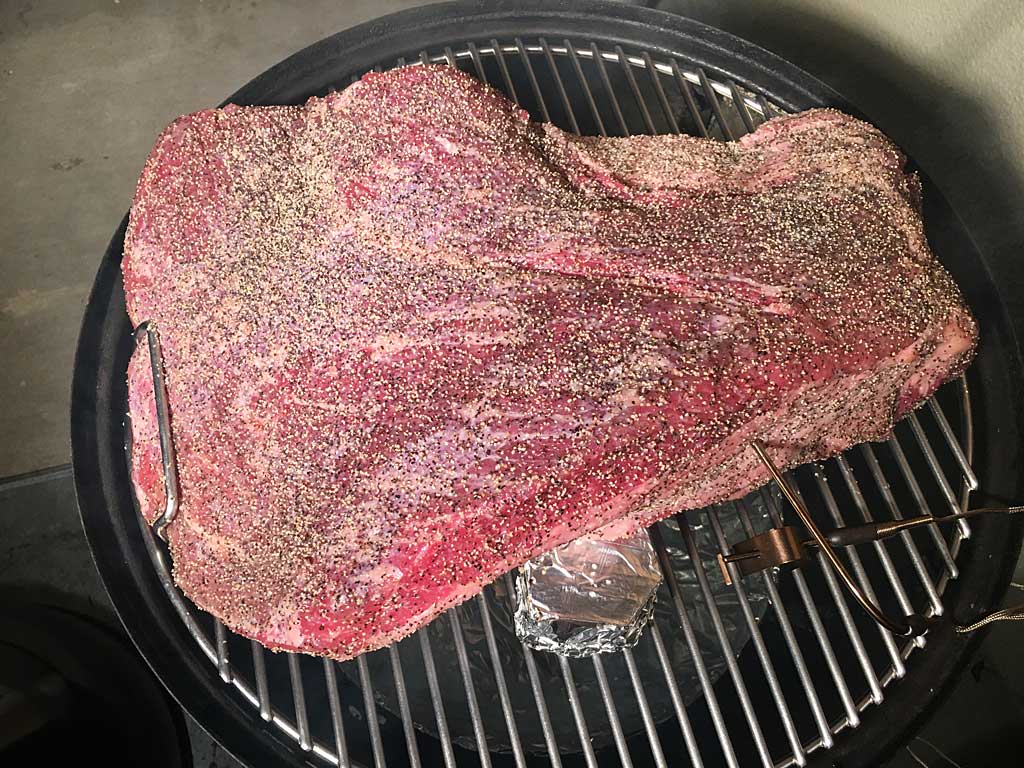


Assemble the cooker and fill the pan with cool water—remember, in Aaron Franklin’s world, water plays an important role in making great brisket. Place the brisket on the top cooking grate fat-side down and cover with the lid. The fat helps shield the lean brisket flat from the heat.
I inserted the Smoke meat probe into the flat horizontally from the side and clipped the air probe onto the grate near the brisket.
With the brisket in the cooker, place the smoke wood chunks on top of the burning coals using a pair of tongs.
Set the top vent to 100% open and leave it that way throughout the entire cooking process. Start with all 3 bottom vents 100% open. As the cooker approaches 250°F, begin to partially close all 3 bottom vents to maintain 250-275°F. Adjust the bottom vents as needed to maintain this temperature range throughout the cooking process.
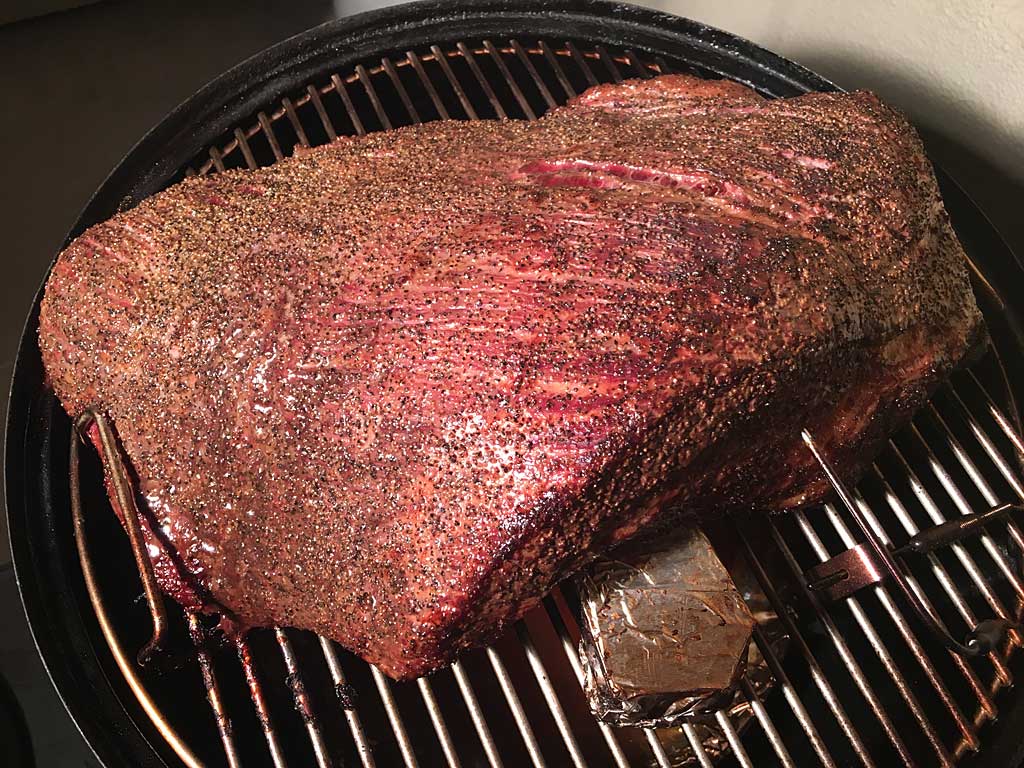
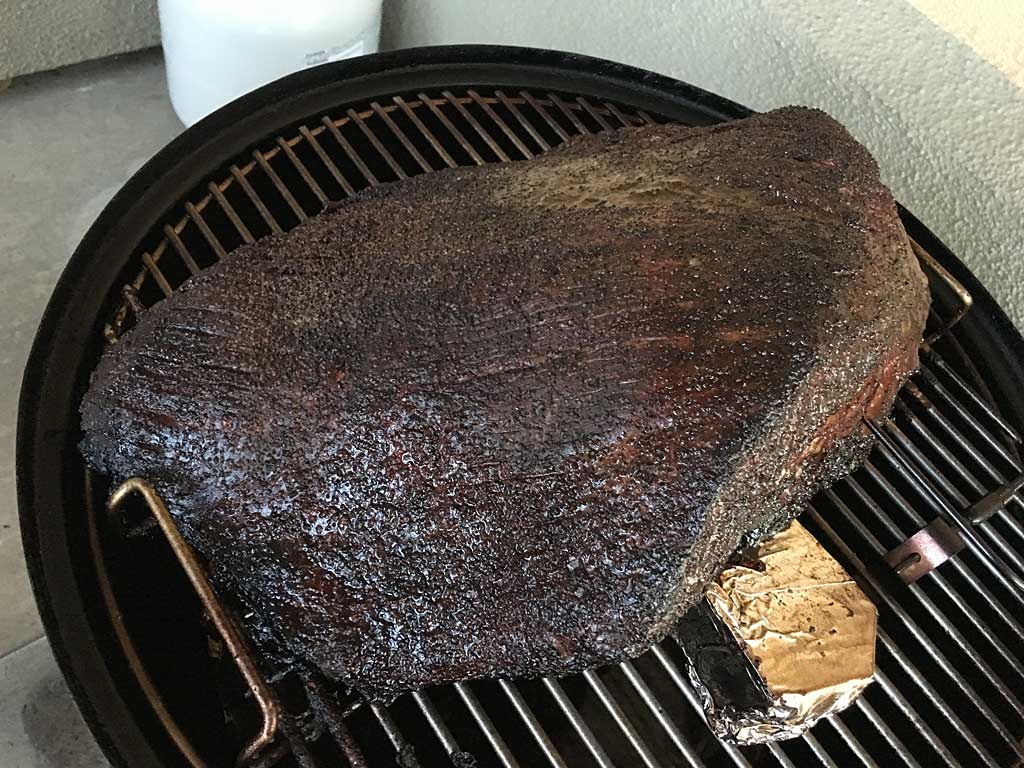
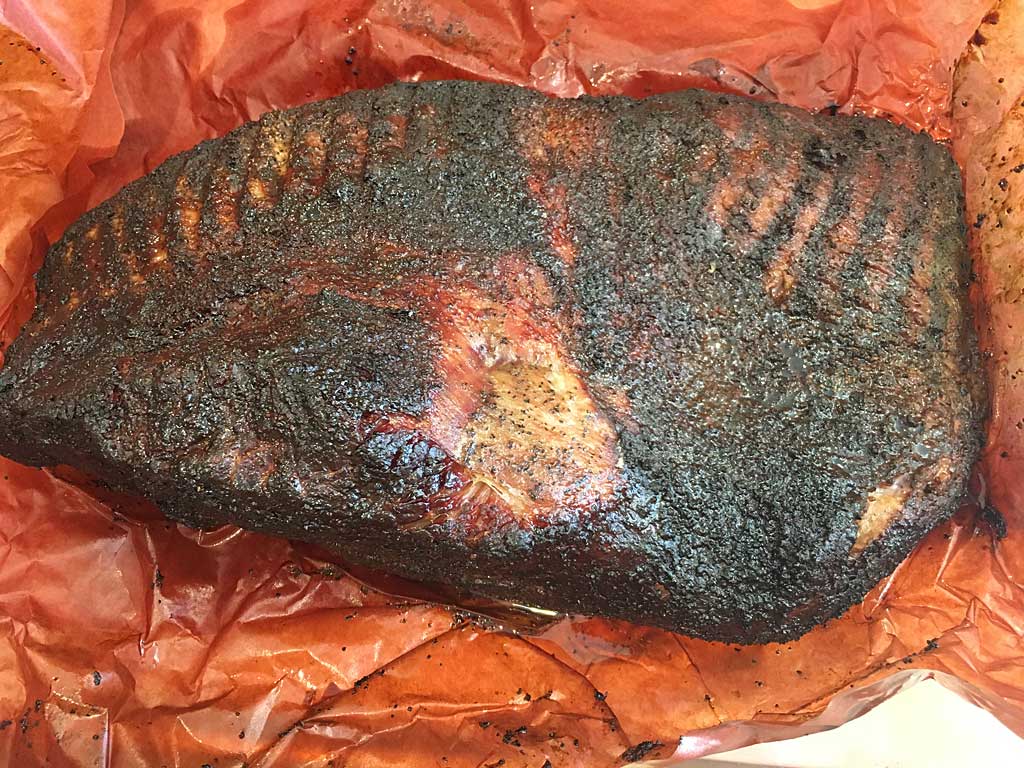
Barbecue the brisket for 3 hours to let the crust set-up (second photo above), then spray the brisket with apple cider vinegar and repeat every 30 minutes.
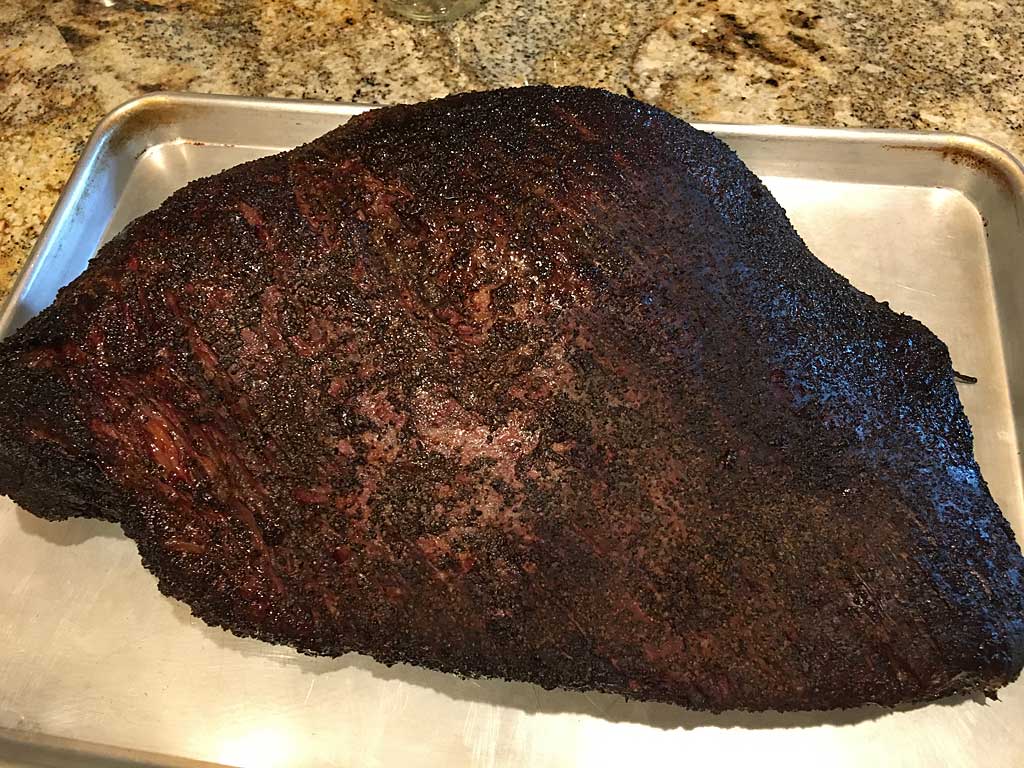
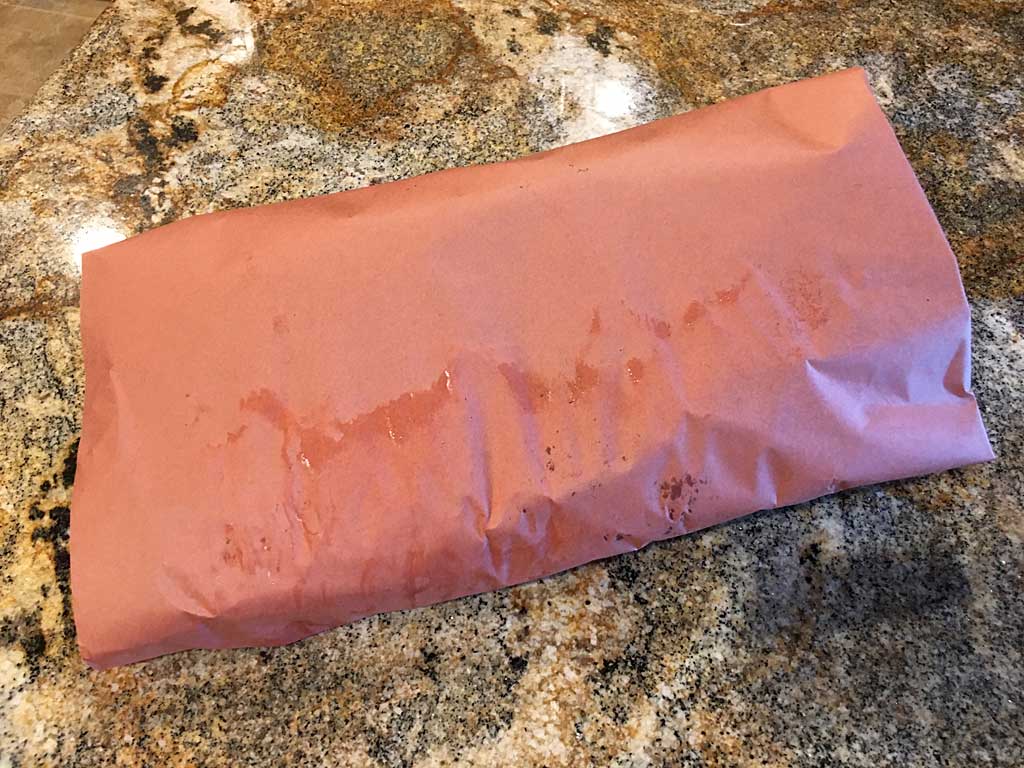
When the brisket reaches 170°F internal temperature (fourth photo above), somewhere in the range of 5-7 hours of cooking, remove it from the WSM, spray it generously one last time, and wrap it like a package in a large sheet of butcher paper and return it to the cooker. If using narrow butcher paper, you may need to overlap two sheets to cover the brisket.
The fifth photo above is a screenshot from the Smoke app showing how the internal meat temp rose to 170°F over the course of about 7 hours.
Return the wrapped brisket to the smoker fat-side up (so the sticky fat doesn’t stick to the paper under the weight of the brisket) and continue cooking for several hours until it reaches 205°F internal temperature. Check for tenderness by inserting an instant-read thermometer vertically into the center of the flat. If it goes in and out like butter, the brisket is done.
Here’s how the temperature and vent settings went during my cook:
| Lid Temp | Grate Temp | Meat Temp | Vent 1 % | Vent 2 % | Vent 3 % | |
| 12:00 am | – | – | 46 | 100 | 100 | 100 |
| 12:30 am | 228 | 225 | 53 | 100 | 100 | 100 |
| 1:00 am | 260 | 255 | 74 | 100 | 100 | 100 |
| 1:15 am | 275 | 267 | 83 | 100 | 50 | 50 |
| 1:30 am | 265 | 264 | 92 | 100 | 100 | 50 |
| 2:00 am | 280 | 275 | 107 | 100 | 100 | 50 |
| 2:30 am | 288 | 286 | 122 | 100 | 50 | 50 |
| 3:00 am (s) | 297 | 297 | 132 | 50 | 50 | 50 |
| 3:15 am (w) | 300 | 310 | – | 50 | 50 | 0 |
| 3:30 am (s) | 270 | 292 | 139 | 50 | 50 | 0 |
| 4:00 am (s) | 244 | 268 | 146 | 50 | 50 | 0 |
| 4:30 am (s) | 244 | 257 | 152 | 100 | 50 | 0 |
| 5:00 am (s) | 300 | 301 | 156 | 25 | 25 | 25 |
| 5:30 am (s) | 262 | 282 | 159 | 25 | 25 | 25 |
| 6:00 am (s) | 271 | 258 | 162 | 50 | 50 | 50 |
| 6:30 am (s) | 274 | 273 | 165 | 50 | 50 | 50 |
| 7:18 am (s)(b) | 260 | 268 | 170 | 50 | 50 | 50 |
| 8:30 am | – | 258 | 185 | 50 | 50 | 50 |
| 9:30 am | – | 260 | 195 | 50 | 50 | 50 |
| 10:25 am | – | 248 | 205 | 50 | 50 | 50 |
(s) sprayed with apple cider vinegar
(w) added water to pan
(b) wrapped in butcher paper
Note that the vent percentages represent the way I set the vents at the time indicated.
Rest The Brisket Then Slice

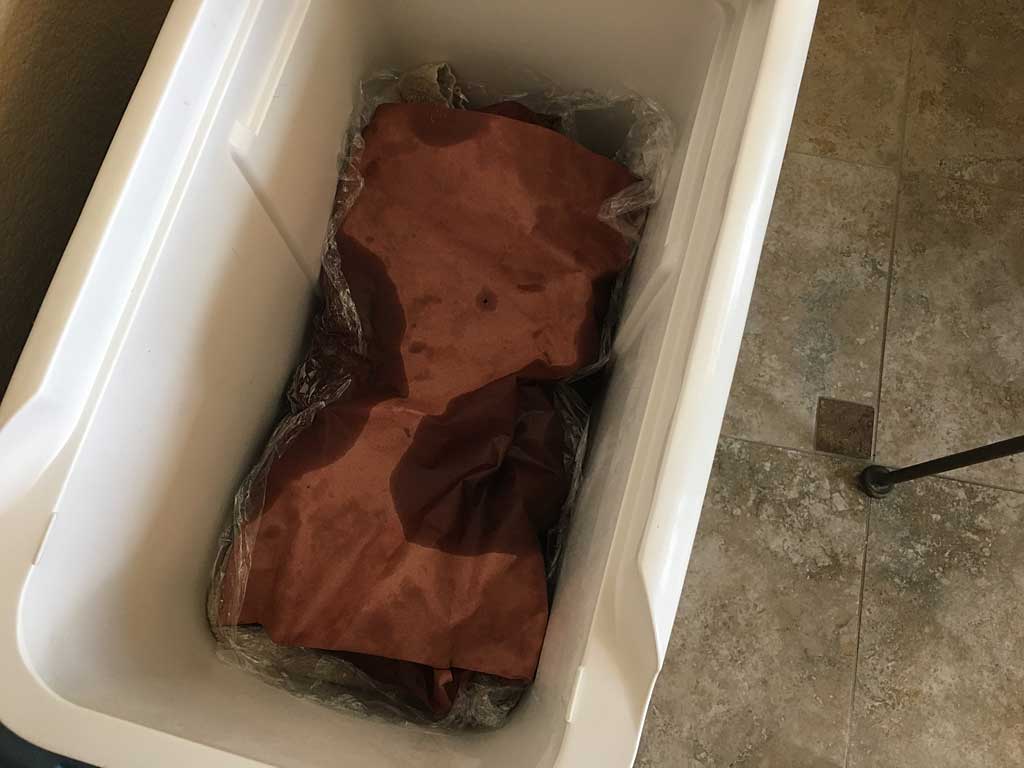
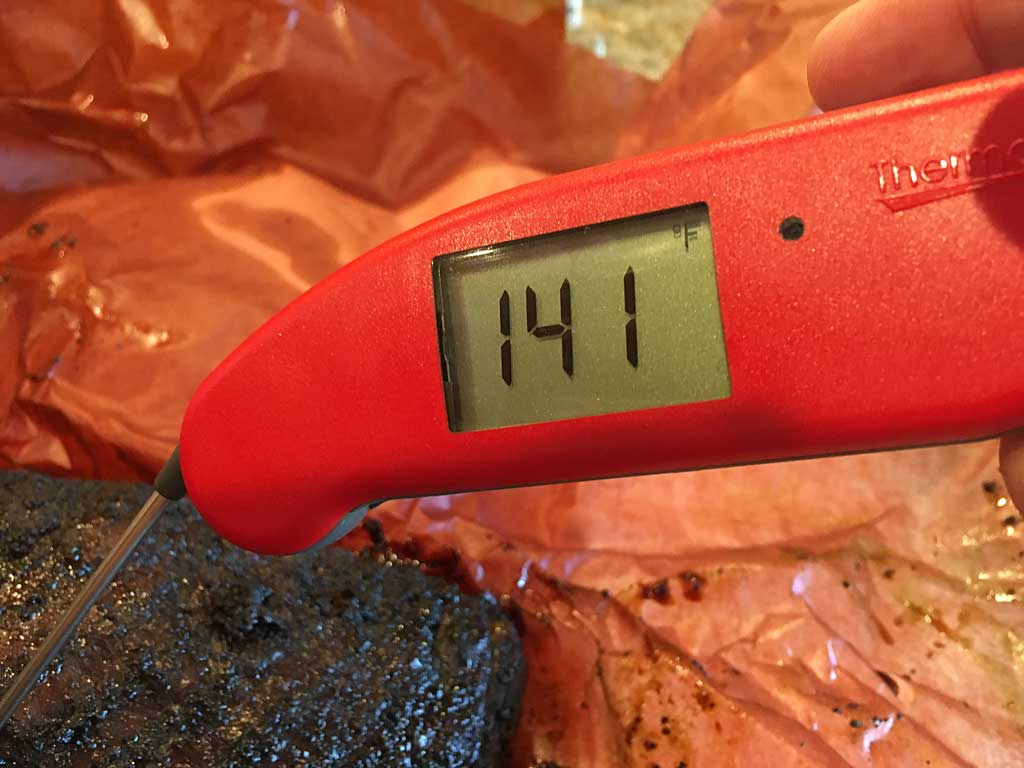
These photos show the finished brisket coming out of the smoker at 203°F. Keep the brisket wrapped in the paper and let rest at room temp for about 10 minutes, then move it into a empty cooler. Place an old bath towel in the bottom, then the wrapped brisket, then cover with another towel. Let the brisket rest for 2-3 hours, making sure the meat stays at a food-safe temperature of 140°F or higher.
My brisket rested in the cooler for 4 hours, and as you can see in the fifth photo it was still above 140°F at that point.
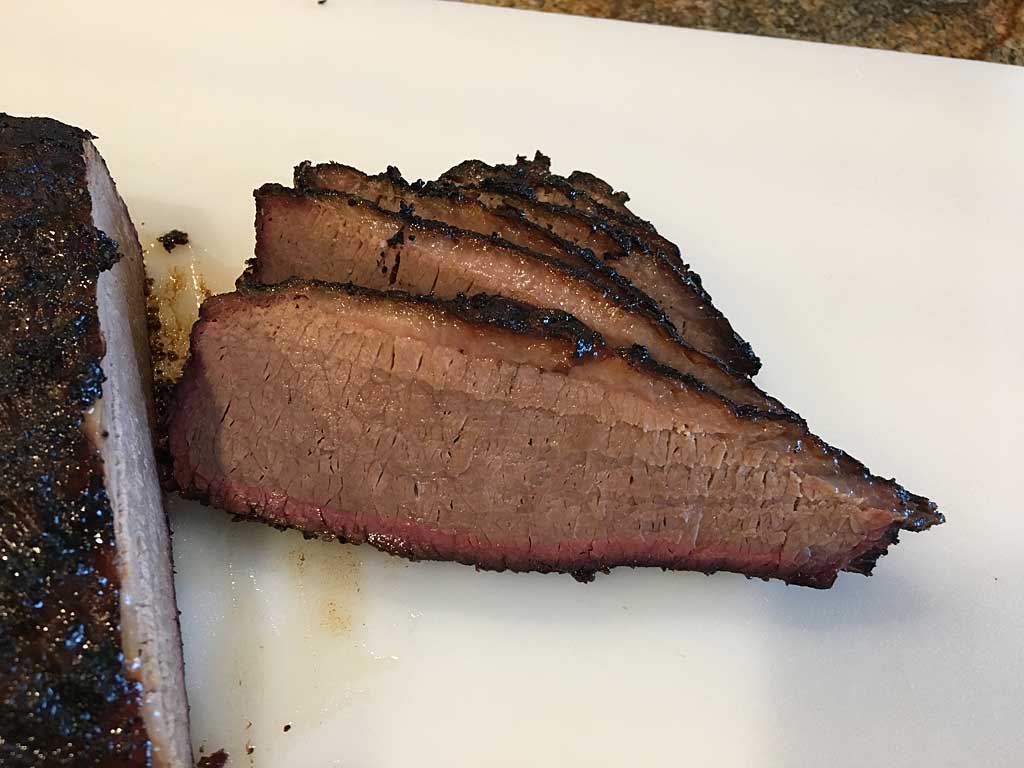
The following video demonstrates how Aaron Franklin slices brisket using the “Texas Turn” method. If you really want to be like Aaron Franklin, you can buy the same slicing knife he uses in this video. I’ve got one and it gets the job done nicely.
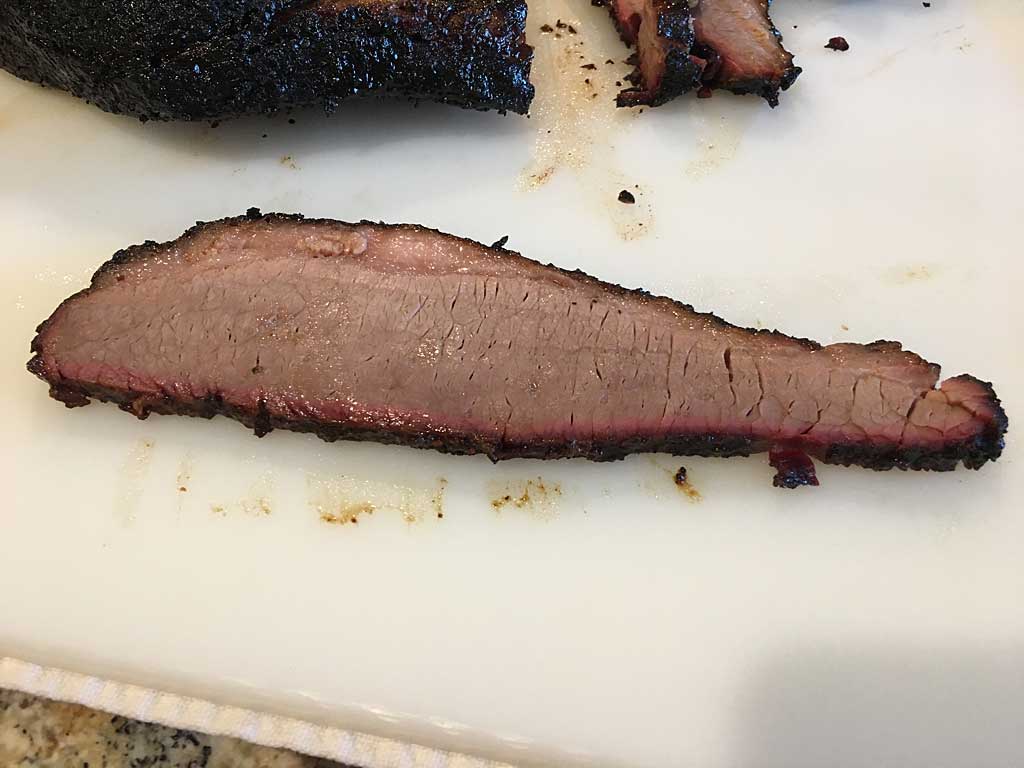
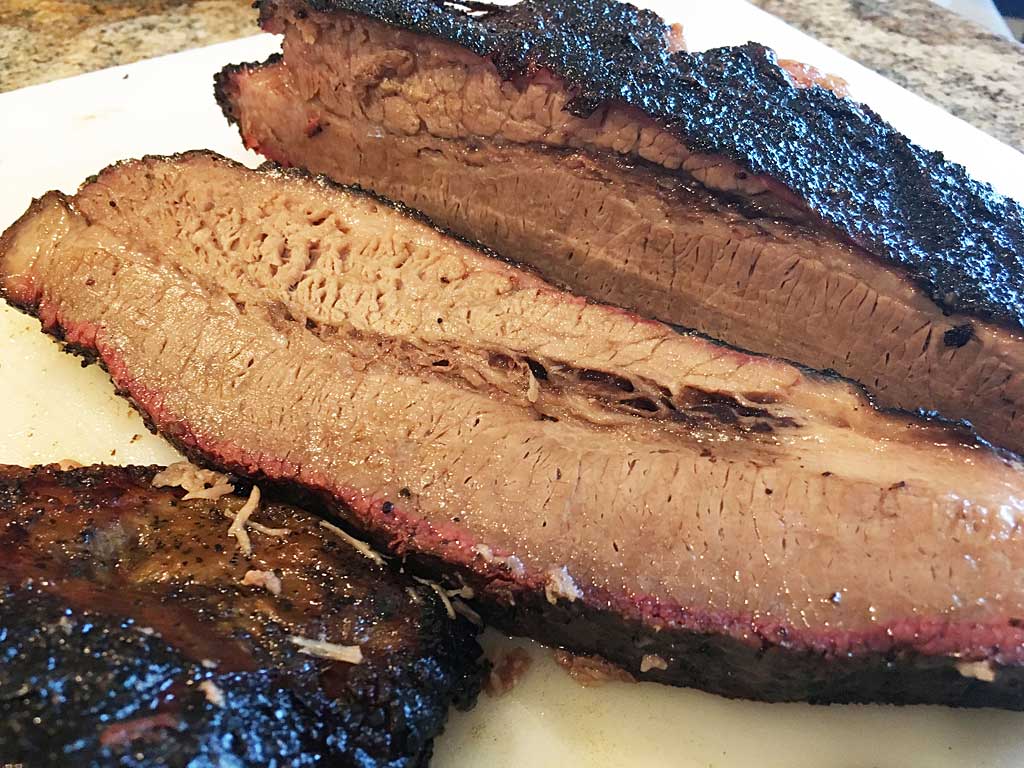
Slice the flat portion about 1/4″ thick, and just as you hit the point section, turn the brisket 90° and cut 3/8″ slices across the grain of the point. This results in a slice of meat containing both point and flat, where the point is cut precisely across the grain, but the flat is cut at an angle across the grain.
In Texas, it’s all about the meat and not about the sauce. Serve sauce on the side, if you like. Here’s a link to a recipe for Aaron Franklin’s Sweet Sauce at The Virtual Weber Bulletin Board that goes great with this brisket.
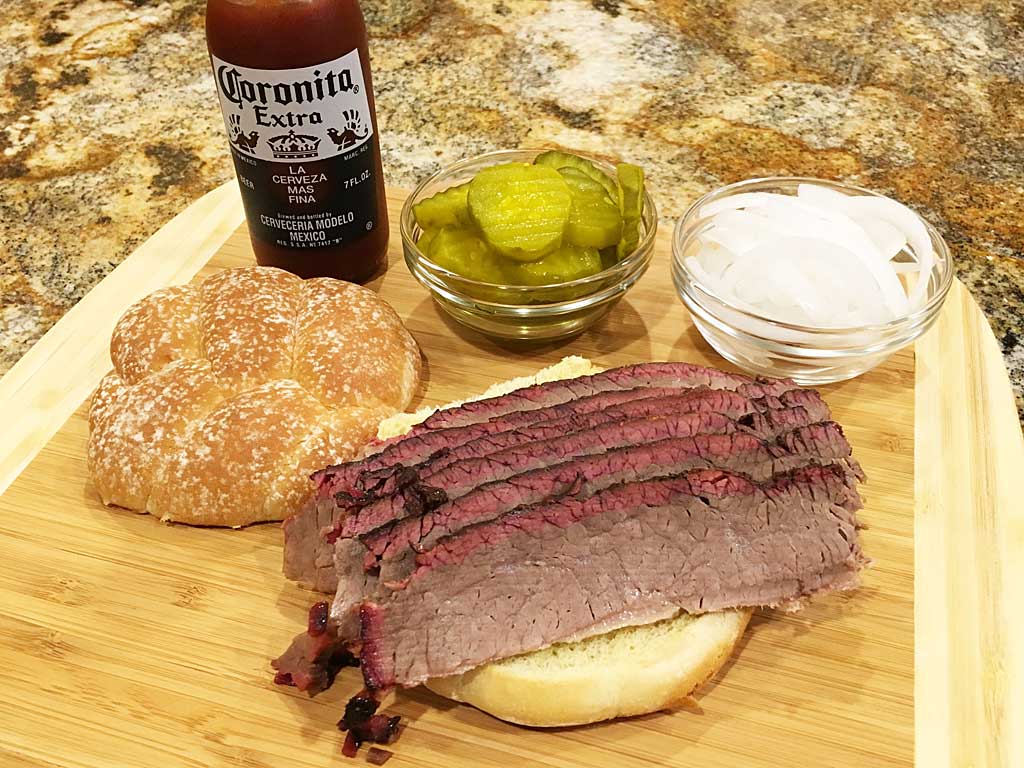

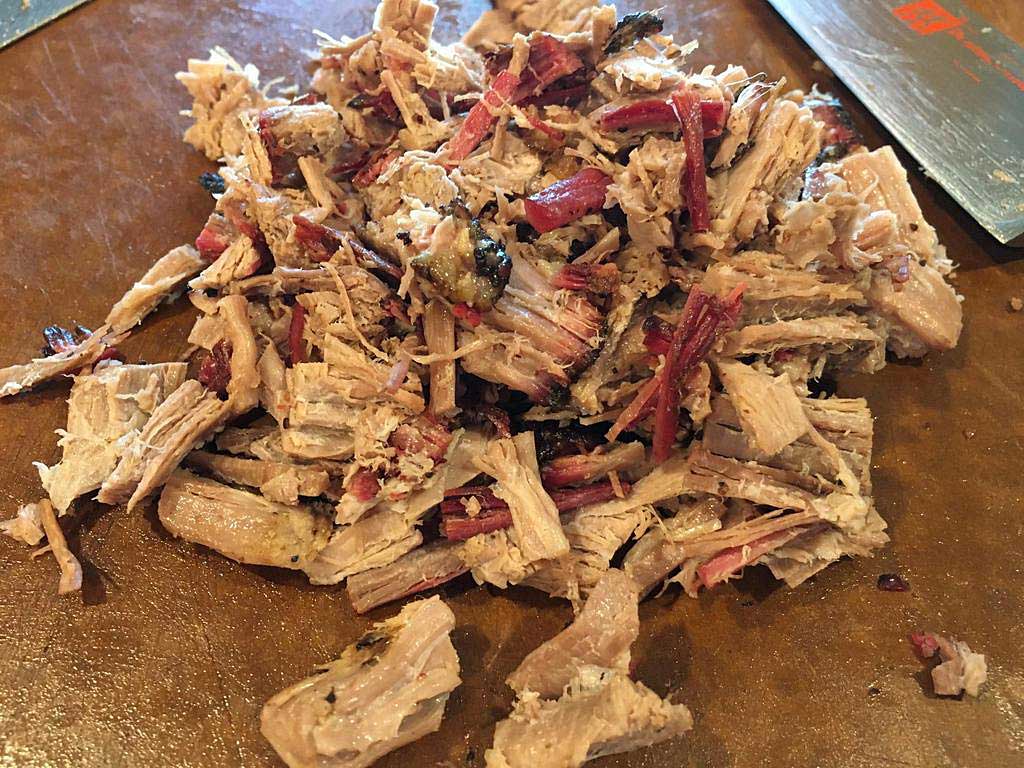
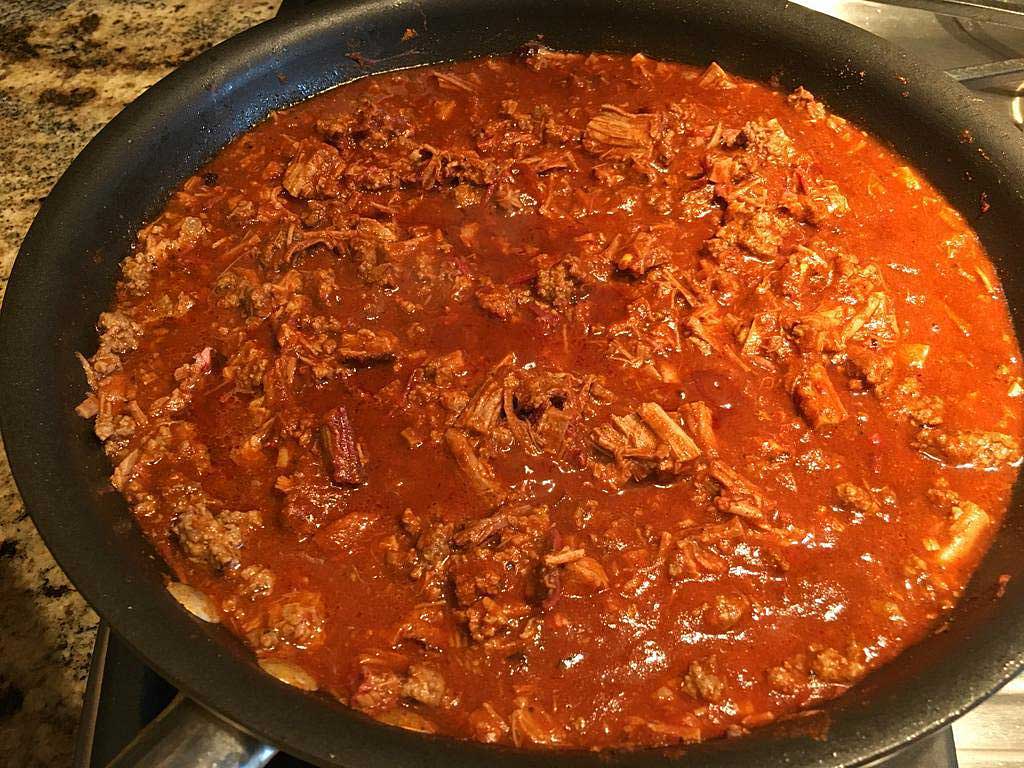
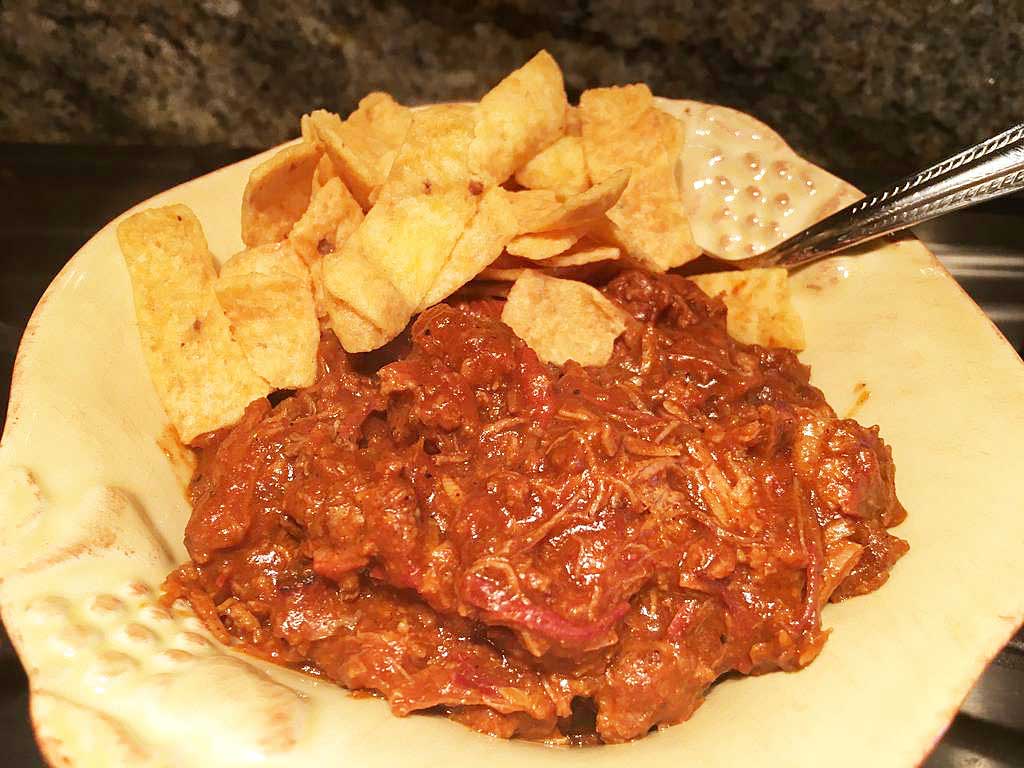
As for leftovers…in my household of two, a whole brisket is like the Energizer bunny—it keeps going and going! I froze chunks of brisket using my FoodSaver vacuum sealer and used it later to make the sandwich, the burnt ends with mac & cheese, and the brisket chili shown above.
More Brisket Links On TVWB
- Brisket – High Heat
- Brisket – Smoked & Oven Finished
- Brisket – Midnight Cook
- Brisket – Wet Rub
- Whole Brisket – Competition Trim
- Brisket Flat – Central Texas Style Butcher Paper
- Burnt Ends – Kansas City Style
- Burnt Ends – Smoky, Sticky, Sweet
- Pastrami – Dry Cured
- Quick Pastrami – Smoked Corned Beef Brisket
- Brisket Servings Calculator
- Brisket Selection & Preparation
- Separating Brisket Flat & Point
- Using An Electric Oven To Hold Brisket At Temperature
- Camp Brisket 2020 Trip Report


