In This Topic
- Standing Rib Roast Defined
- Anatomy Of Beef Rib Roast
- Choosing Beef Rib Roast
- What Size Beef Rib Roast To Buy
- Prepping Beef Rib Roast
- Dry-Aging Beef Rib Roast (Optional)
- Seasoning Beef Rib Roast
- Don’t Let Meat Sit At Room Temperature Before Cooking
- Cook Bone-Side Down
- Cooking Temperature & Reverse Sear
- Turning & Basting
- Estimated Cooking Time
- Where To Measure Internal Temperature
- Doneness Of Beef Rib Roast
- Foiling & Resting After Cooking
- Slicing Beef Rib Roast
- Leftovers
- Reheating
- More Standing Rib Roast Links On TVWB
Standing Rib Roast Defined
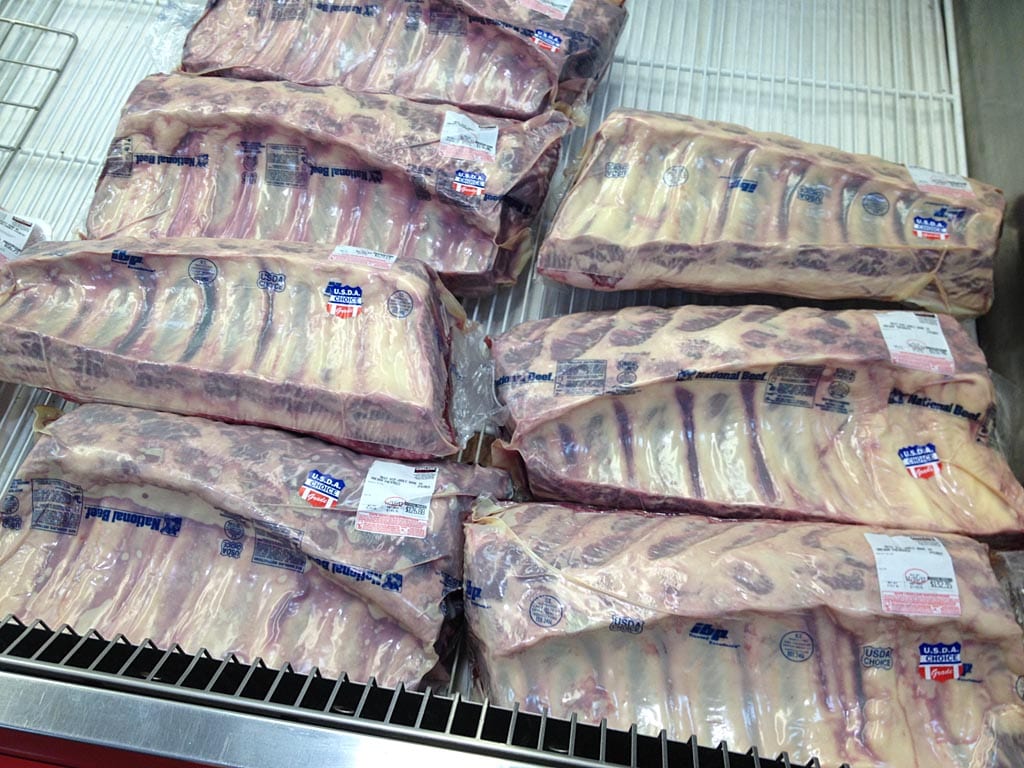
The whole, 7-bone standing rib roast is cut from the primal rib section of the steer. It consists of ribs 6-12 (ribs are numbered from the head to the tail) and weighs 14-20 pounds. Each beef carcass renders two whole beef rib roasts.
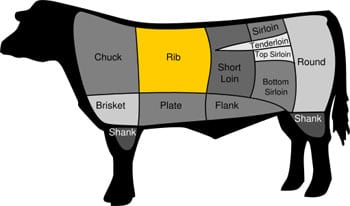
Diagram indicating primal rib section
The term standing rib roast refers to a bone-in roast, and the roast is cooked “standing” on its rack of ribs.
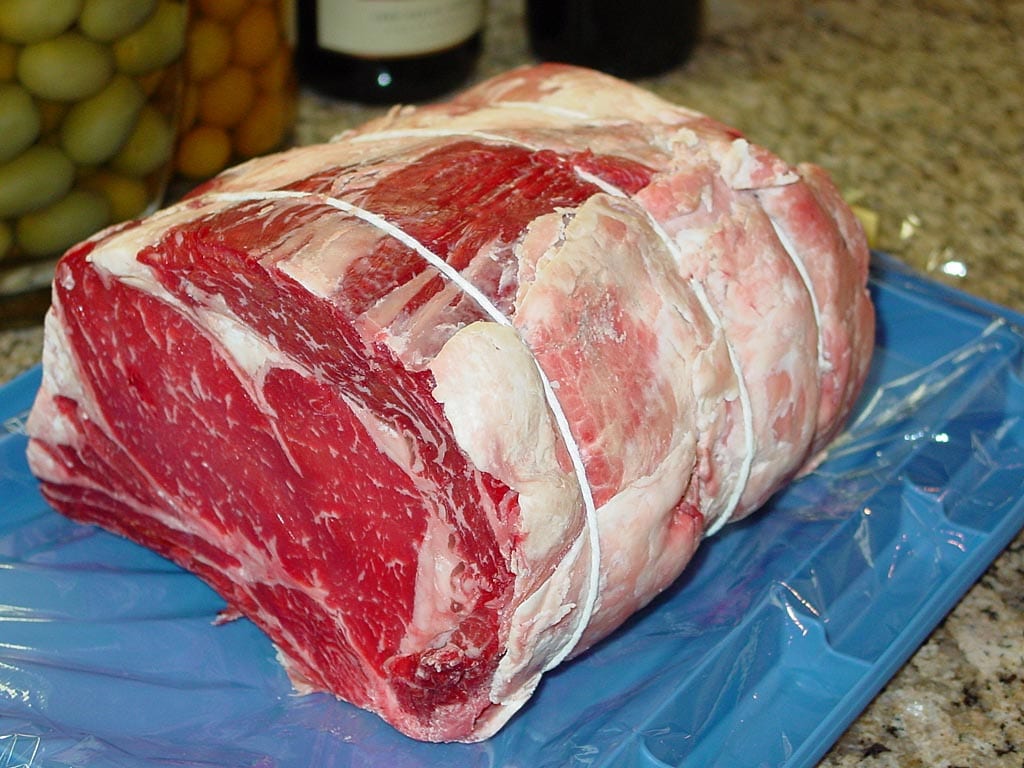
This photo shows a 15.97 pound whole beef rib roast. A 7-rib roast may be cut into pieces and sold as 2-, 3-, 4-, or 5-rib roasts. A 3-rib roast will weigh 6-7 pounds.
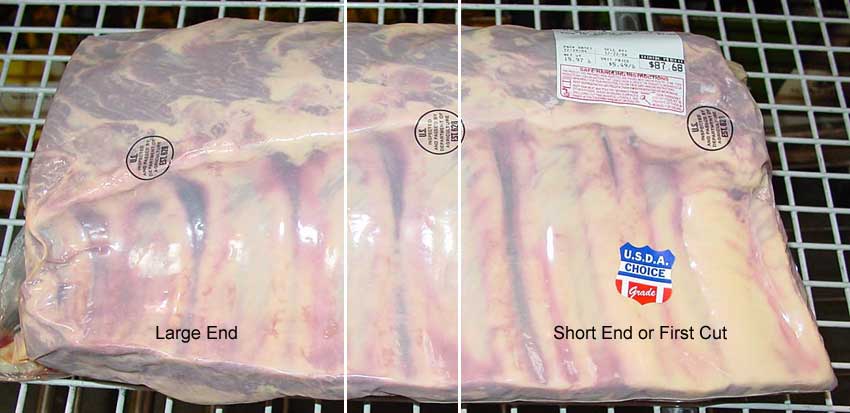
Whole, USDA Choice beef rib roast with large end and small end indicated
Anatomy Of Beef Rib Roast
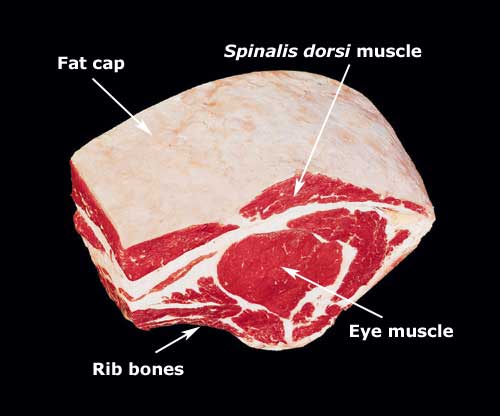
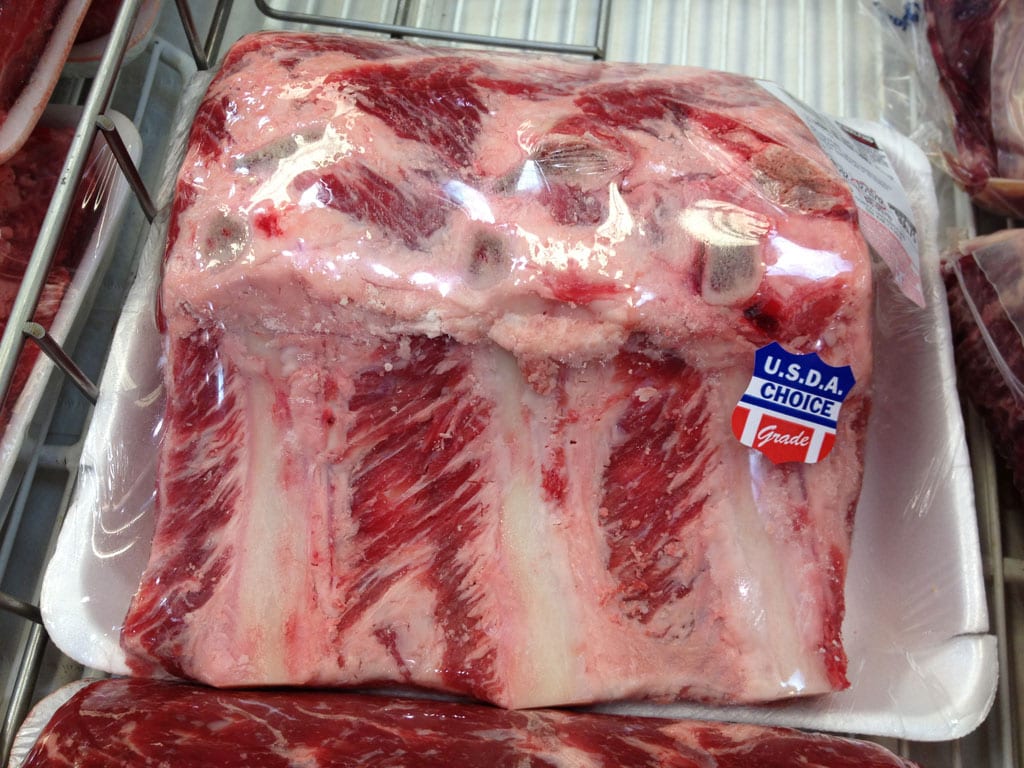
Annotated photo of beef rib roast large end, ribs 6-8
A beef rib roast consists of these major parts:
- Fat Cap: The thick layer of fat covering the outside surface of the roast. It helps protect the meat during cooking and crisps when exposed to high heat.
- Rib Bones: Not great at conducting heat, the bones insulate the side of the meat where attached and prevent overcooking. A treat for those who enjoy eating ribs.
- Eye Muscle: The center part of the roast with good fat marbling and tenderness.
- Spinalis Dorsi Muscle: Known as “rib eye cap steak” when separated from the rib roast, this super-tender and flavorful portion sits above the eye muscle and is a favorite among rib roast fans.
Choosing Beef Rib Roast
There are several considerations when selecting a beef rib roast for grilling or barbecuing.
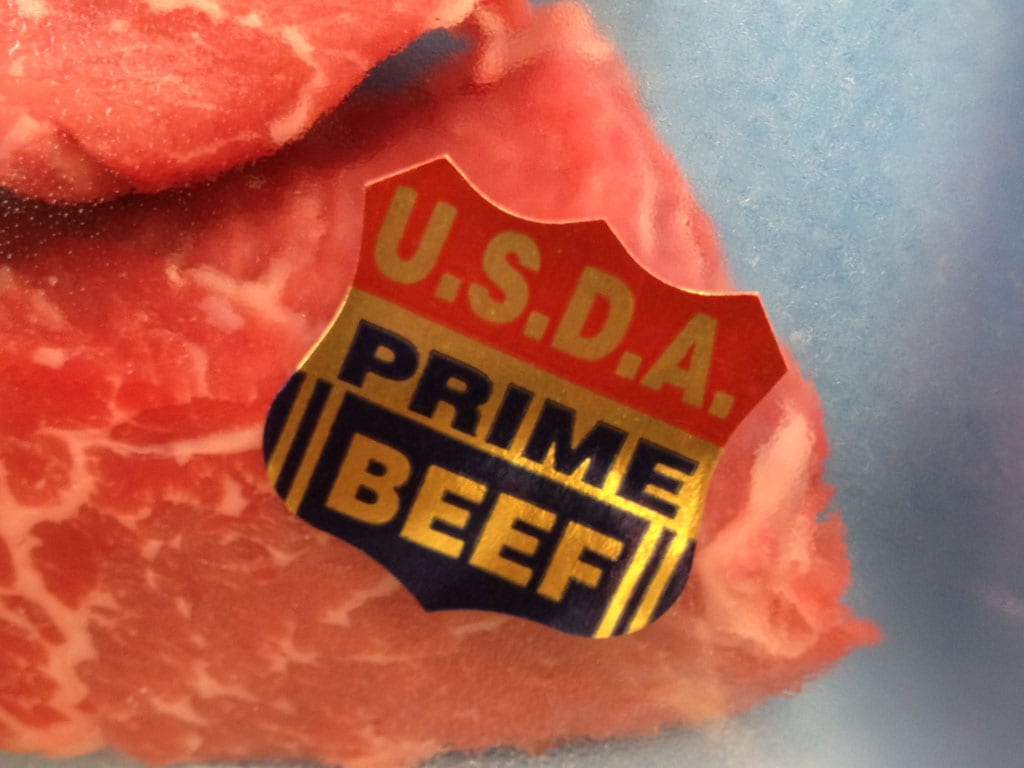
Quality Grade: Buy USDA Choice or Prime
Many beef producers pay to have their meat graded for quality by the United States Department of Agriculture (USDA). The highest quality grade is USDA Prime. USDA Prime is the most tender, juicy, and flavorful beef, based on the degree of marbling (intramuscular fat) and degree of maturity (apparent age of the carcass) determined during the grading process. Only about 2% of beef produced in the United States is graded USDA Prime, making it a rare commodity that commands a high price.
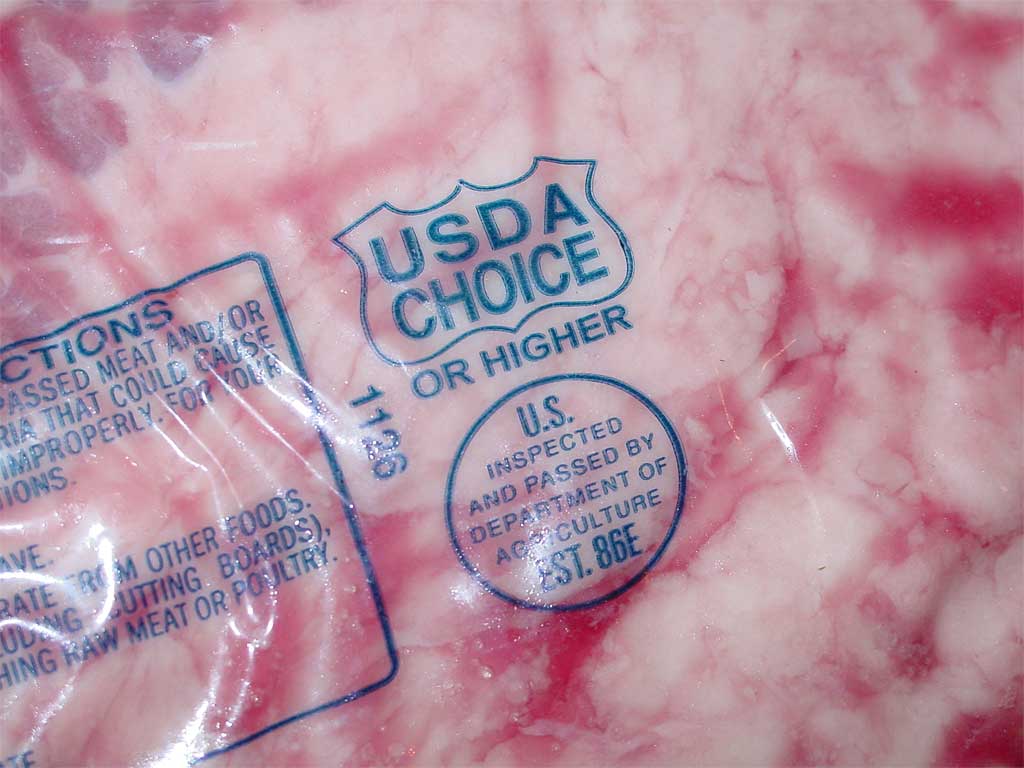
USDA Prime is followed by USDA Choice, and then USDA Select, each with less visible marbling and potentially more maturity. There are several quality grades below USDA Select, but you won’t see them in the supermarket.
You can easily find USDA Choice beef rib roasts at better supermarkets and membership warehouse stores. It’s a very good choice for grilling or barbecuing—tender, with a good amount of marbling, and reasonably priced.
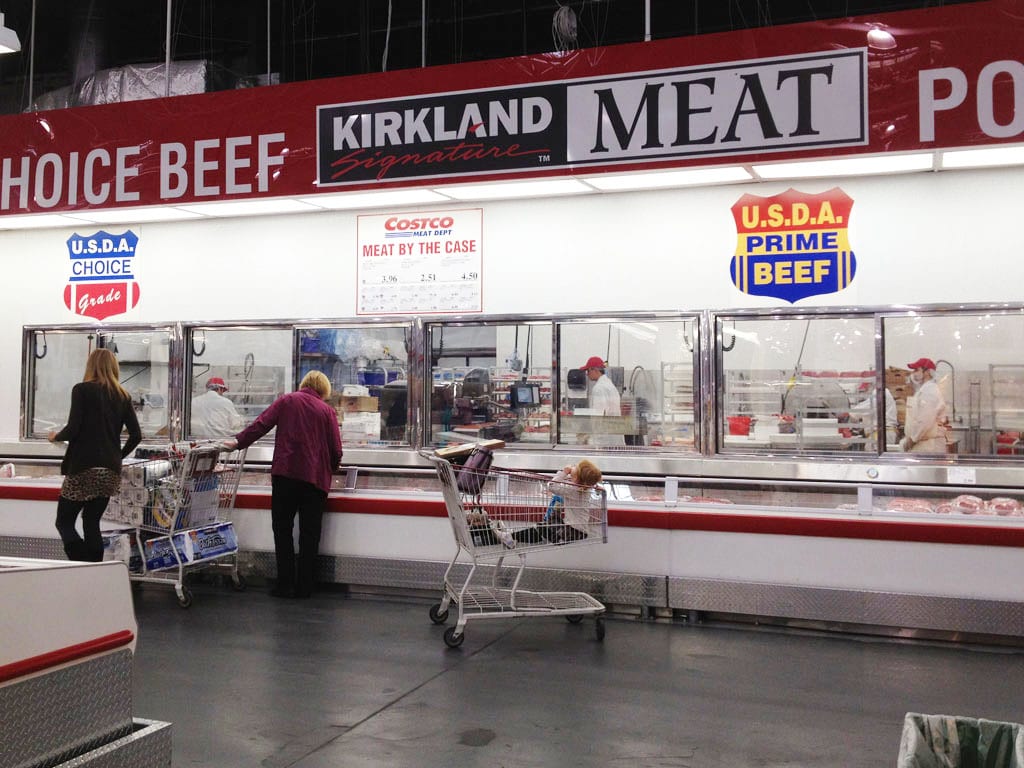
If you can find it, and if your budget allows for it, splurge on a USDA Prime beef rib roast. It’s the best of the best, with superior tenderness, marbling, and flavor. You’ll find it at high-end butcher shops, gourmet supermarkets, and sometimes at membership warehouse stores.
Because USDA Select roasts have even less marbling than USDA Choice, they’re more likely to seem tough and less juicy after cooking. Seek out USDA Choice instead—you’ll be glad you did.
Look for the USDA Prime or USDA Choice shield on the package, as shown in these photos.
Historically, the term prime rib has been used to describe beef rib roast of any quality grade. The USDA does not require that beef rib roast come from USDA Prime grade beef.
Small End Vs. Large End
Some people prefer a beef rib roast cut from ribs 10-12 (closest to the short loin) because it offers more lean meat and fewer large areas of fat. This roast is called the small end or first cut.
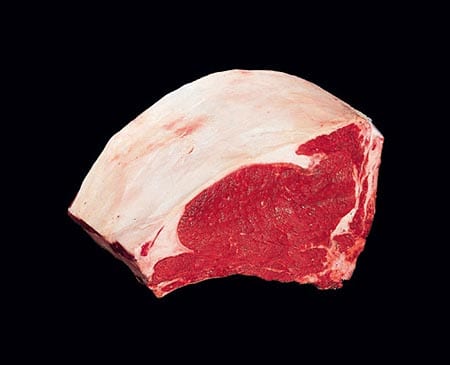
Small-end beef rib roast (ribs 10-12)
Other folks like a roast from ribs 6-8 (closest to the shoulder). This is called the large end. People choose this cut because it contains more fat, more flavor, and more of the spinalis dorsi or ribeye cap—that super-tender, fat-marbled layer on the outer edge of the roast.
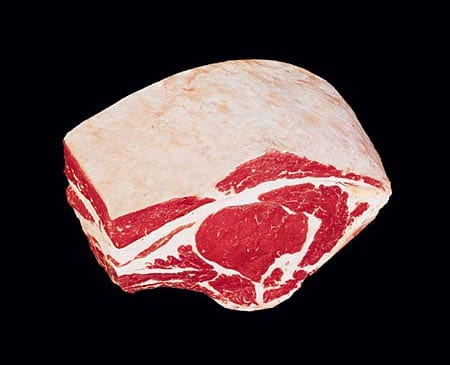
Large-end beef rib roast (ribs 6-8)
Beside the amount of lean vs. fat, you can tell the difference between these two roasts by comparing the length of their bones. A small-end roast has longer rib bones than a large-end roast.
So, if you want more lean meat for your money, buy one from the small-end. If you like more fat, purchase one from the large end.
Bone-In vs. Boneless
Beef rib roasts are sold two ways—bone-in or boneless. There are several advantages to cooking a bone-in beef rib roast:
- Fat and connective tissue that surround the bones add moisture and flavor to the meat as it breaks down during cooking.
- Rich flavor from bone marrow may migrate into the meat during cooking.
- Bones slow the cooking of meat and limit the evaporation of moisture.
- Bones are easily removed after cooking and make a tasty treat for the chef!
Buy a bone-in beef rib roast whenever you can.
Branded Beef
Some beef producers “brand” their beef products—not with a red-hot branding iron, but with fancy marketing names. Examples of successful branded beef include Certified Angus Beef (CAB), Meyer Natural Angus Beef, and IBP Chairman’s Reserve Certified Premium Beef. Pretty much any meat that has a fancy name attached to it is a branded beef product.
Producers say that branded products meet higher standards than non-branded beef, are of higher quality, and taste better. Some brands claim to choose younger cattle with more marbling that straddle the line between USDA Choice and USDA Prime grades. Meyer Natural says that its beef is produced without hormones or antibiotics.
I’ve cooked both branded and non-branded beef rib roasts, and I think the branded beef like CAB and Chairman’s Reserve are somewhat better than regular Choice beef. If you have a choice between branded and non-branded beef rib roasts at roughly the same price, consider going with the branded product, as long as it has that all-important USDA Prime or USDA Choice grade shield on the package. Without that shield, you have no guarantee of quality, no matter what the butcher tries to tell you.
What Size Beef Rib Roast To Buy
An easy way to estimate how much rib roast to buy is to figure on feeding two people per bone. This is a generous estimate that allows for some leftovers.
- 6 people = 3-rib roast
- 8 people = 4-rib roast
- 10 people = 5-rib roast
- 12 people = 6-rib roast
- 14 people = 7-rib roast
Another way to estimate is to figure on 1 to 1-1/4 pounds pre-cooked weight per serving.
Prepping Beef Rib Roast
If you purchase a USDA Prime beef rib roast from a butcher, given the price you pay, you should expect it to be perfectly trimmed and tied with butcher’s twine at each bone. Just season it and away you go.
In most cases, there’s no need to trim anything from a beef rib roast before cooking it. Of course, if you see anything that looks odd or out of place, remove it before cooking.
You should tie the roast at each bone before cooking. This prevents the outer layer of meat from pulling away from the rib eye. Place the roast bone-side down. Cut a length of kitchen twine, loop it around the roast parallel to the first bone, bringing the two ends to the top of the roast. Pull snug and tie with whatever kind of knot you like, then repeat at each bone.
Don’t bother cutting the ribs off and tying them back on before cooking, as you’ll read about in some recipes. They’re easily removed once the roast is cooked.
This video demonstrates how to tie a roast. Click on the video to play.
Dry-Aging Beef Rib Roast (Optional)
You don’t have to dry-age a beef rib roast before cooking it, but if you’re interested in learning more about the process, read on.
Beef is dry-aged in order to make it more tender and flavorful. During dry-aging, enzymes in the meat go to work on the connective tissue and muscle fibers, resulting in increased tenderness. Also, a significant amount of moisture evaporates from the meat, resulting in more intense flavor.
I was inspired to dry-age a beef rib roast after watching Alton Brown do it on Good Eats on the Food Network. Experts like Brown and Cook’s Illustrated magazine say that you can safely dry-age beef in your refrigerator at home for 3-7 days, while others like Bruce Aidells suggest that you leave dry-aging to professional butchers.
If you choose to dry-age a beef rib roast, you accept the risk of ruining an expensive cut of meat, or that you won’t like the resulting flavor. Some people who are not familiar with the taste of dry-aged beef describe it as “gamy” or “musty”. Others call it “buttery” or “rich”. In the end, it’s all a matter of personal preference.
On Good Eats, Alton Brown drilled holes in a Rubbermaid storage container to create a “prolifically perforated plastic bin”. This allows air to circulate around the meat and protects it from spills and other contaminates, while protecting your fridge from any juices that might seep from the roast. Place the roast bone-side down on the lid and put the bin over the roast, as shown in the photo.
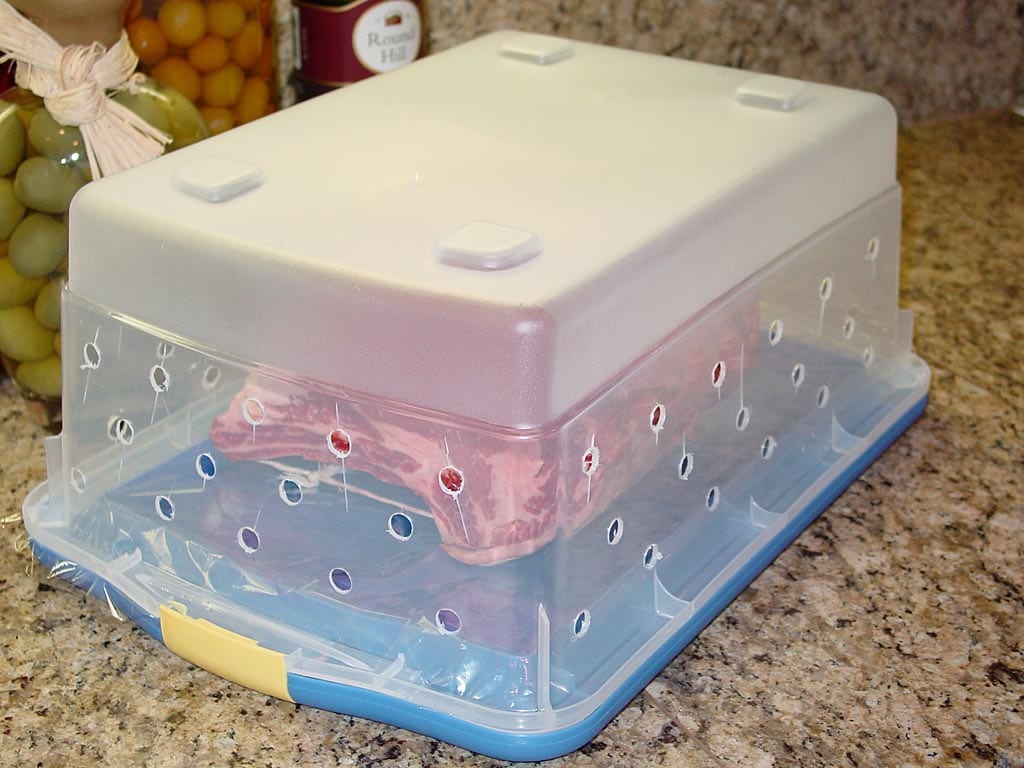
Alternatively, Brown suggests placing the roast bone-side down on a rack over a rimmed baking sheet pan and covering loosely with a dry towel, changing the towel daily.
When dry aging beef, your refrigerator should be impeccably clean and free of any items that produce strong odors, as the exposed meat may absorb these odors.
Place the roast at the back of the lowest shelf in your refrigerator, which should be the coldest location. Lower the refrigerator setting to achieve a temperature of 34-36°F. Measure the temperature near the roast using a refrigerator thermometer, or place a probe thermometer in a glass of water situated next to the roast.
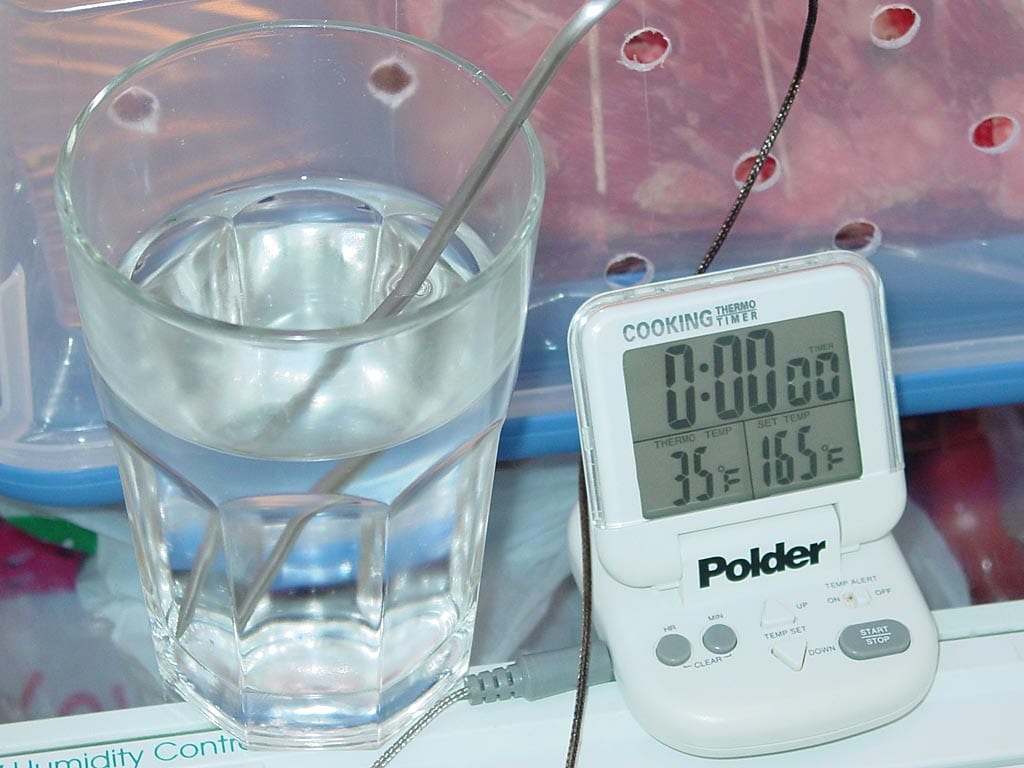
I dry aged this roast for 3 days. Brown says, “You may notice a slightly funky aroma. That’s OK. The smell of success.”
This photo shows how the roast looked after 3 days in the perforated bin.
At first glance, it doesn’t look much different than before, but the next photo shows that some of the edges have begun to dry out.
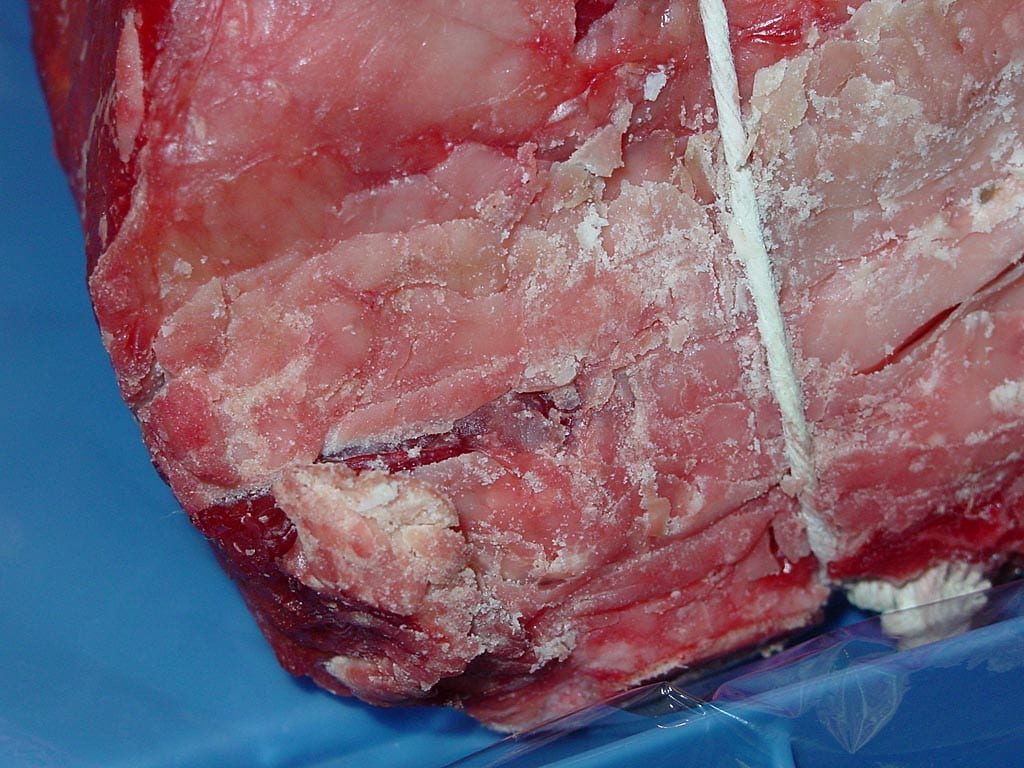
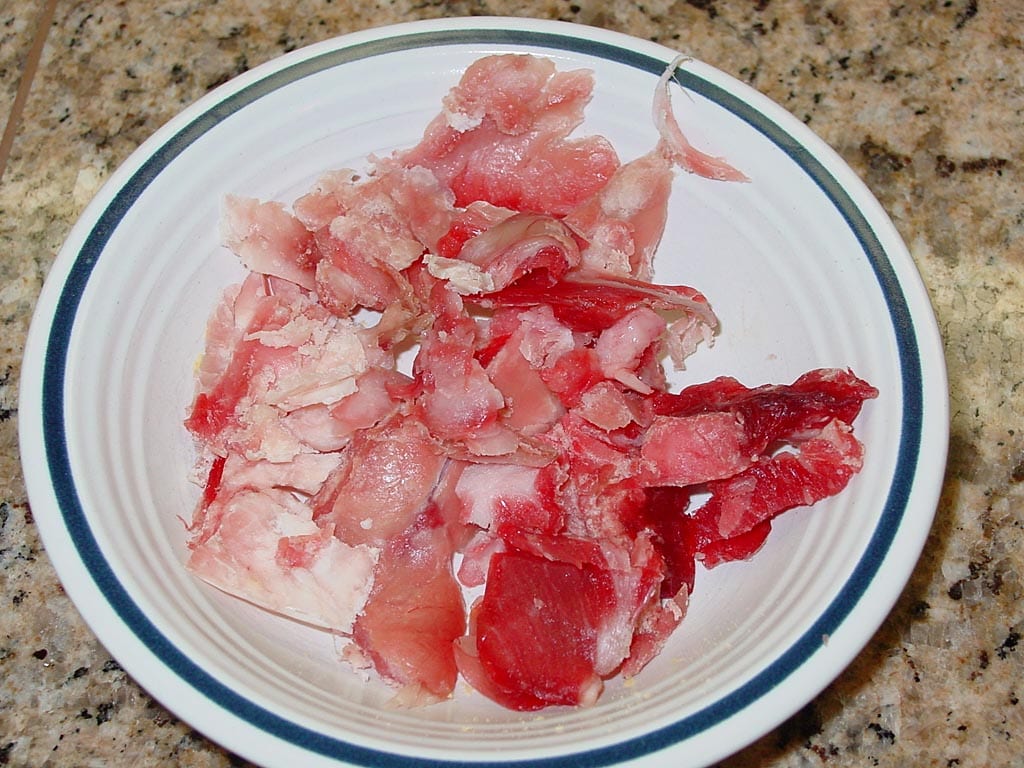
Use a sharp knife to shave off any dried or leathery spots on the roast. This photo shows how much I trimmed from this roast.
Here’s a resource about aging meat that you might find interesting:
Seasoning Beef Rib Roast
There are lots of approaches when it comes to seasoning a beef rib roast. The most simple is a 2:1 ratio of kosher salt and freshly cracked black pepper—this just enhances the natural, rich flavor of the meat. For something more complex, try a commercial or homemade rub, or an herb paste. You’ll find examples of all of these approaches at the end of this article.
Make sure to season thoroughly. This is a large, thick cut of meat, so it can take a good amount of seasoning on the surface.
Don’t Let Meat Sit At Room Temperature Before Cooking
Many beef rib roast recipes suggest that you allow the meat to sit at room temperature for 1-2 hours before cooking. I have done this in the past but not anymore. I don’t think it’s a good idea from a food safety standpoint, and starting with a cold interior temperature makes it easier to achieve a rare or medium-rare roast in a low & slow 225-250°F smoker.
Tie the roast the night before. When ready to cook, take the roast out of the refrigerator, pat it dry with paper towels, apply the rub, and let it sit on the kitchen counter while firing-up the WSM, 15-30 minutes max, and put it into the smoker. If a recipe calls for marinating the roast overnight, you can take it from the refrigerator directly into the smoker once it’s fired up.
Cook Bone-Side Down
Beef rib roasts are typically cooked with the bone-side facing down. The bones act as a natural roasting rack.
Cooking Temperature & Reverse Sear
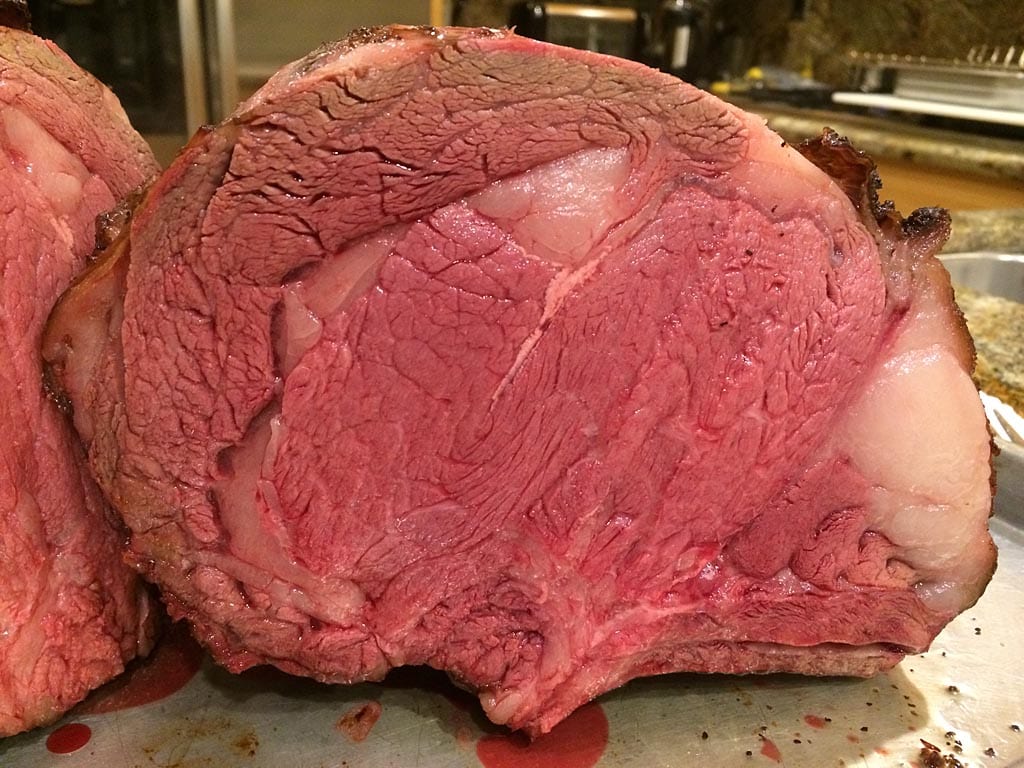 You can successfully cook a beef rib roast using a variety of cooking temperatures and techniques. In my experience, the best method for achieving a perfectly rare rib roast that’s red from edge to edge is cooking at 225-250°F to an internal temperature of 125°F, then finishing directly over hot coals or in a 500°F oven for a few minutes to sear the exterior. This is known as the reverse sear method. You’ll find an example of a reverse sear rib roast in the Standing Rib Roast – Salt & Pepper article.
I’ve cooked several rib roasts at 325-350°F and they turn out fine, but you will get more overcooked meat around the edges.
 For red meat from edge to edge, cooking low & slow at 225-250°F is the way to go.
Turning & Basting
There is no need to turn or baste a beef rib roast during grilling or barbecuing.
Estimated Cooking Time
At a cooking temperature of 225-250°F, the estimated cooking time for a 3-rib roast weighing 6-7 pounds to rare doneness is 3-1/2 to 4 hours, 30-40 minutes per pound.
At a cooking temperature of 325-350°F, the estimated cooking time for a 3-rib roast weighing 6-7 pounds to rare doneness is about 2 hours, 17-20 minutes per pound.
Factors that affect cooking time include the size of the roast, the starting internal temperature of the meat, how hot the cooker is running, what type of fuel is used, and weather conditions.
Where To Measure Internal Temperature
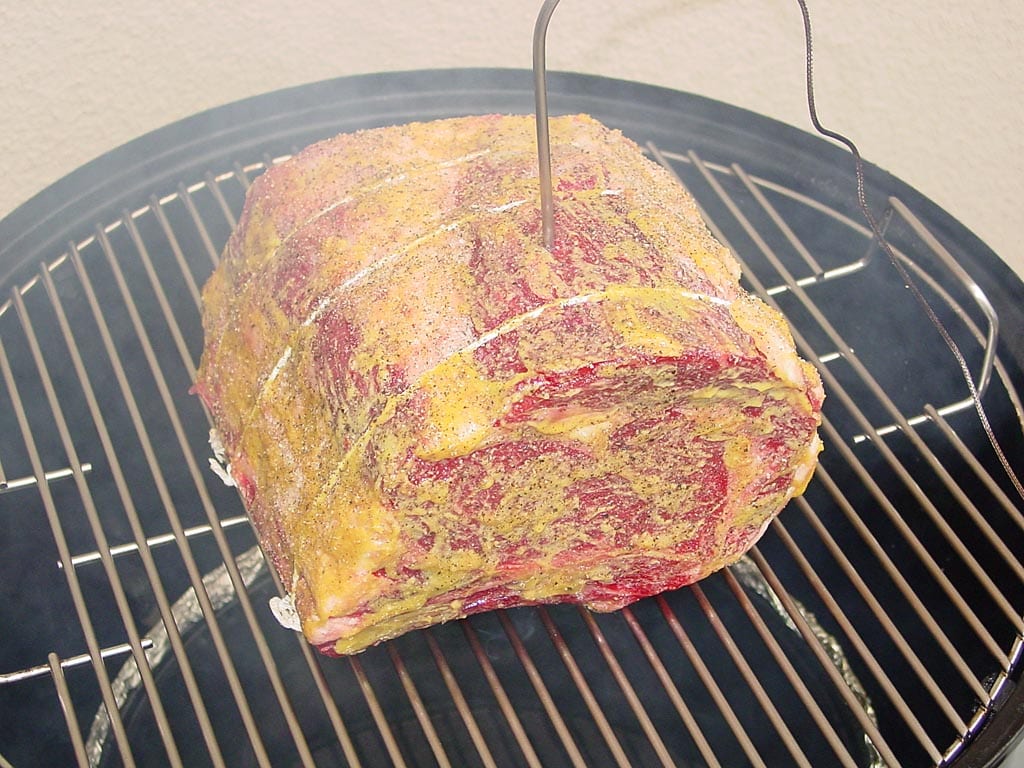 To measure the internal temperature of a beef rib roast, insert a probe thermometer into the middle of the roast from the top.
To make sure you hit the middle, place the thermometer on the outside end of the roast, so the tip is at the center of the roast. Pinch your fingers on the thermometer stem where it meets the top of the roast, then move the thermometer to the top center of the roast and insert it until your fingers touch the meat.
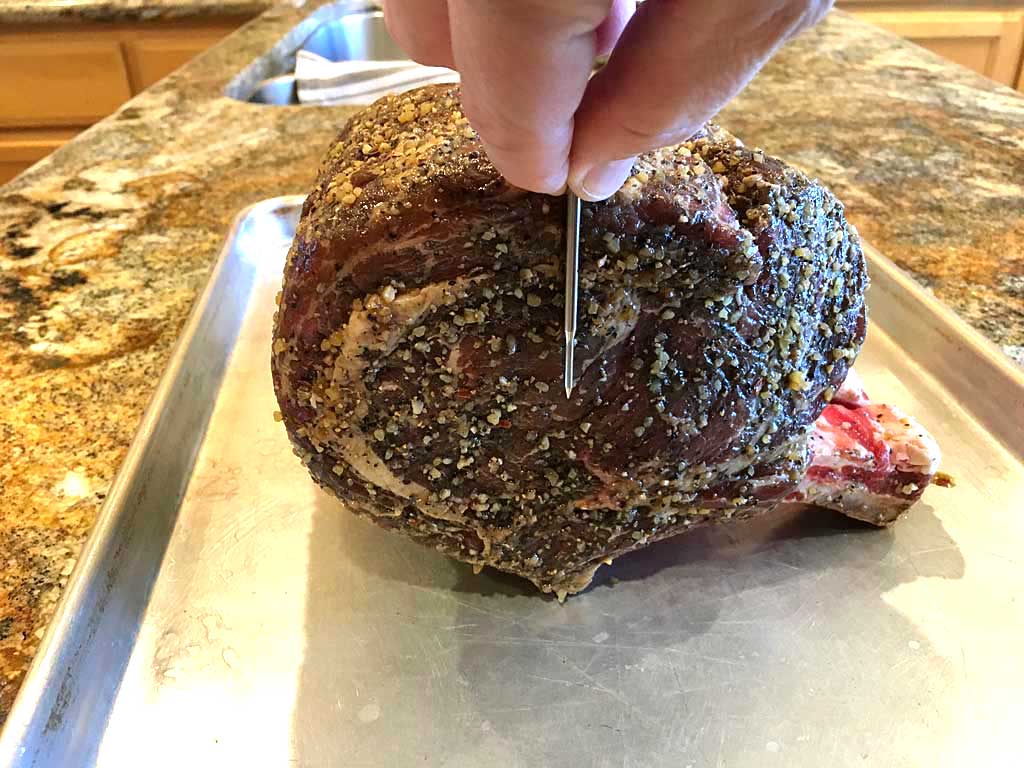
Toward the end of cooking, check the temperature in multiple spots using an instant-read thermometer and average the results.
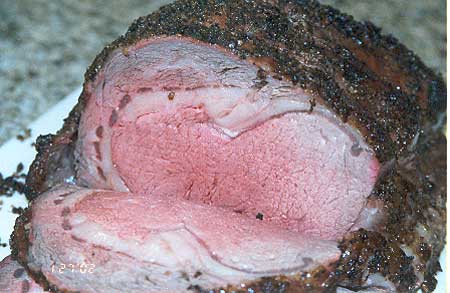
Doneness Of Beef Rib Roast
This doneness chart for beef roasts comes from The Complete Meat Cookbook and assumes cooking at 325-350°F. Remove the roast from the cooker when it reaches the temperature in the “Remove” column, and carryover cooking during the resting period will bring the finished internal temp up to the range shown in the right column.
If cooking at 225-250°F, cook the roast to the low end of the “Ideal” column before resting the meat, as there won’t be as much carryover cooking once the roast comes off the smoker.
| Remove From Heat | Ideal Temperature After Resting | |
| Very Rare | 110-115°F | 115-125°F |
| Rare | 115-120°F | 125-130°F |
| Medium-Rare | 125-130°F | 130-140°F |
| Medium | 130-140°F | 140-150°F |
| Medium-Well | 145-155°F | 150-165°F |
| Well Done | Don’t Ask! | Fahgettaboudit! |
Foiling & Resting After Cooking
After cooking, cover the beef rib roast loosely with aluminum foil and let rest for 15-30 minutes before removing the bones and slicing. This allows the juices inside the meat to redistribute. You can read more about the science behind this in Letting Meat Rest After Cooking.
Slicing Beef Rib Roast
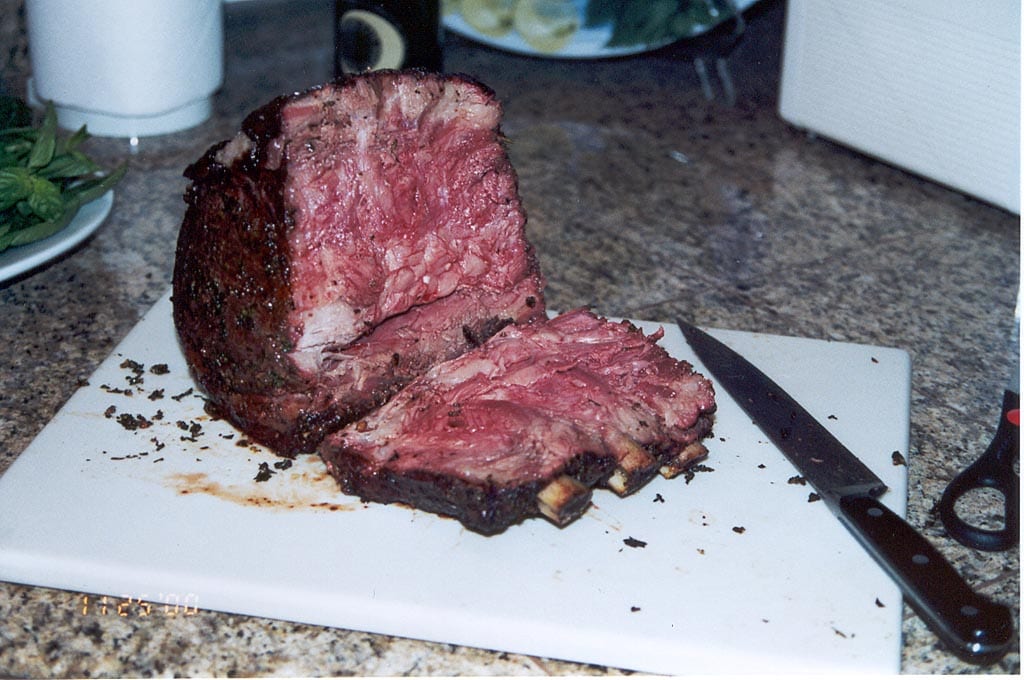
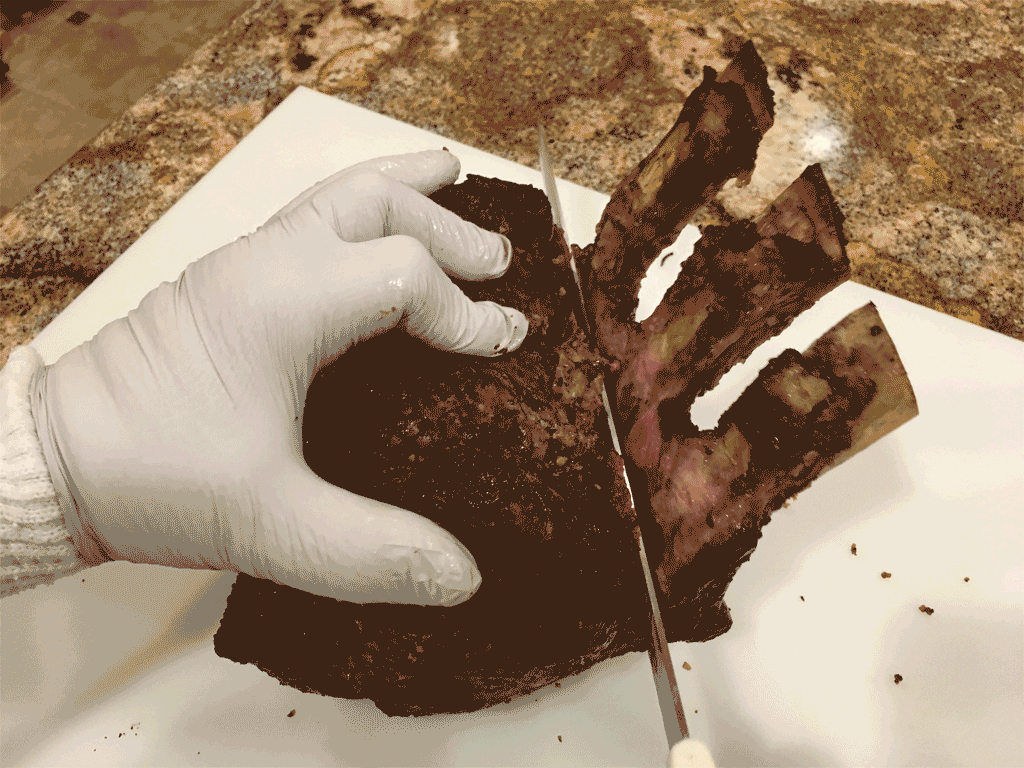
To carve, remove the twine and roll the roast onto its side so the bones are pointing straight up. Using the bones as a handle, cut downward close to the bones using a sharp boning knife or an electric carving knife to remove the bones. Click here to see the cutting process as a GIF.
Next, place the roast flat on the cutting board and carve slices 1/2″ thick or to your liking.
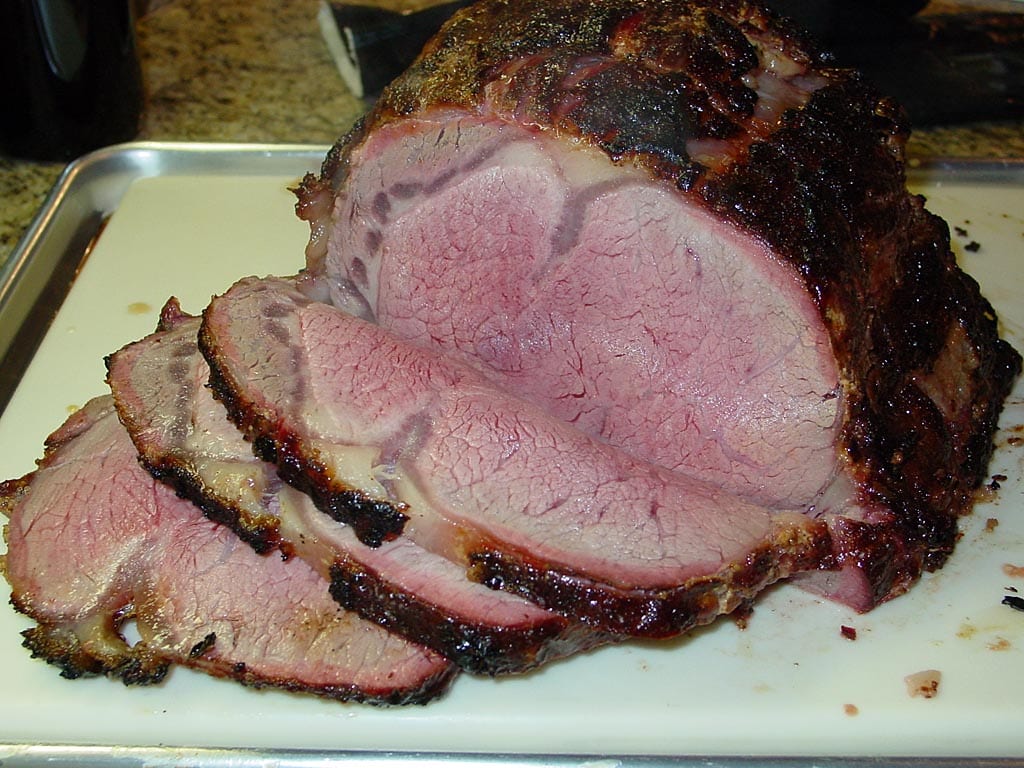
Cut the bones into individual pieces and serve them along with the roast…or save them for yourself!
Leftovers
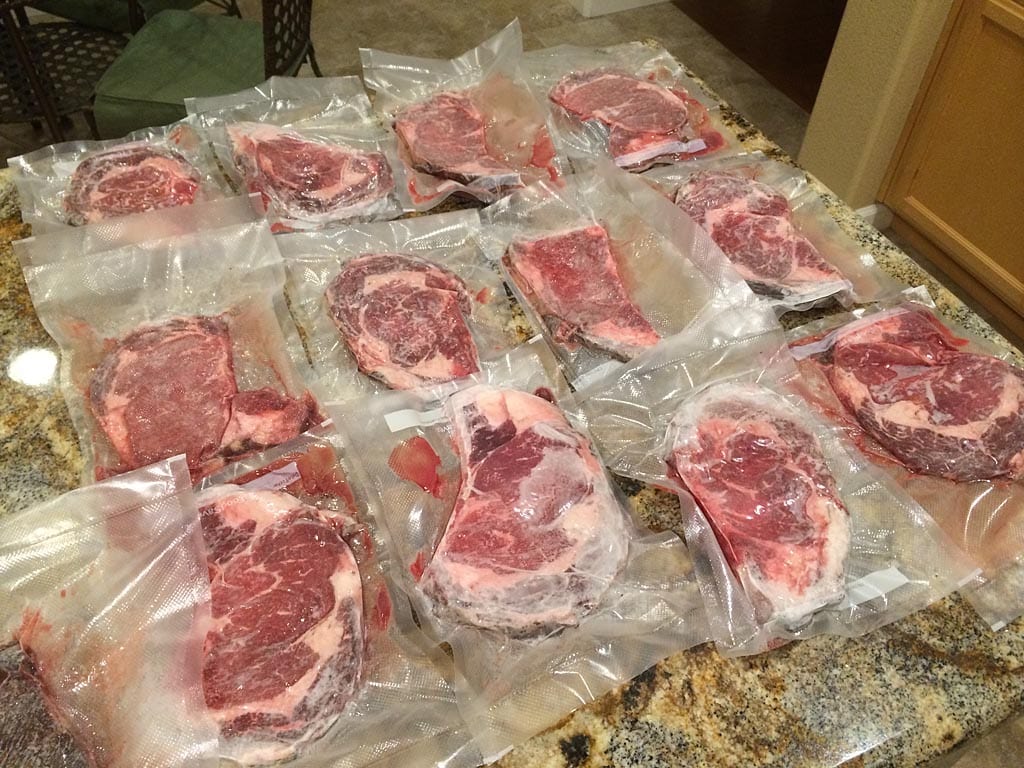
Leftover beef rib roast can be kept in the refrigerator for 3-5 days. Leftovers can also be sliced into individual serving portions, sealed in FoodSaver bags, and frozen.
Reheating
Gentle reheating is the key to great leftover beef rib roast.
Place a slice of meat on a plate and cover with plastic wrap. Heat in the microwave at 20% power for 1 minute. Check the temp with your fingers. Continue at 20% power in 15-30 second increments until warmed to your liking.
If you’ve stored individual serving portions in FoodSaver bags, bring a large pot of water to a boil. Turn off the heat and place an unopened, unfrozen bag into the hot water. Let sit for several minutes until heated to your liking.
More Standing Rib Roast Links On TVWB
- Prime Rib – Herb Crusted
- Standing Rib Roast – Montreal Rub
- Standing Rib Roast – Dry Aged
- Standing Rib Roast – Salt & Pepper
Primal rib section diagram: 2009 by JoeSmack from Wikipedia Commons


