In This Topic
Several Weber Smokey Mountain Cooker owners have created rolling platforms or added wheels to their cookers. Here are a few examples.
Note: Adding wheels to your WSM may be dangerous and you do so at your own risk. Weber warns that you should never move a hot cooker before, during or after use.
Rolling Platforms
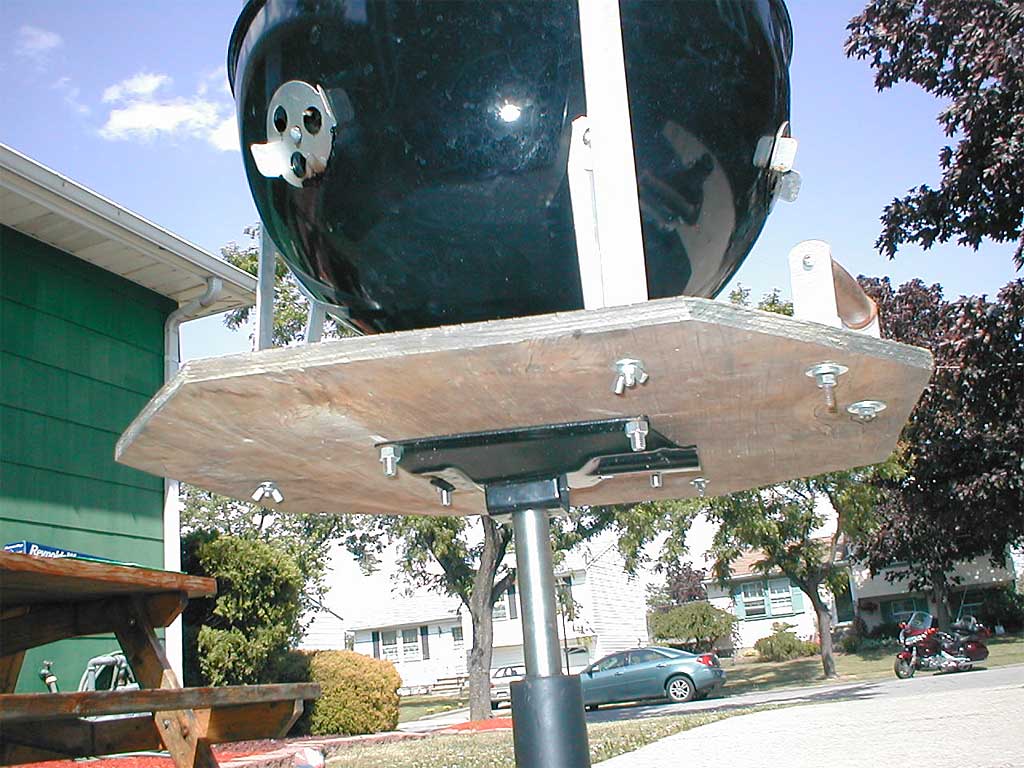
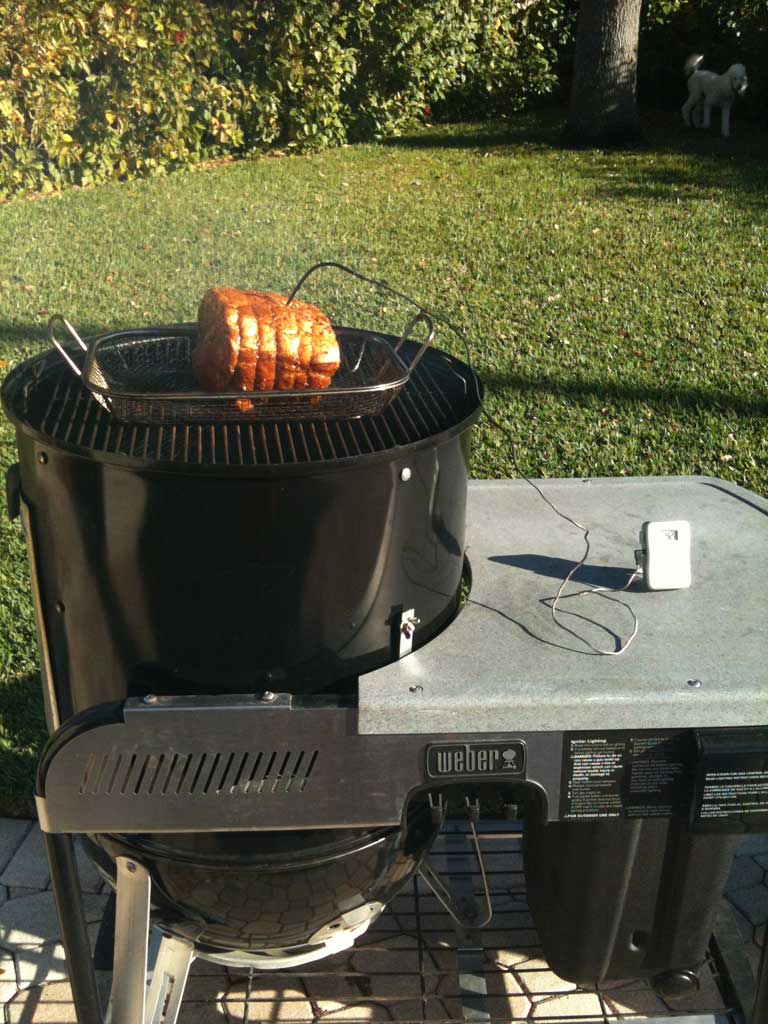
Joel K built a rolling platform to move his cooker between the garage and patio.
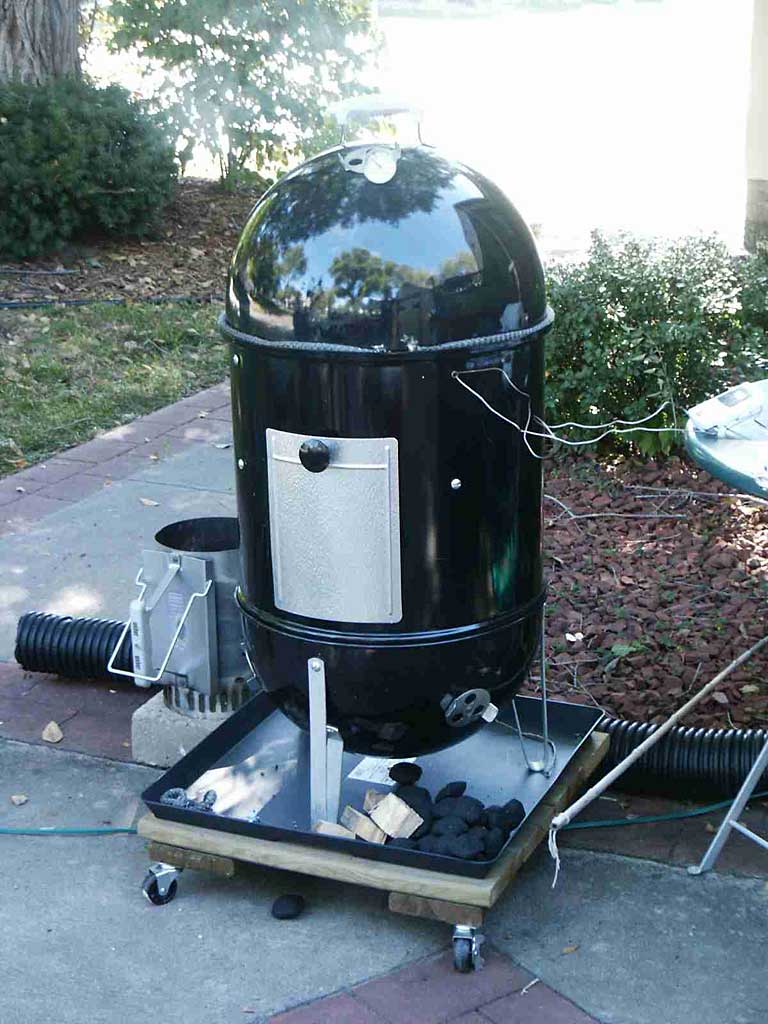
Joel writes, “I started with a 22″ decking square made of pressure-treated lumber I picked up at a home center (about $3). I added four 2” casters—two are locking (about $10). Then I topped it with a drip pan made of some kind of plastic material ($8). The pan is screwed to the decking square.
“I haven’t secured the WSM to the rolling platform yet, but I’m thinking about a way to do it that allows easy release. I’m also thinking of attaching a handle to the side, maybe mounting a side table there.”
Joel used his rolling platform for several “low and slow” cooks and had no problems…until one day he cooked a meatloaf at high temperature and “kind of melted the pan.” So Joel is now looking for a metal pan, perhaps a hot water heater pan or an undercar oil drip pan.
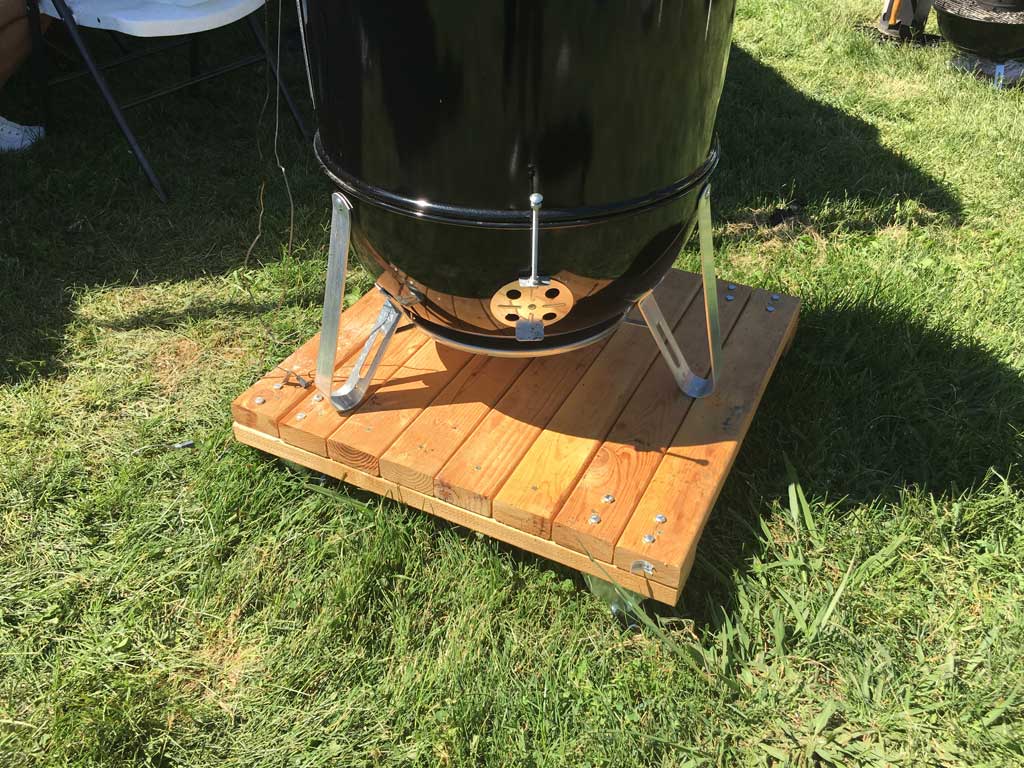
The Thin Blue Que barbecue team from Lodi, CA rolls into Northern California competitions using this nifty platform made from 2×4 dimensional lumber, a few wood screws, and four swivel casters bolted onto the bottom.
 Donny Anderson of Maryville, TN has a WSM mounted to a satellite dish.
Donny writes, “I bought a WSM on Craigslist that was mounted on a convex disc with casters. I quizzed the previous owner about where he found the dish for mounting. Turns out it is a satellite TV dish! It really fits well and the casters are mounted well. The caster system held up well during its first overnight cook. We had a pretty strong thunderstorm blow through and it stayed right where I left it. I did learn that the dish needed additional holes for drainage as there was standing water inside.”
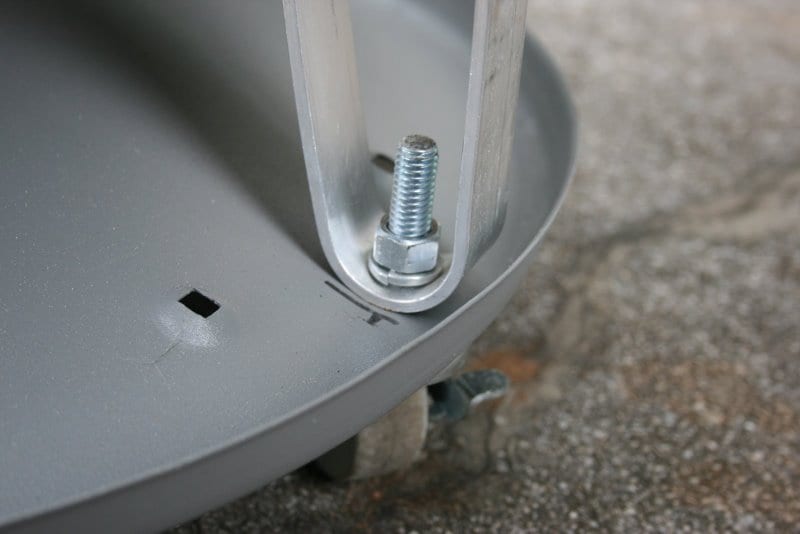
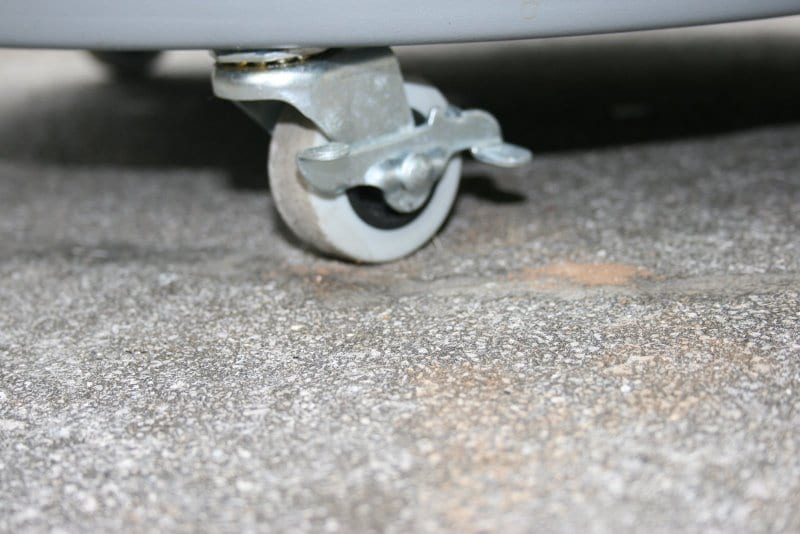
Scott Zanders from Germany attached his WSM to a metal ring outfitted with 3 locking casters.
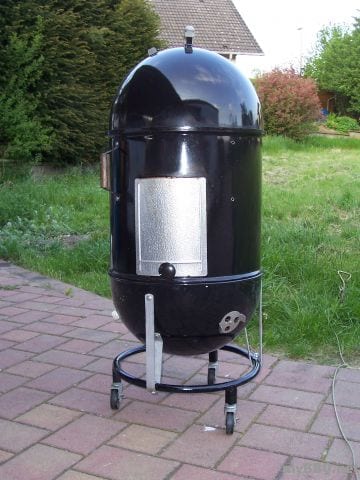
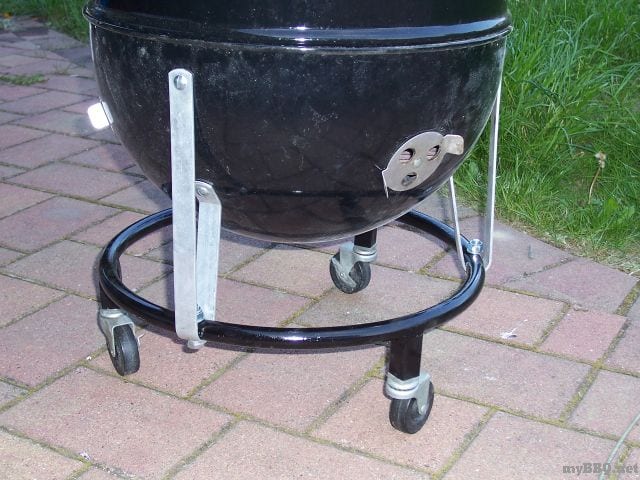
“A friend of mine made the ring and I painted it,” says Scott. “The wheels are from an old roll-around table.”
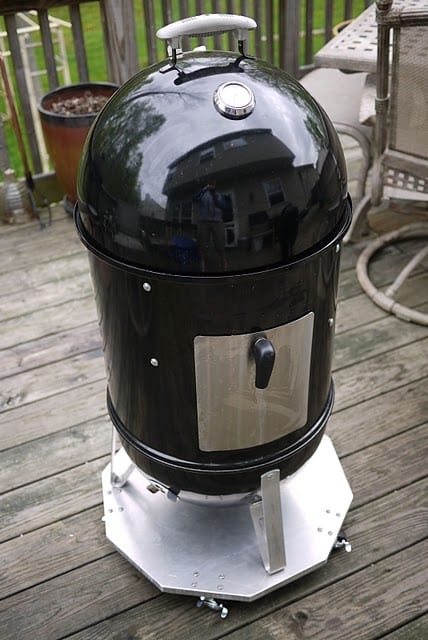
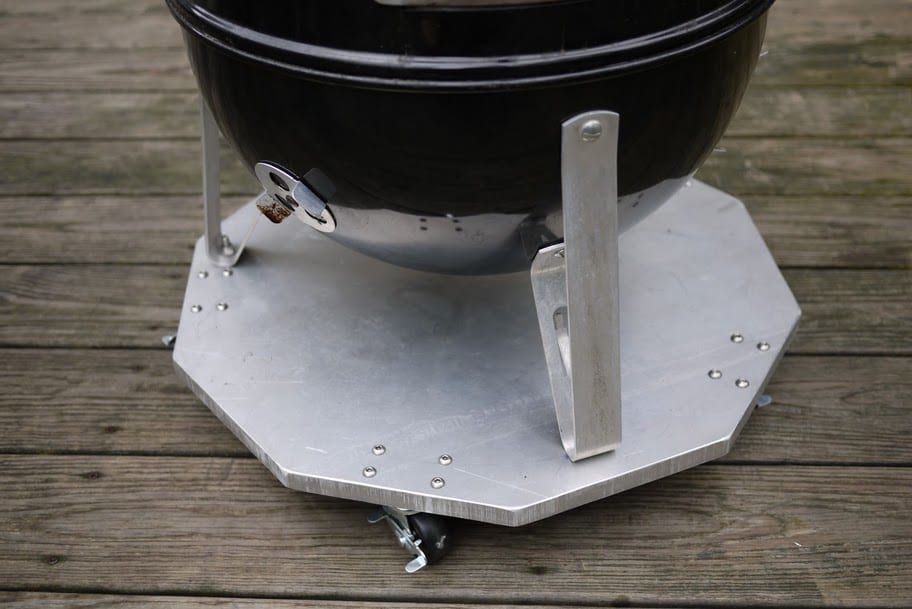
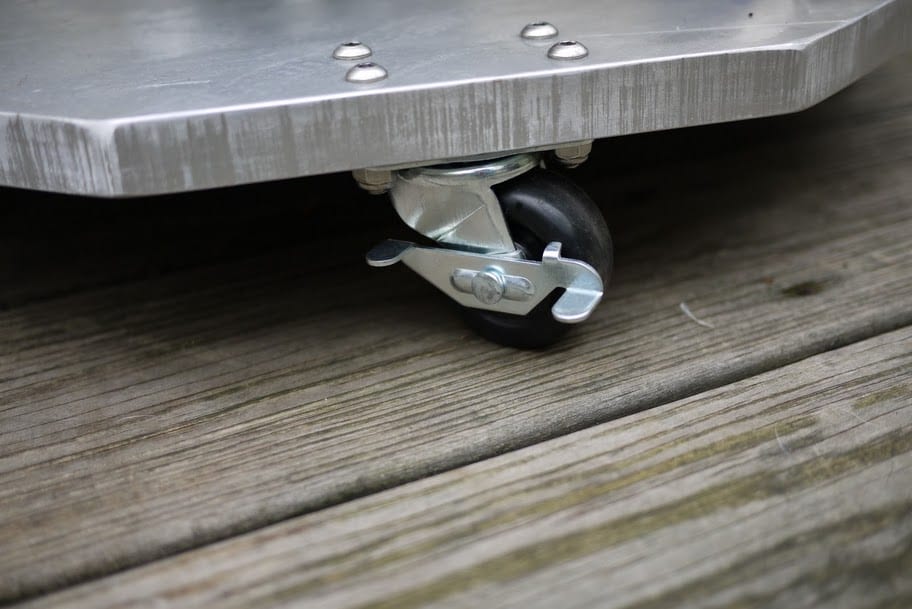
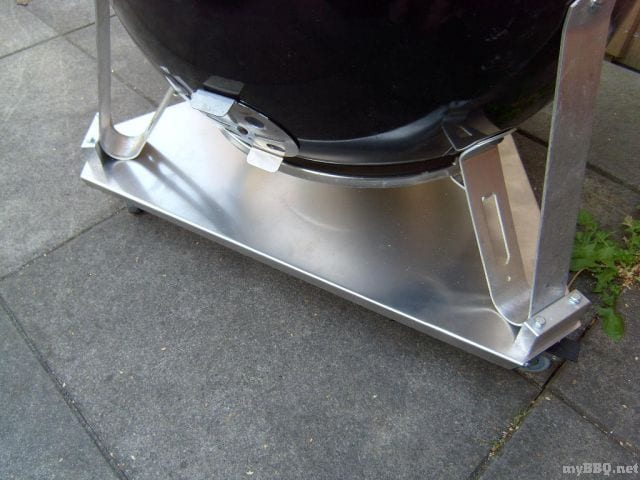
David Verba fashioned a platform out of a thick sheet of aluminum and added locking caster, all for about $100.
Sandee McKinivan from Cheektowaga, NY mounted his WSM to the wheelbase of an old office chair. He attached a piece of 1/2″ plywood to the wheelbase, then drilled 1/4″ holes through each leg and attached them to the plywood using screws and wing nuts for easy removal.
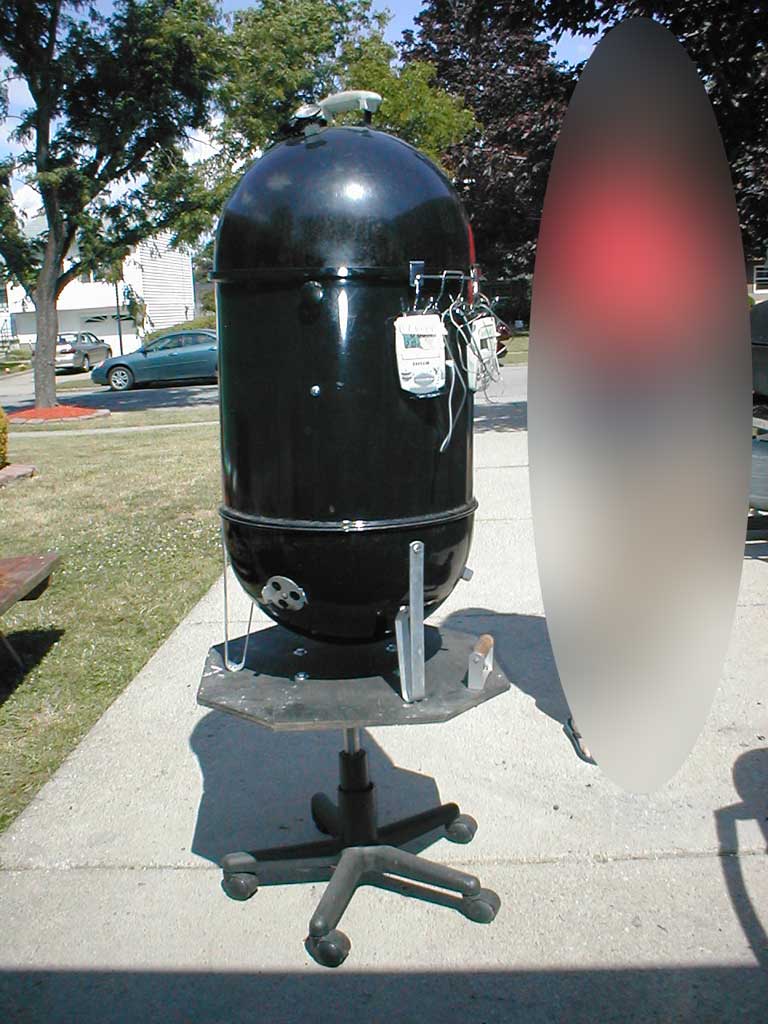
Sandee says, “This works great because it lifts the smoker up 18″, moving it is a snap, and best of all it only takes up about the same floor space as the smoker itself. It is very stable…it does not move around unless you pull/push on it. It looks tipsy because of the height, but I can grab the plywood with both hands, try to tilt it as hard as I can, and it will barely budge. The top cooking grate is 46″ from the ground.”
John Kliem from Munich, Germany made a platform for his 22.5″ WSM using a plywood base with casters and covered it with aluminum. Small aluminum blocks at each corner hold the legs in place.
Dan Peter from Ohio writes, “I built this little cart from leftover 3/4″ plywood and 4″ casters. The smaller piece of plywood on top stiffens it up and gives the legs a place to nest. The smoker just sits on top and wheels around easily even when fully loaded. Only the front wheel swivels, so it is very easy to move. I had to paint the front because it was hard to remember which wheel swiveled. Cost was about $20.”
Charlie Noble works in a small welding shop. One benefit of his employment is that he gets to barbecue on the job…as long as he shares the ‘que with the boss! He rolled 1/8″ x 1″ metal stock into a ring and welded on a circle of 1/16″ sheet metal. Short pieces of 2″ pipe are welded to the platform to hold the cooker legs. Add 3 casters to the bottom and this WSM is ready to roll!
Y. Yang of Columbia, MO created this highly modified 22.5″ WSM that he named Drogon after a dragon character in George R.R. Martin’s A Song of Ice and Fire novel series.
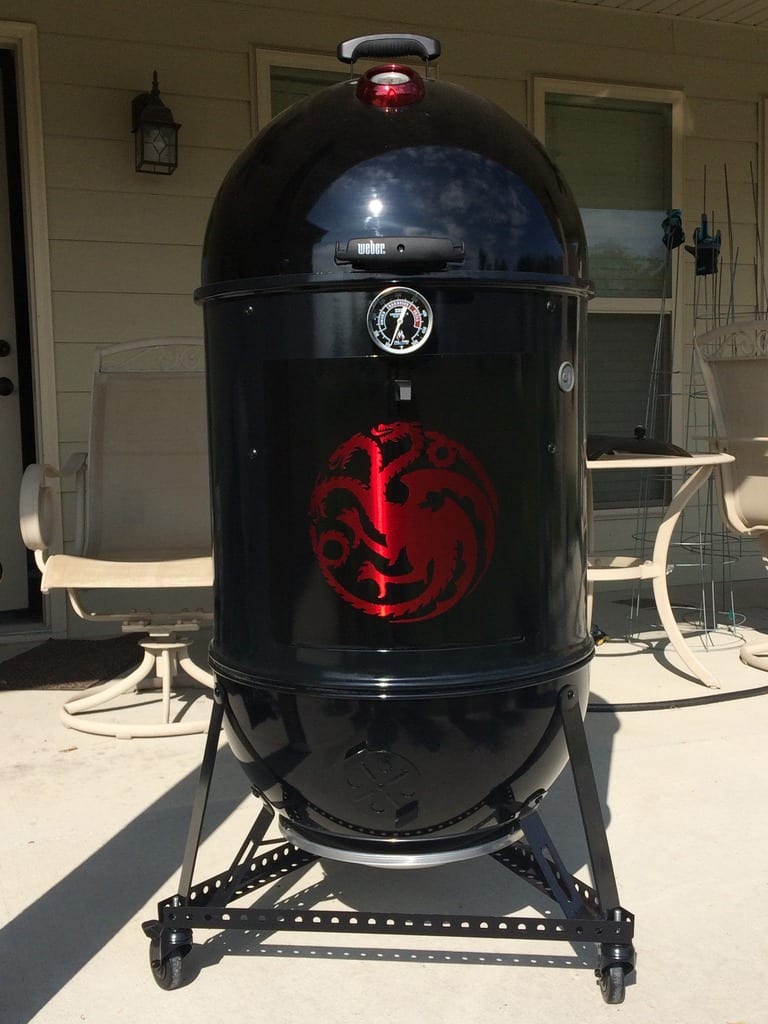
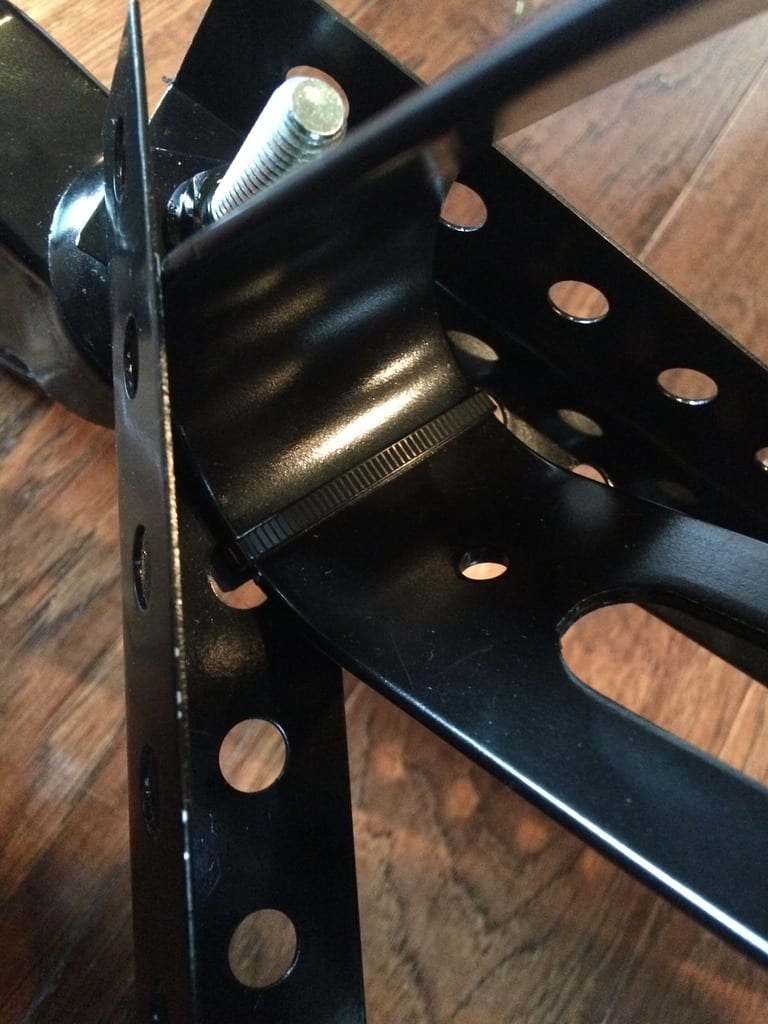
“I made a dolly out of zinc-plated steel punched angles and threaded bolt total-lock casters,” says Yang. “I did it this way because I wasn’t confident I could center the holes properly if I were to drill into the legs, and I wanted the ability to easily remove the smoker from the dolly if I wanted. The legs happen to nestle perfectly inside the frame, and they’re secured with zip ties.” You can read more about Y. Yang’s 22.5″ WSM modifications on The Virtual Weber Bulletin Board.
These videos demonstrate how to build a triangle rolling platform for your Weber Smokey Mountain Cooker.
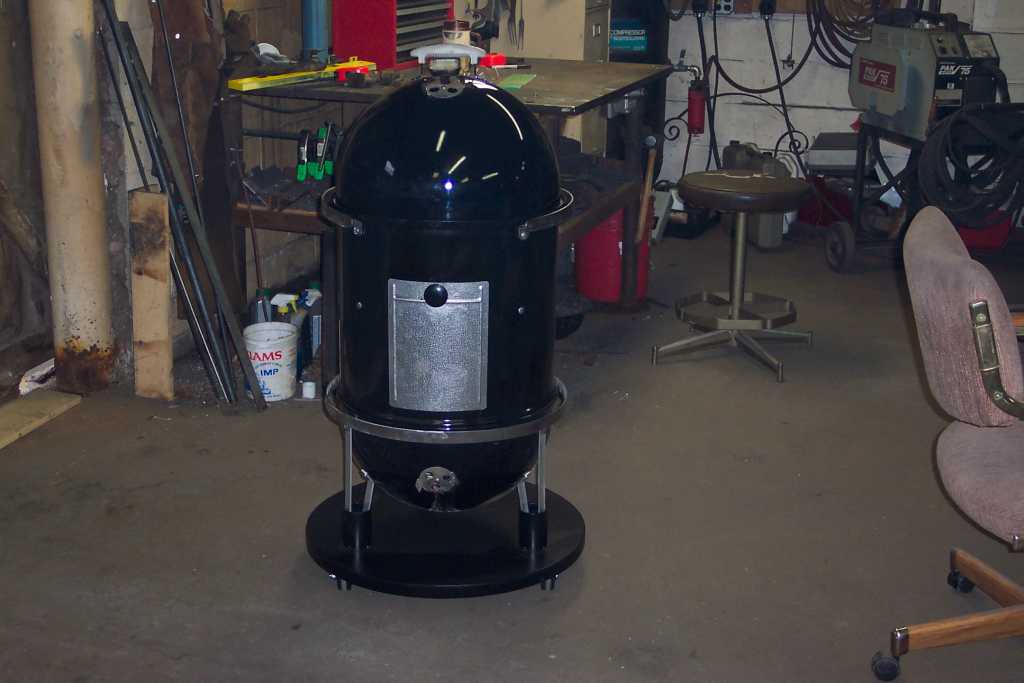
“Smokey Jim” Leidigh crafted this wheeled base for his 22.5″ WSM using a hardwood “+” of 2x4s with a plywood round mounted on top. Casters are fastened to the 2x4s.

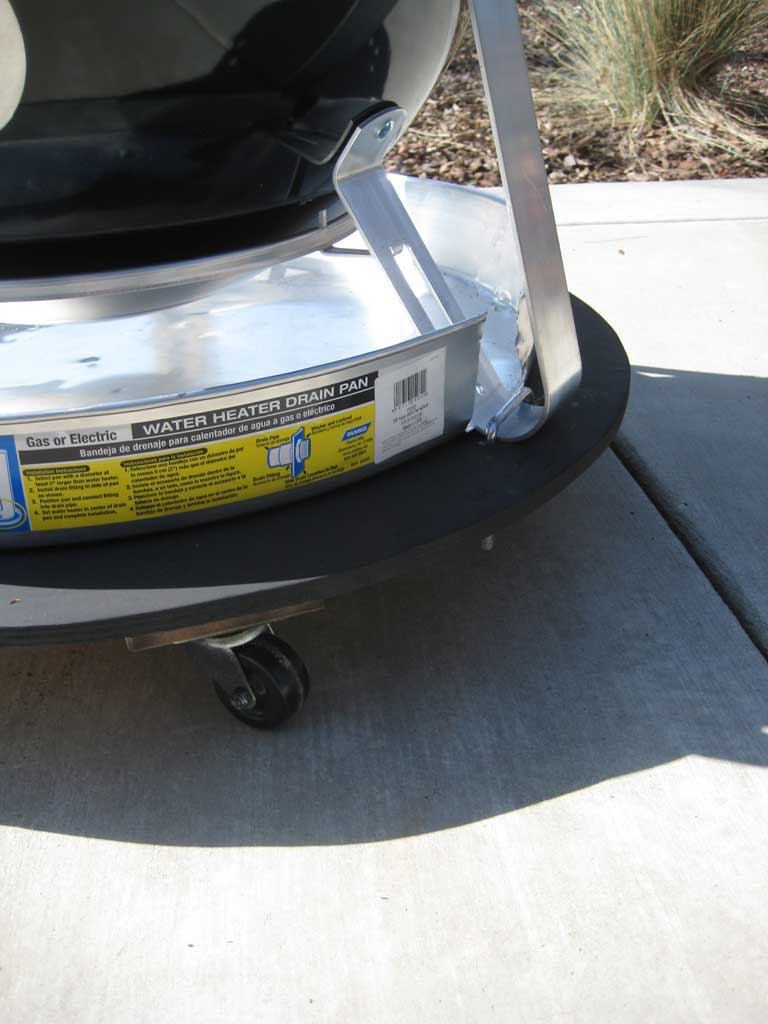
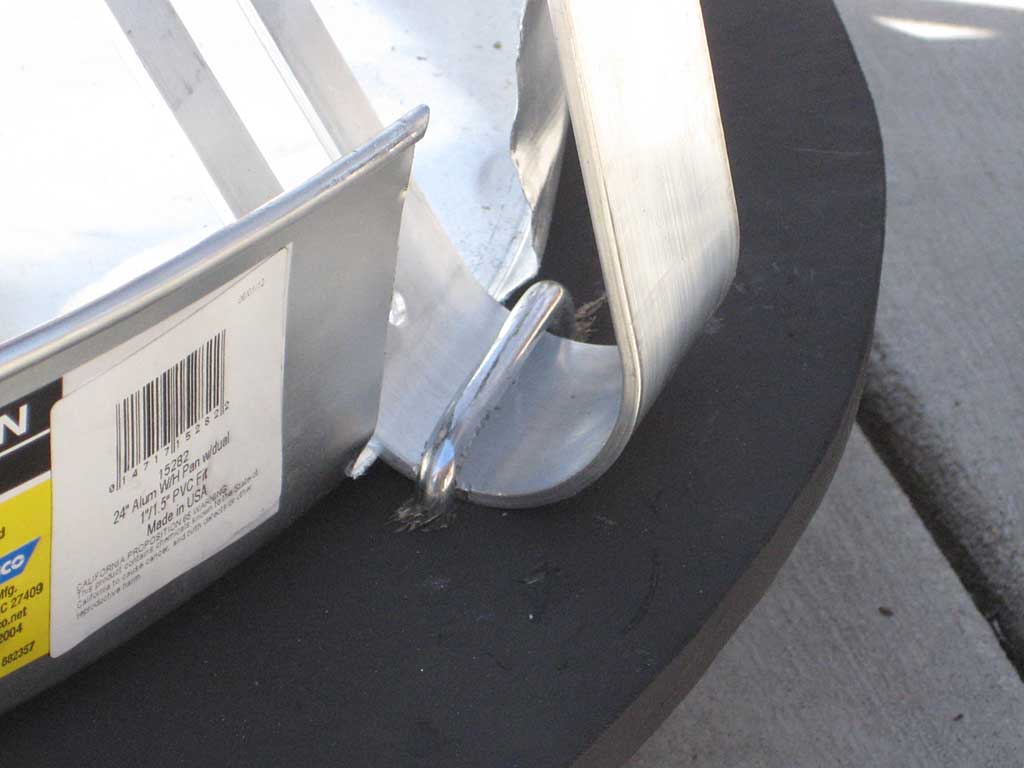
“The pan is a 24″ water heater drip pan from The Home Depot,” says Jim. “The pan has cutouts for the three legs. Each leg is held down to the base with flattened u-bolts.”
Casters On Legs
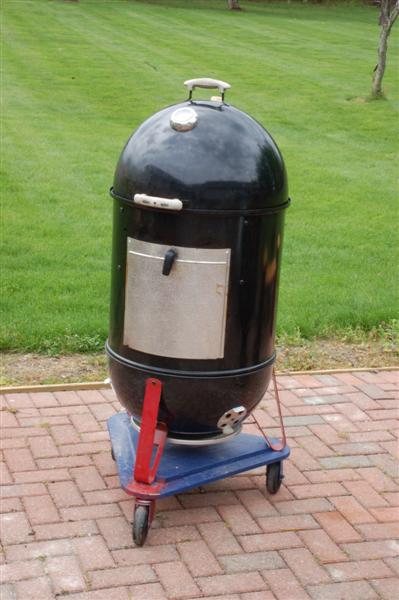
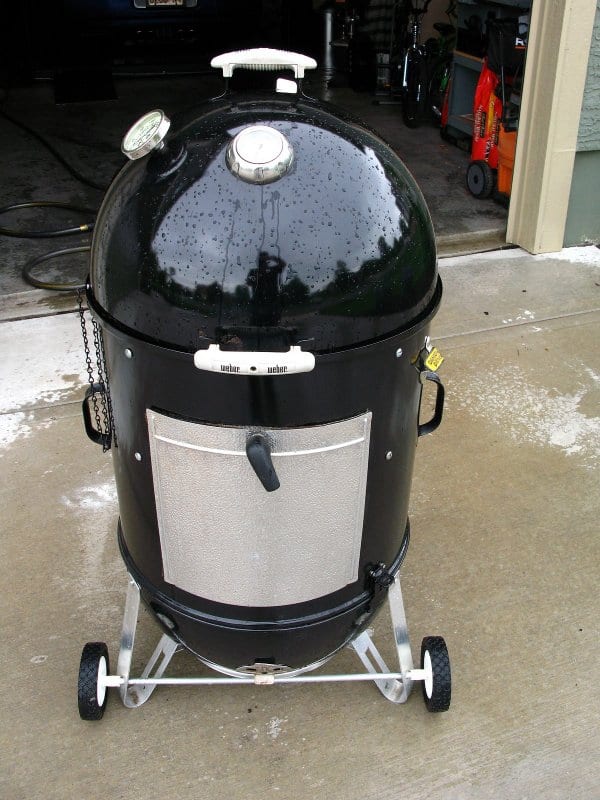
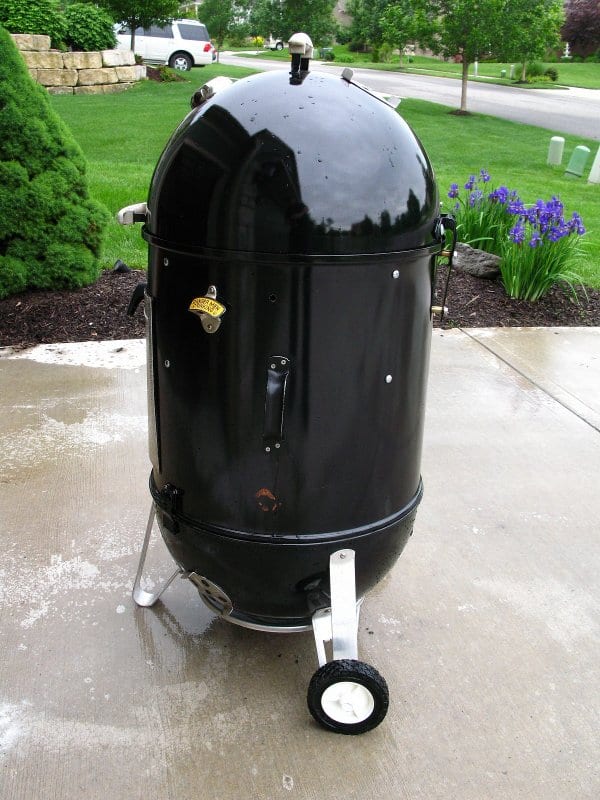
Wayne Maxwell added casters to the legs of his Weber Bullet.
Wayne says, “The addition of the wheels went smoothly, taking a little less than 1 hour labor and another 1/2 hour or so tracking down washers, nuts and tools. The wheels are 2″ threaded stem caster-type bought at Home Depot for about $4 each. Since I had everything else on hand, the total cost was about $16 (including 1 spare wheel – they come in sets of 2). Although an empty WSM is a little top heavy, with the wheels on and fully assembled, it easily rolls across the concrete with me just holding on the top section handle for balance.”
Wheels On Legs
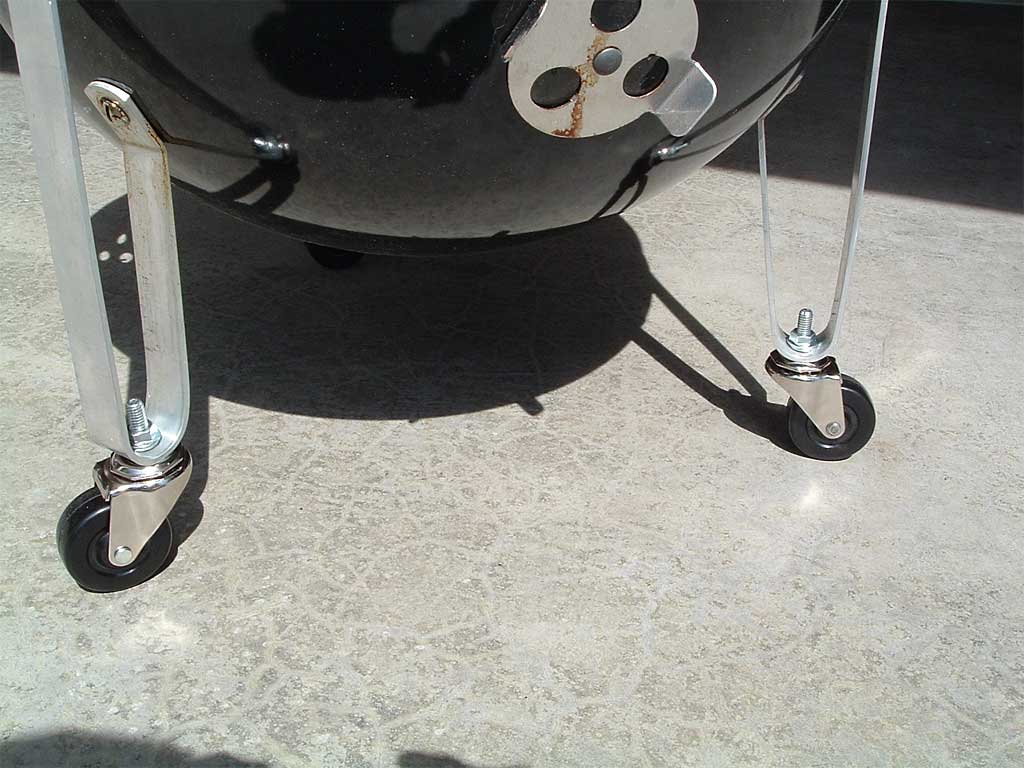
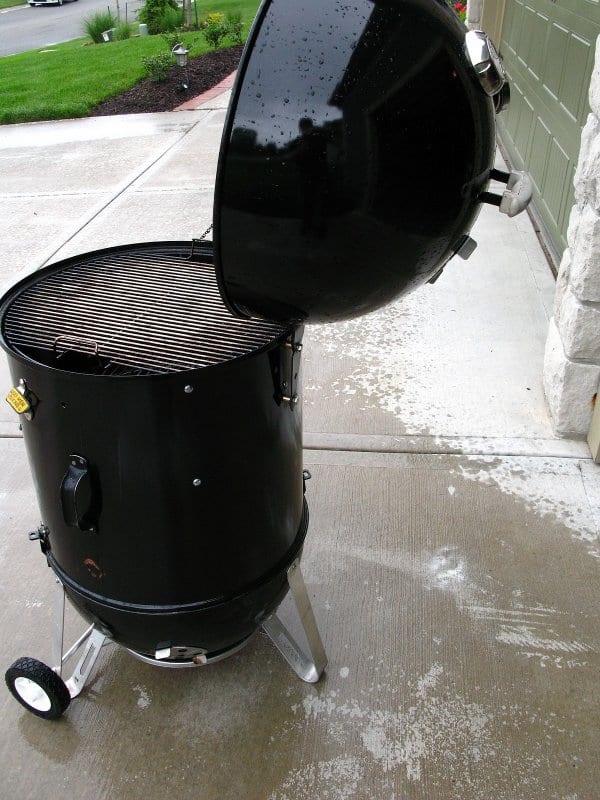
Shaun R added an axle and steel wheels to his 22.5″ WSM.

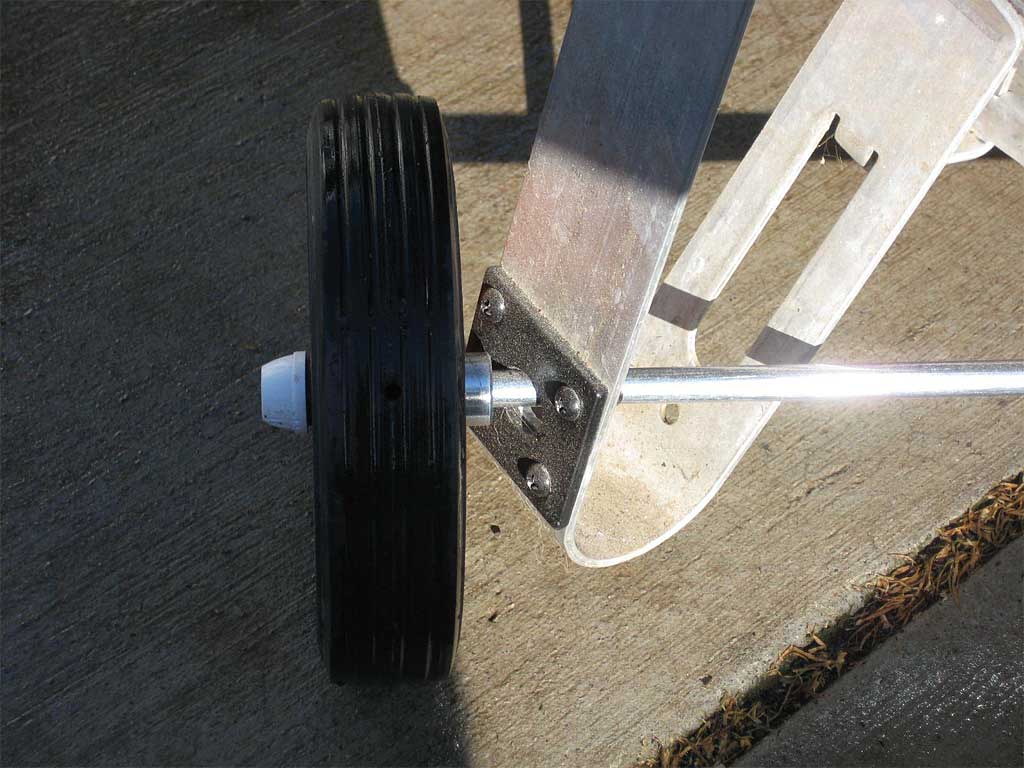
He drilled 5/8″ holes into the legs and used a 3/8″ steel rod as an axle. Square washers were fastened to the legs to add strength where the holes were drilled. Spacers were placed on each end of the rod and then the wheels were attached. An adjustable carriage bolt was used on the front leg for leveling the cooker.
If you look closely, you’ll notice that Shaun made some other changes to this cooker. It looks like he’s taken another charcoal bowl and added handles and a thermometer to make a lid with 3 exhaust vents. He used 4 sheet metal screws to fasten the middle cooking section and the charcoal bowl together and added a handle to the middle cooking section above the access door opening. This allows Shaun to move the cooker around without it coming apart.
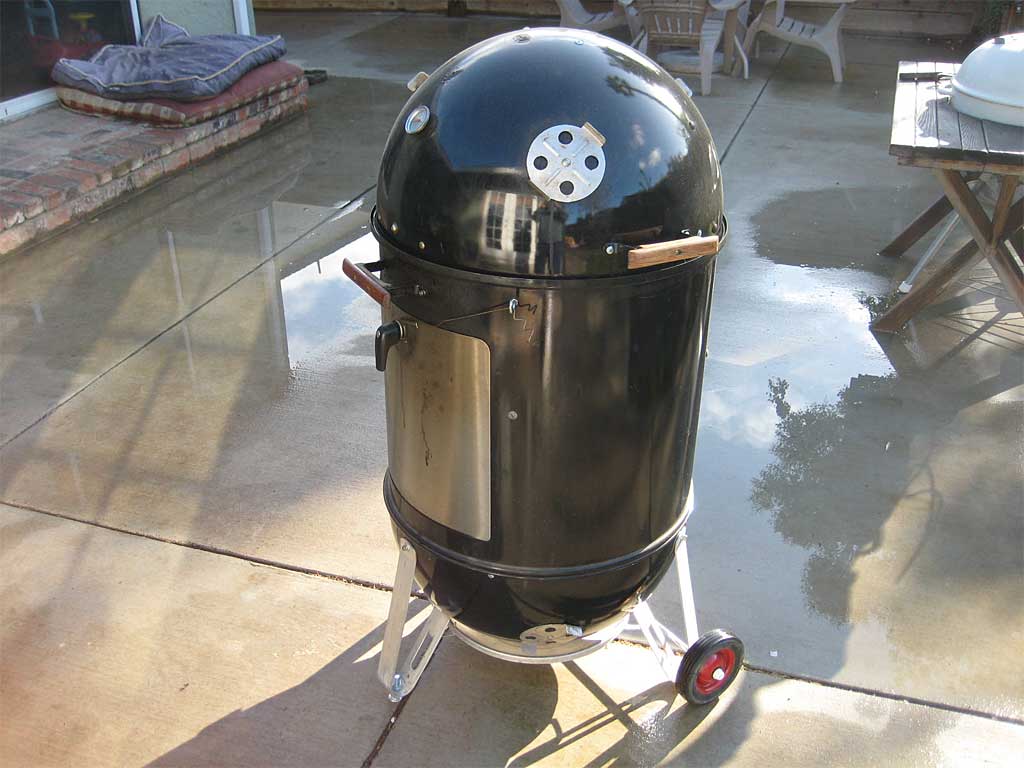
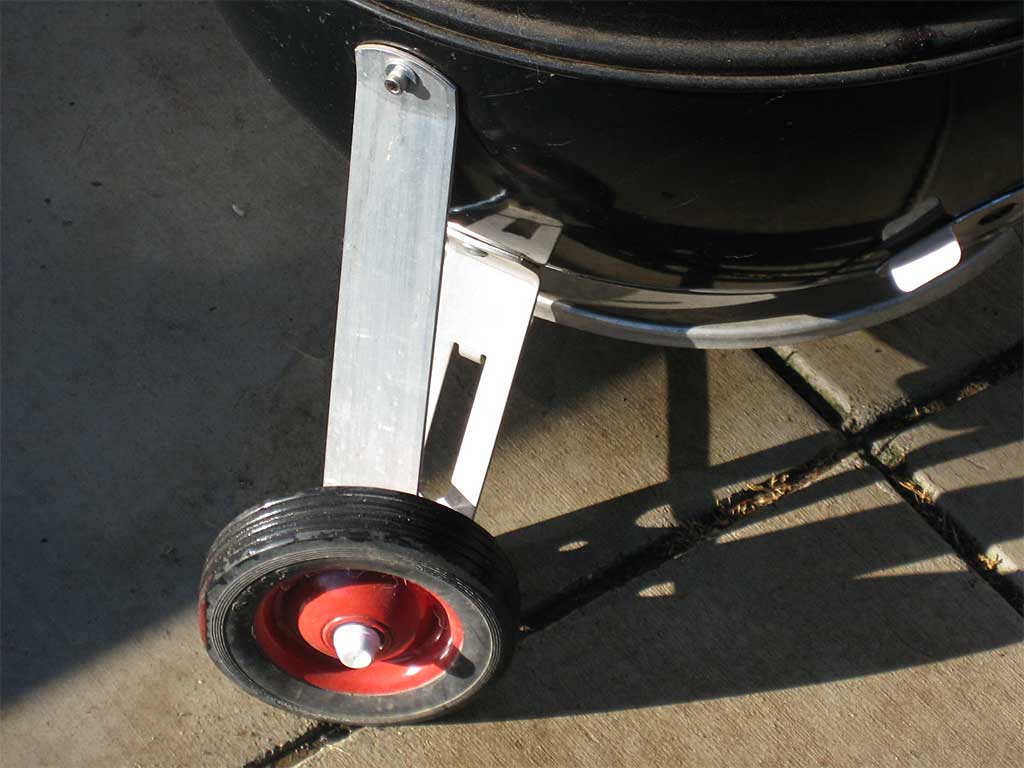
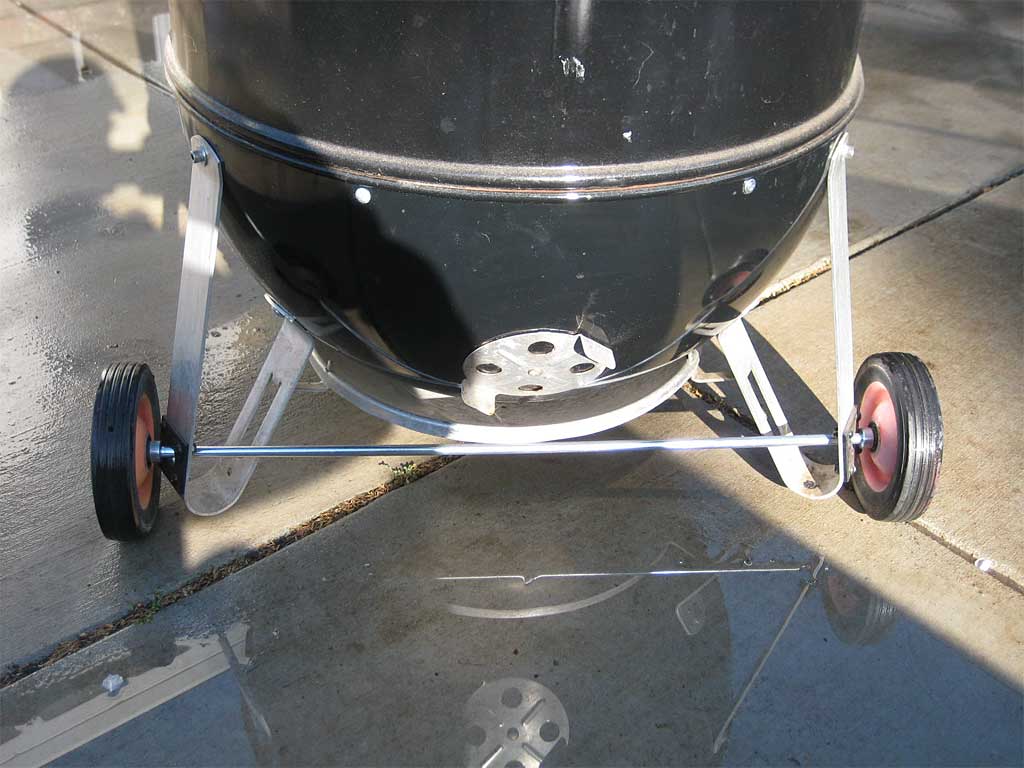
Paul from Overland Park, KS created a pull-behind 22.5″ WSM.
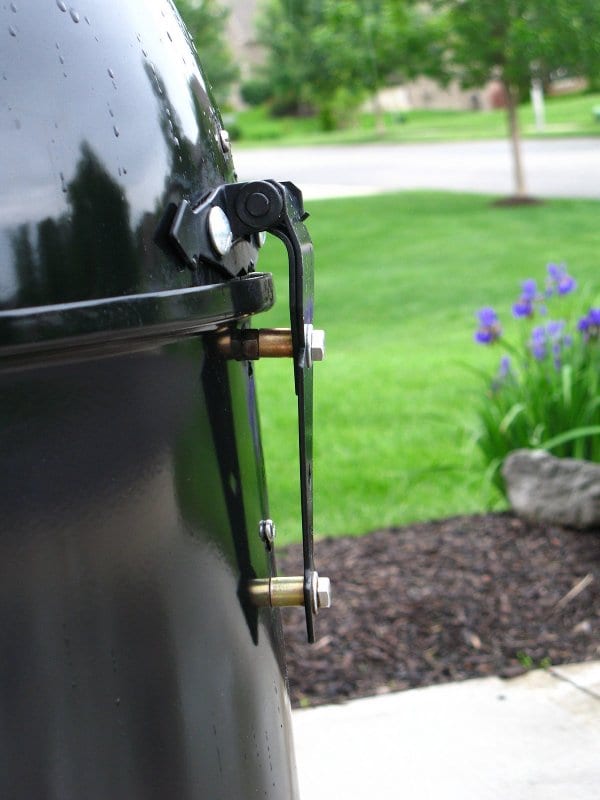

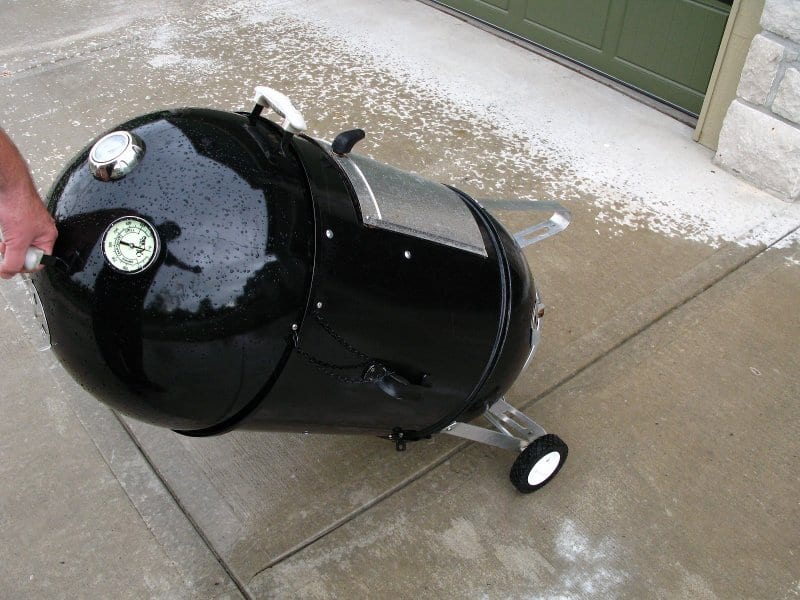
Besides adding an axle and 2 wheels, Paul used a gate hinge, spacers, and stainless steel hardware to attach the lid to the middle cooking section. He positioned two fasteners 180° apart that allow the middle cooking section and the charcoal bowl to be locked together.
To ensure stability while cooking when the lid is open, he rotates the middle cooking section and locks the fasteners. This allows the lid to open over the leg with no wheel; if the lid were to open over the axle, the unit would have a tendency to tip over. A stainless steel chain and hardware are used to provide a stop for the lid. To transport the cooker, Paul rotates the middle cooking section and locks the fasteners. Now he can pull the cooker by the lid handle.
Paul says if he had it to do all over again, he would add some material to the inside of the lid where the gate hinge attaches for additional strength. He’s also considering upgrading the lid handle, as he feels the standard handle may not be strong enough for pulling the unit.
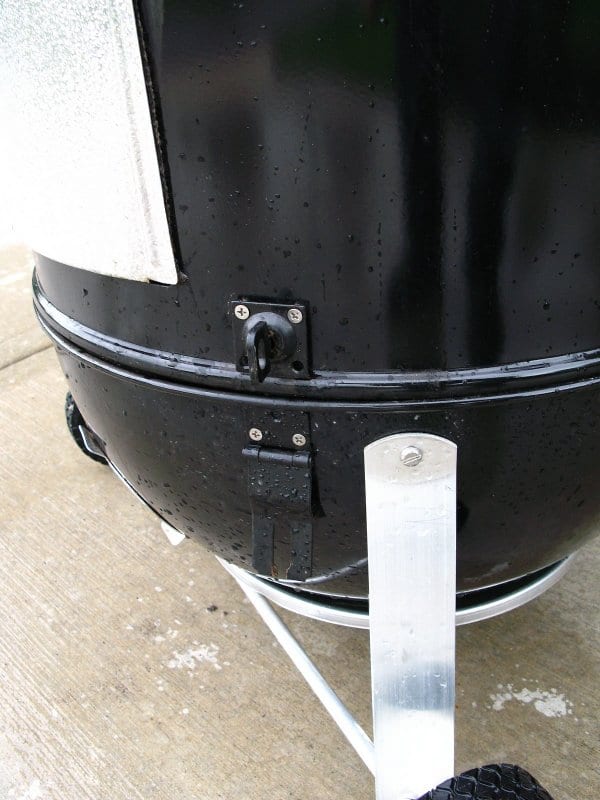
Miscellaneous mods include handles on the middle cooking section, a hole for probe thermometers, an upgraded glow-in-the-dark lid thermometer, a gasket around the access door, and, of course, a beer bottle opener!
Rolling Carts
Brian Moriarty bought a beat-up Weber Performer charcoal grill for $10 on Craigslist and converted it into a twin WSM cart.
“I removed the top frame cross pieces and turned the charcoal bin around to make the fold-down table,” says Brian. “The wood shelf is 1″ x 6″ Ipe decking and the legs rest in 1-1/2″ ABS pipe plugs. I have a galvanized drip pan that I use underneath the cart when parked on my cedar deck.”
Chris Bjork’s father built a cart for his 22.5″ WSM with powder-coated frame and stainless steel shelves.
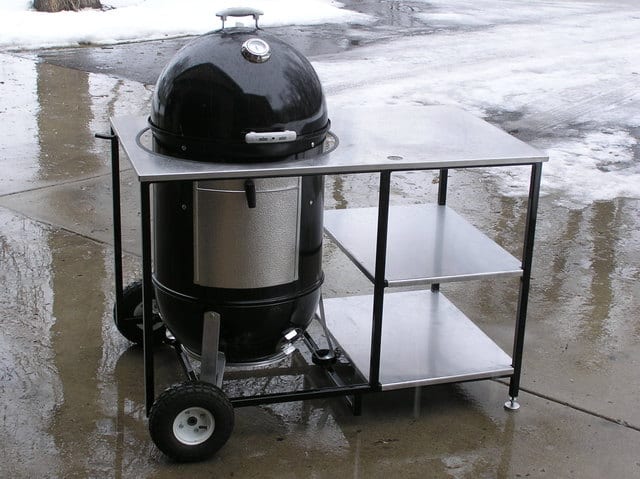
The WSM legs sit in shallow cups welded to the frame. “Due to my dad and his buddies’ line of work, they came across the stainless very cheap as it was being scrapped,” writes Chris. “Original plans had the whole cart being made out of stainless but after construction began, he realized the cost would be way too much. He was able to get the tubing powder coated for $30-35. Large pneumatic tires make rolling easy. I think it’s a hit!”
Dave Gilbert from Connecticut built this wooden cart for his 22.5″ WSM. It features open storage shelves with a towel rod and lid hanger on the end.
Earle Cooper mounted his 22.5″ WSM in a Weber Performer frame.
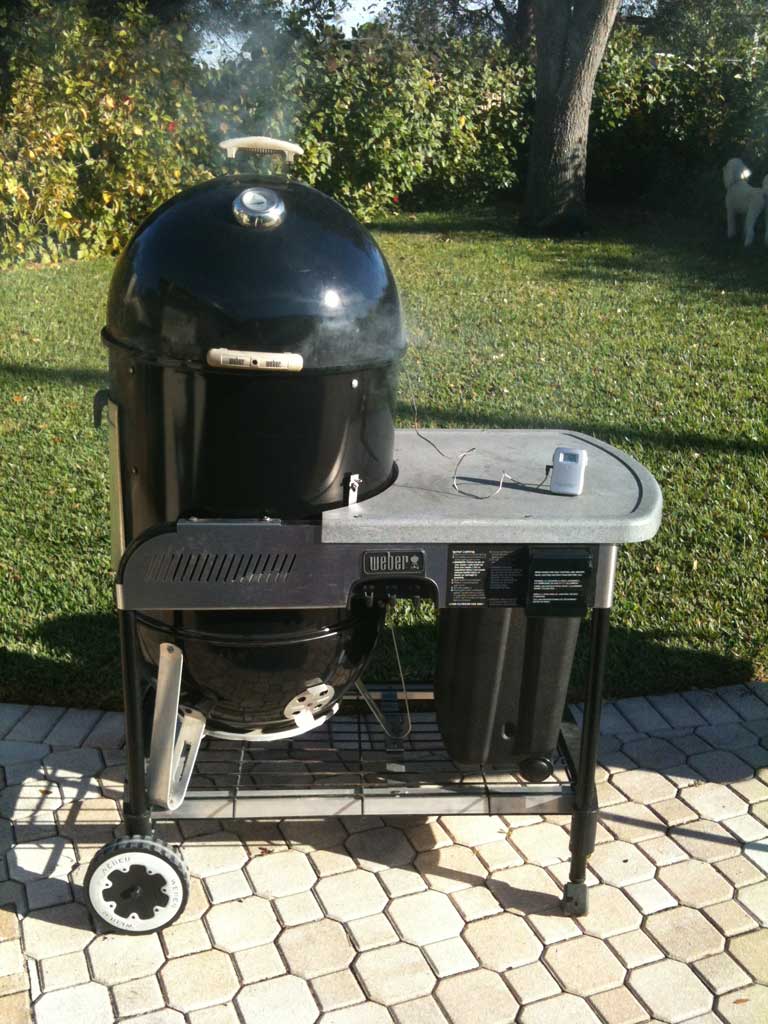
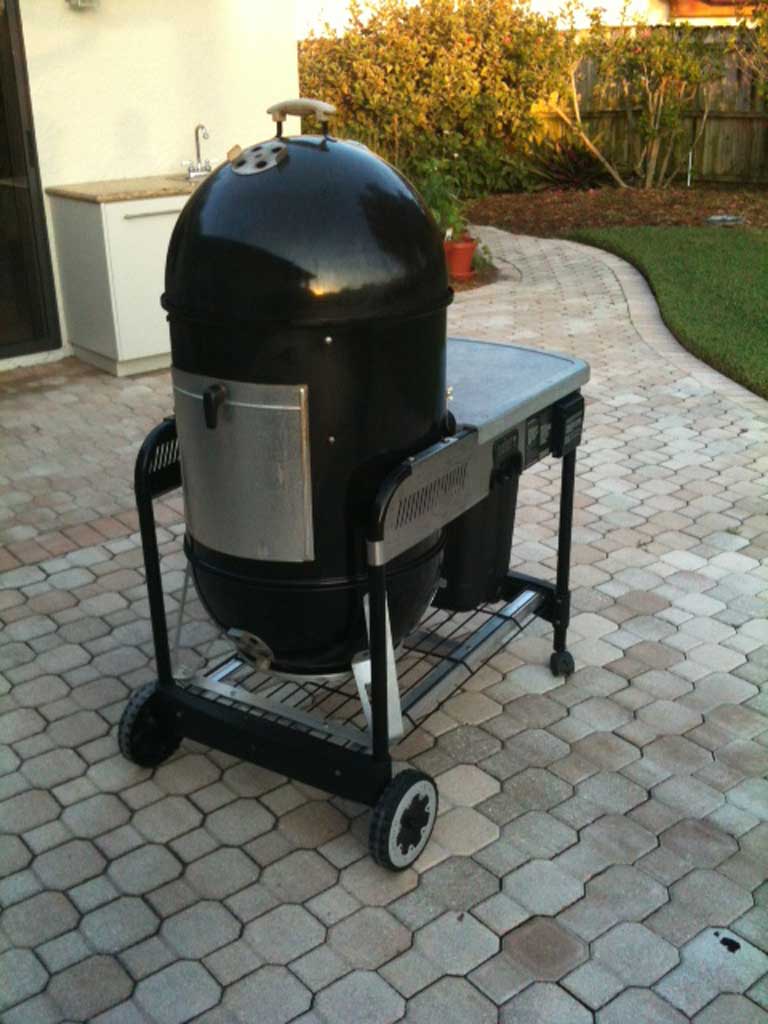
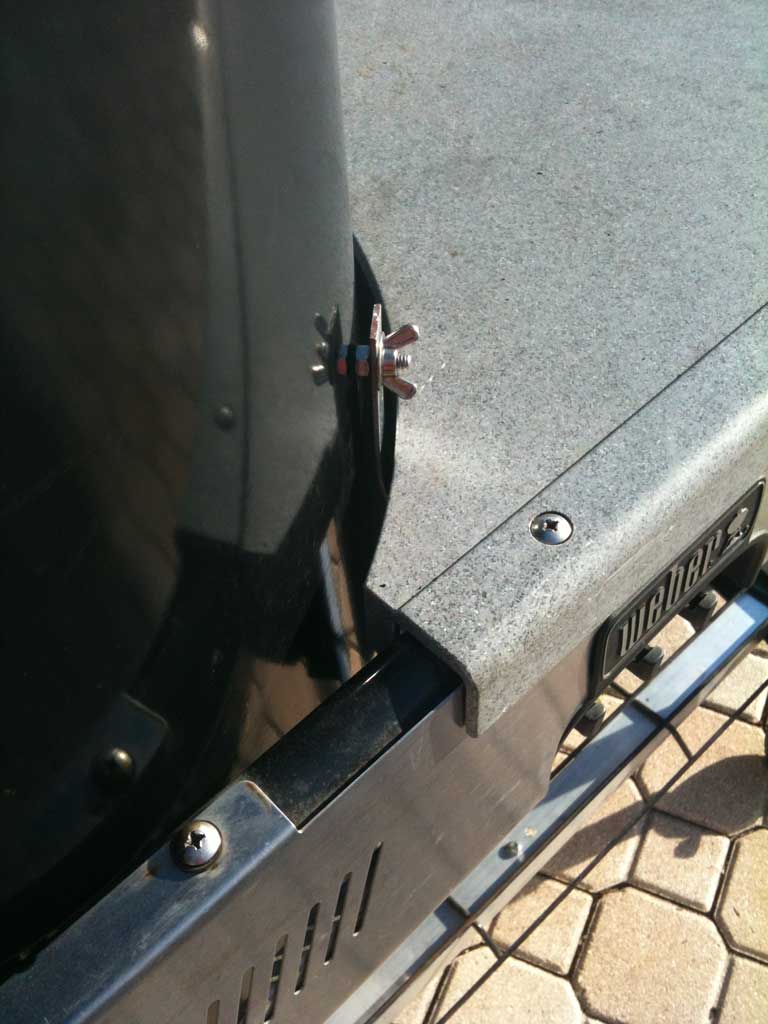
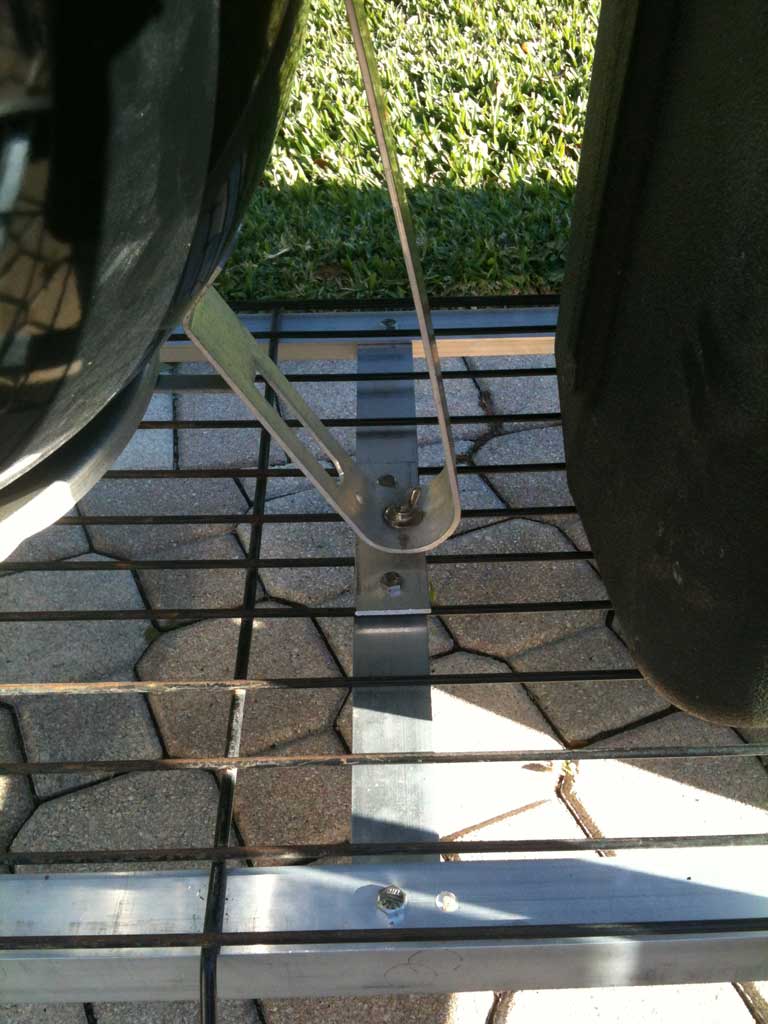
Earle says, “Beefed up the frame with aluminum flat bar and angle. Smoker legs fastened with quick release wing nuts for easy removal and cleaning. Middle section connected to cart with “J” hook and wing nut to prevent it from falling over while moving. All parts available at The Home Depot. No more bending over to service the cooker, convenient work surface, easy to move around the patio or out of the rain.”
Peter Lindfors fabricated a bent pipe cart for his 18.5″ WSM that is reminiscent of a Weber Performer cart.
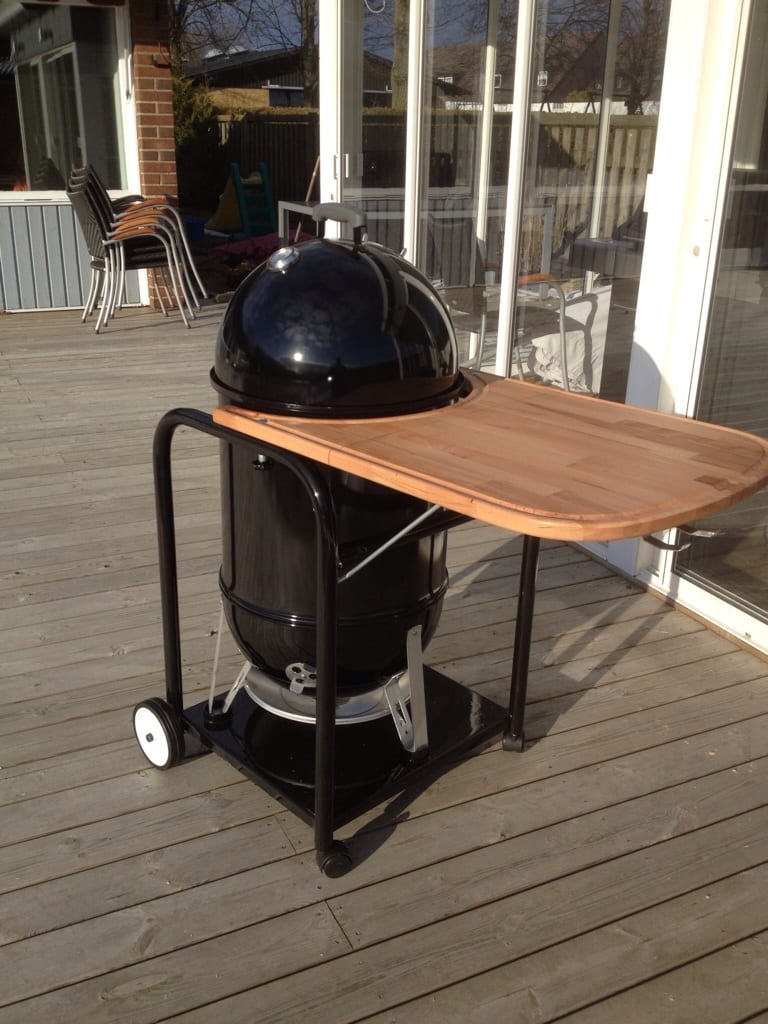
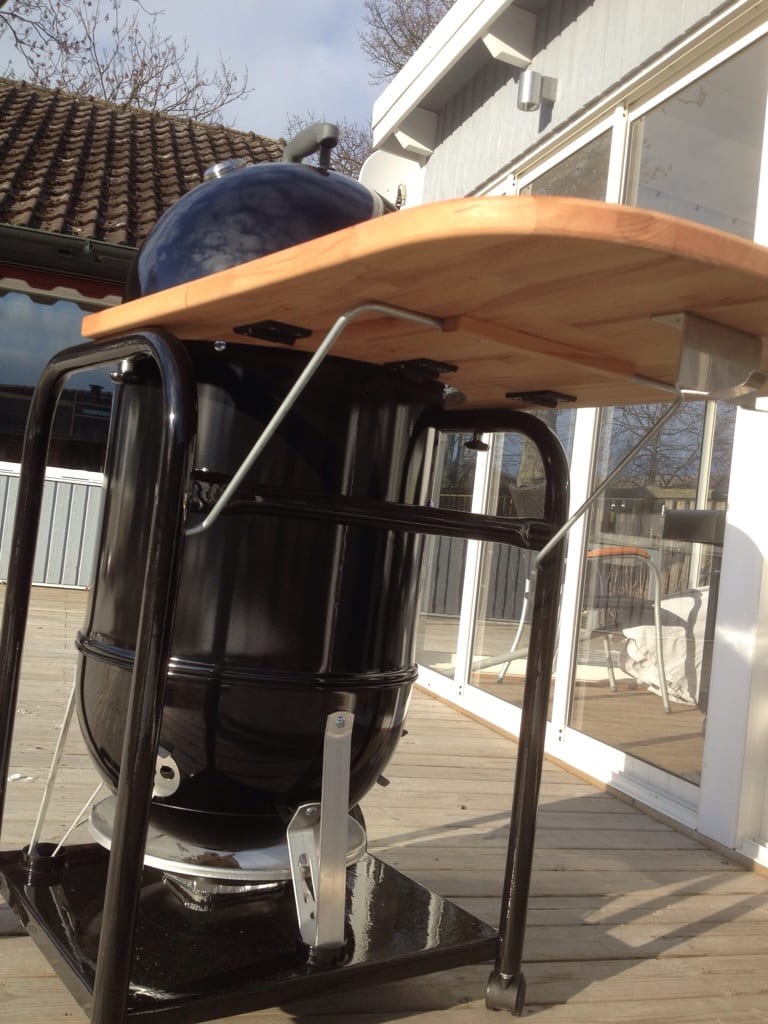
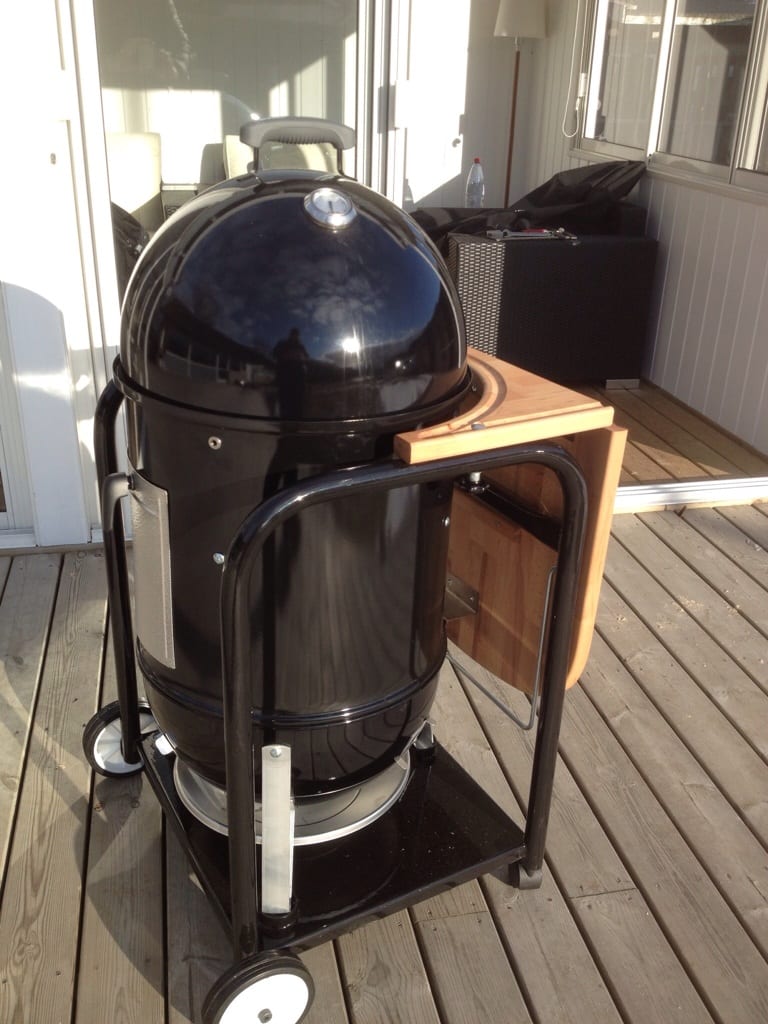
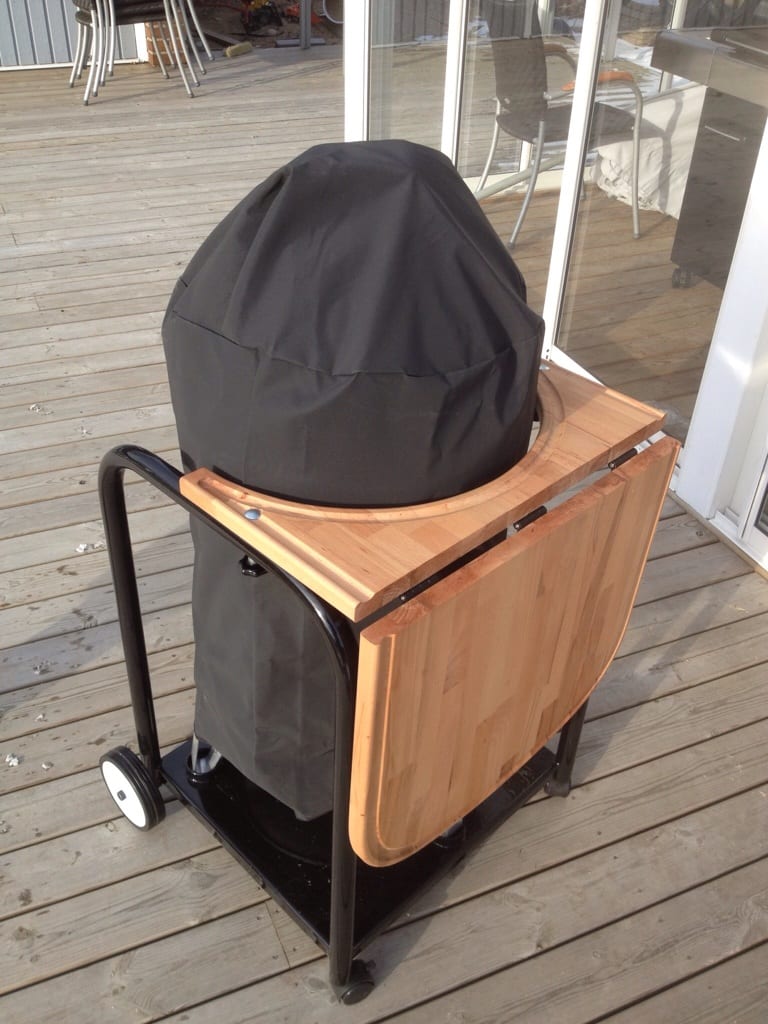
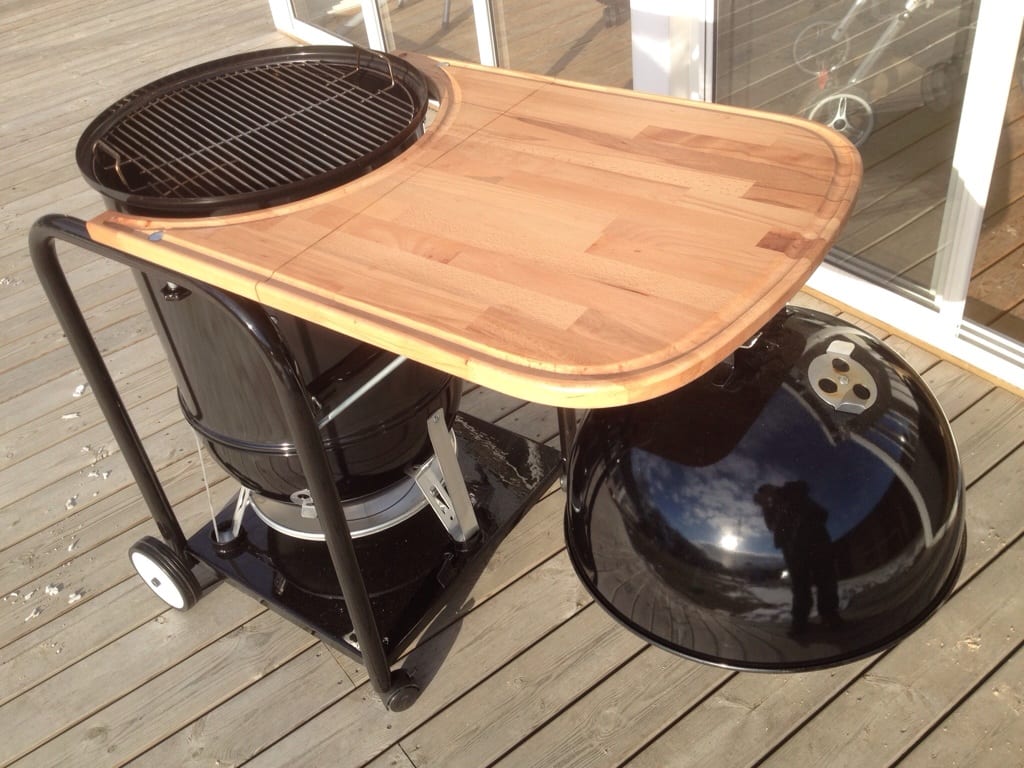
It features a fold-down butcher block work surface that is modified from an Ikea kitchen countertop, two large fixed wheels and two small casters for maneuverability, and the stock vinyl cover fits over the cooker when not in use. Peter says bending and welding the metal pipe is the tricky part of this project and requires specialized tools, but he’s developed another version that does not require welding. You can read all the details of this project with measurements and more photos at The Virtual Weber Bulletin Board.
Ken Fortune made a rolling cart for his 22.5″ WSM using a utility shelving kit from Lowe’s.
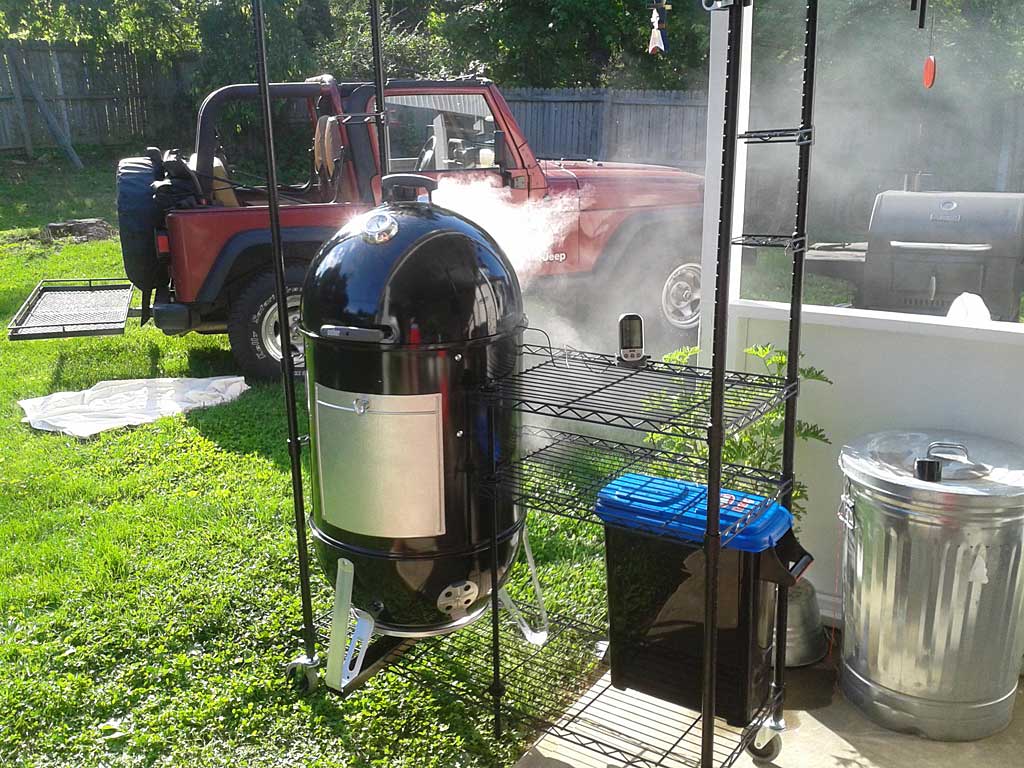
“I cut out half of each shelf, leaving the shelf edge along the back and left side, and ran a 5/8″ threaded dowel through the front corner to secure them,” says Ken. “It rolls around wherever I need it and solved my objection with owning a bullet style cooker—nowhere to put the lid or food.”
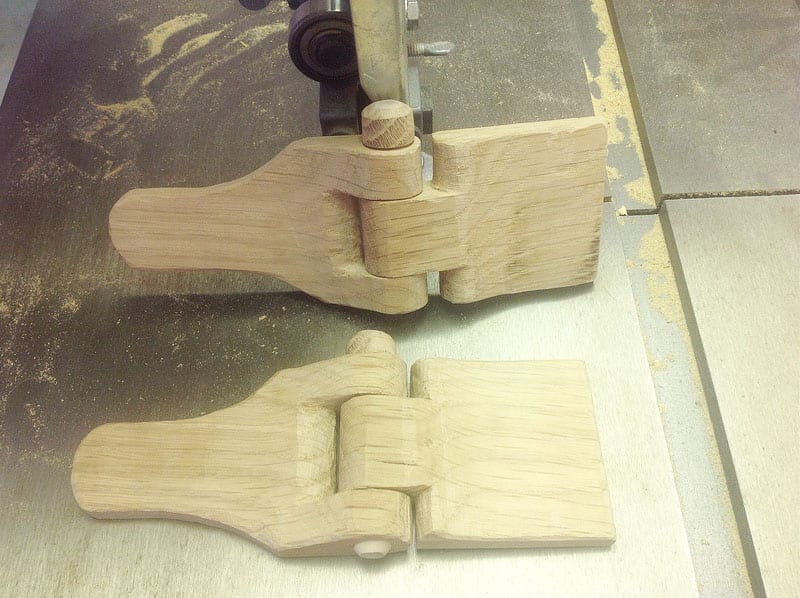
Charles H from Rowlett, TX handcrafted this wooden rolling cart for his 22.5″ WSM, including handmade wooden hinges for a storage cabinet.
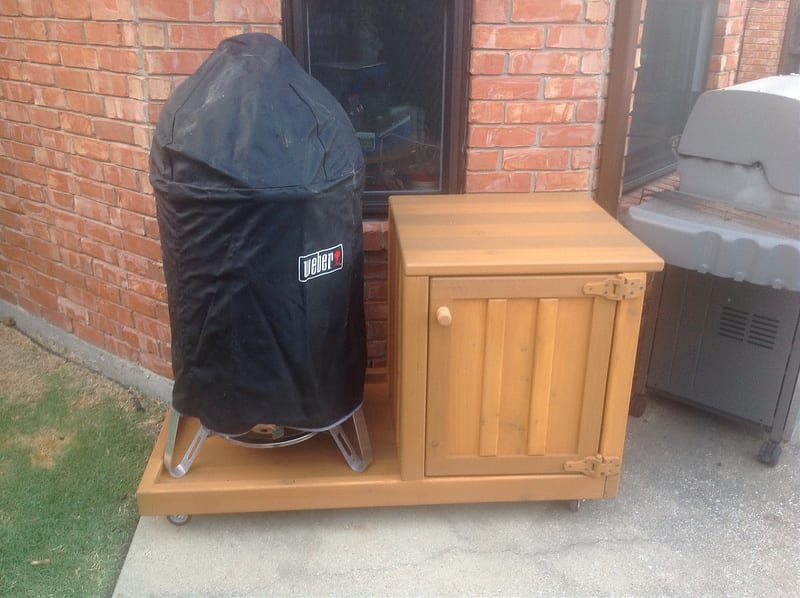
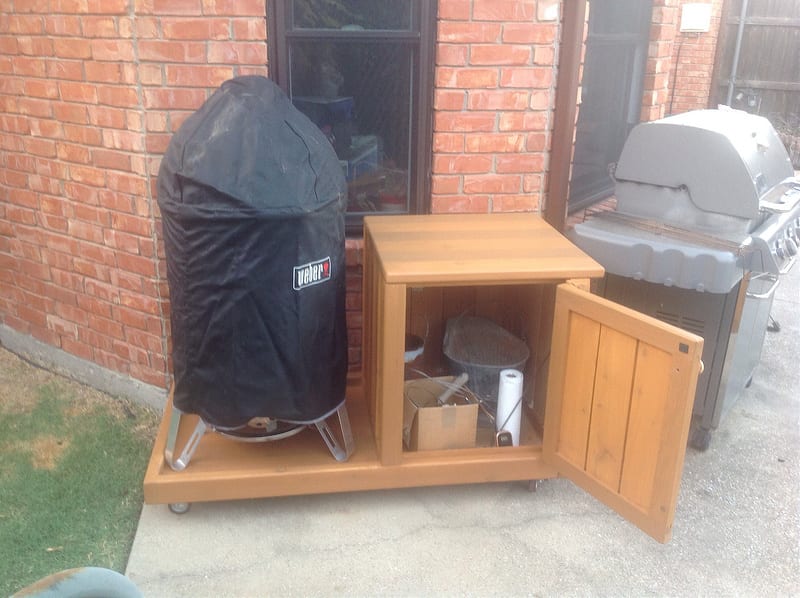
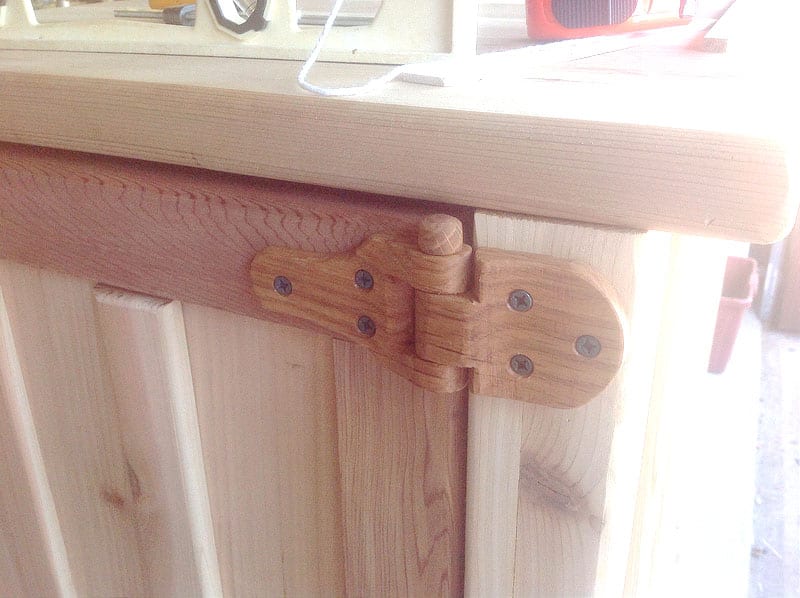
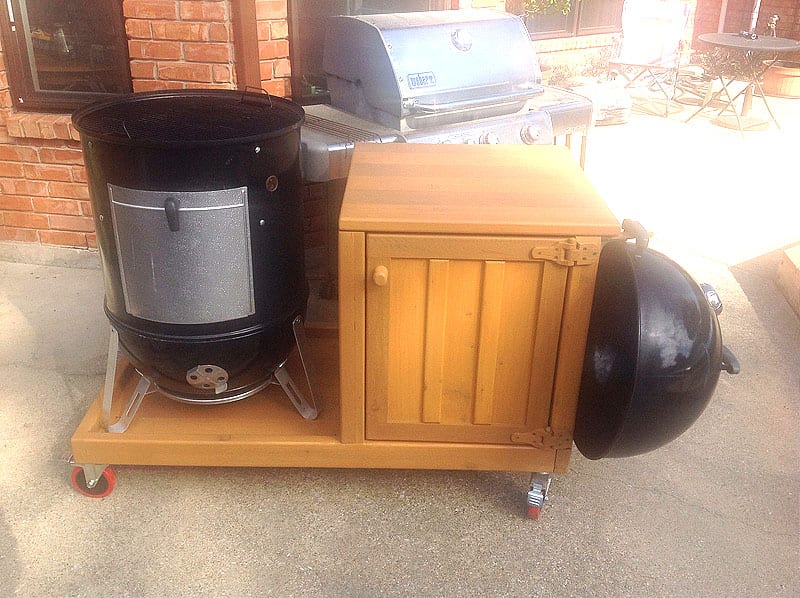
After these photos were taken, Charles added beefier casters and a lid hanger on the right end of the cabinet. You can read details and see more photos of this project at The Virtual Weber Bulletin Board.
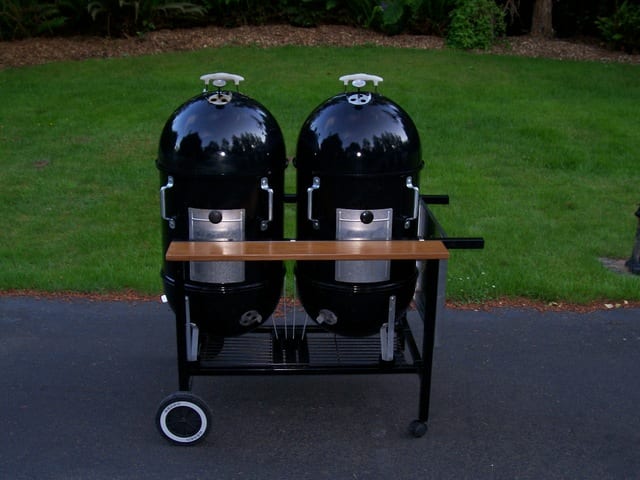
JS Lockwood from Pace, FL made a dual 22.5″ WSM cart that he uses at barbecue competitions.
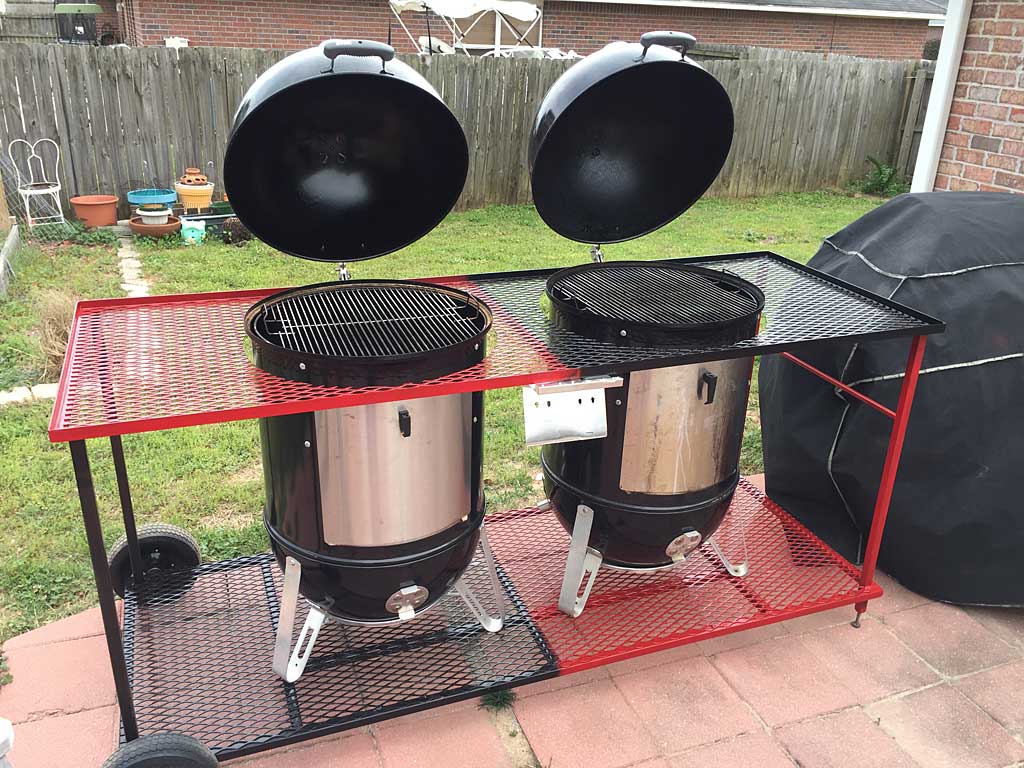
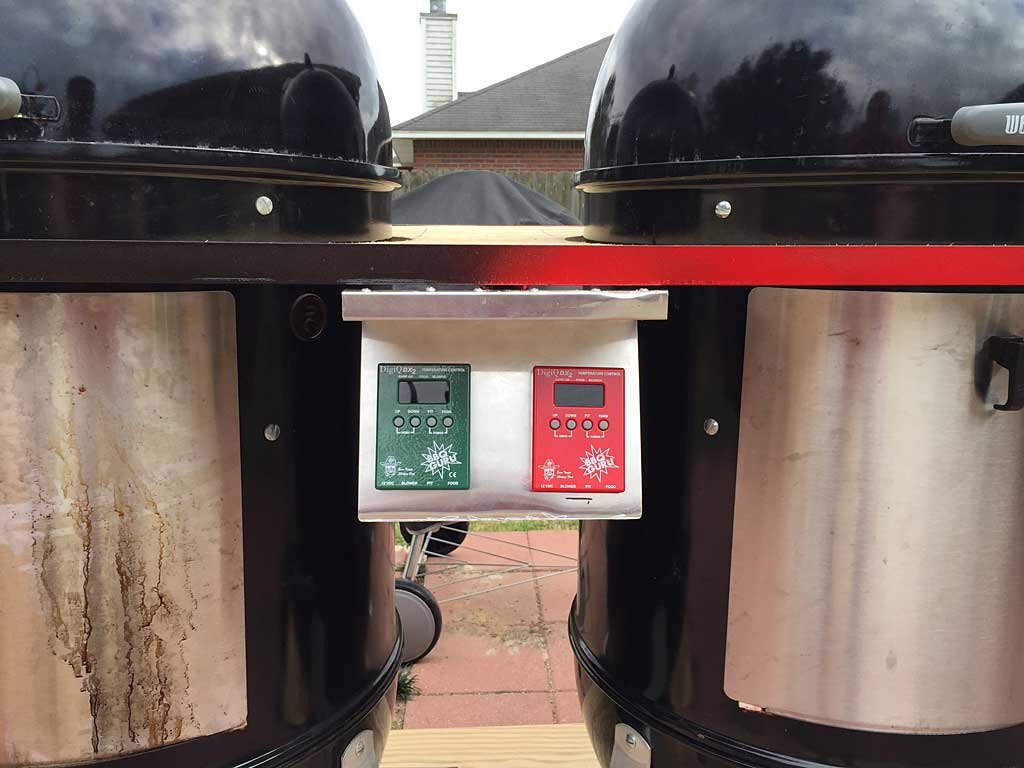
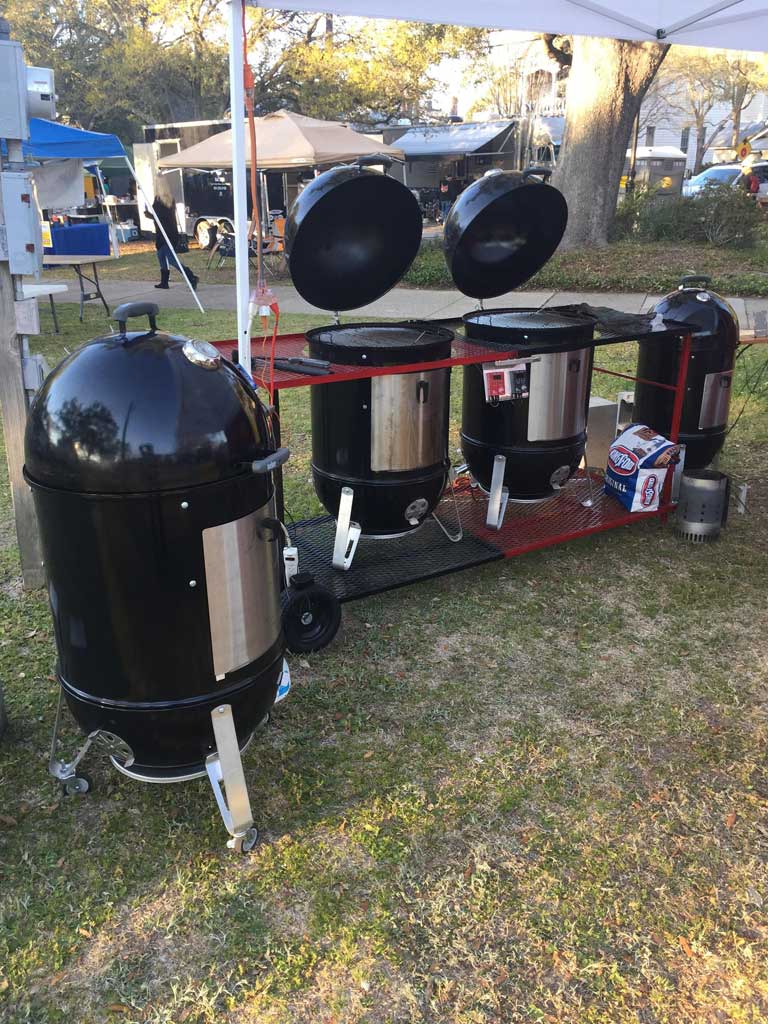
The top frame is constructed using 1″ angle, the lower frame using 1″ square tubing, and expanded metal for the work surface and bottom shelf. Adjustable feet on one end for leveling the unit and no-flat tires on the other end. A holder in the center for two DigiQ automatic temp controllers. A spiffy red and black paint job and this cart is ready for years of service on the competition circuit! You can read more about this cart project on The Virtual Weber Bulletin Board.
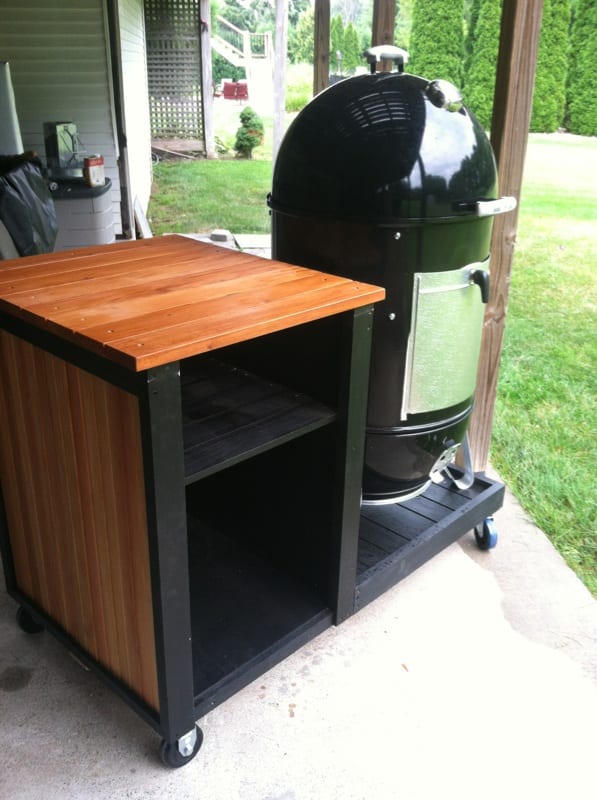
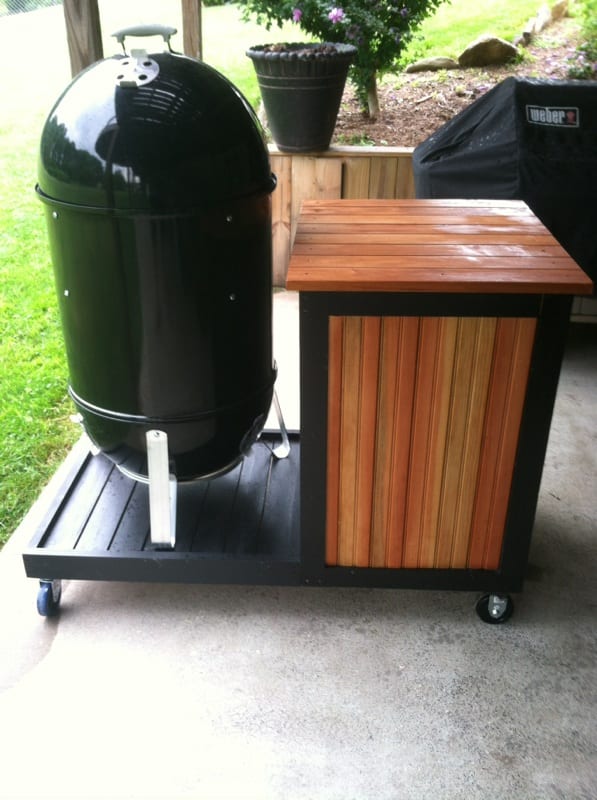
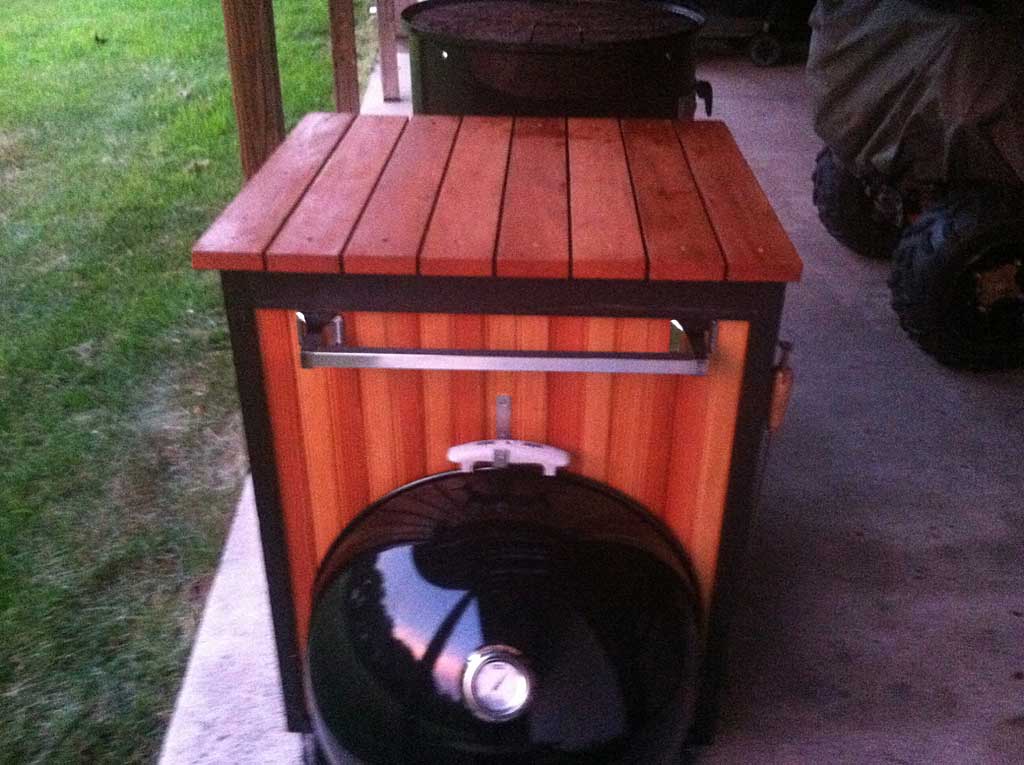
Anthony N from Maryland built a hybrid enclosure/wooden cart for his 22.5″ WSM out of dimensional lumber, plywood, and stained cedar siding.
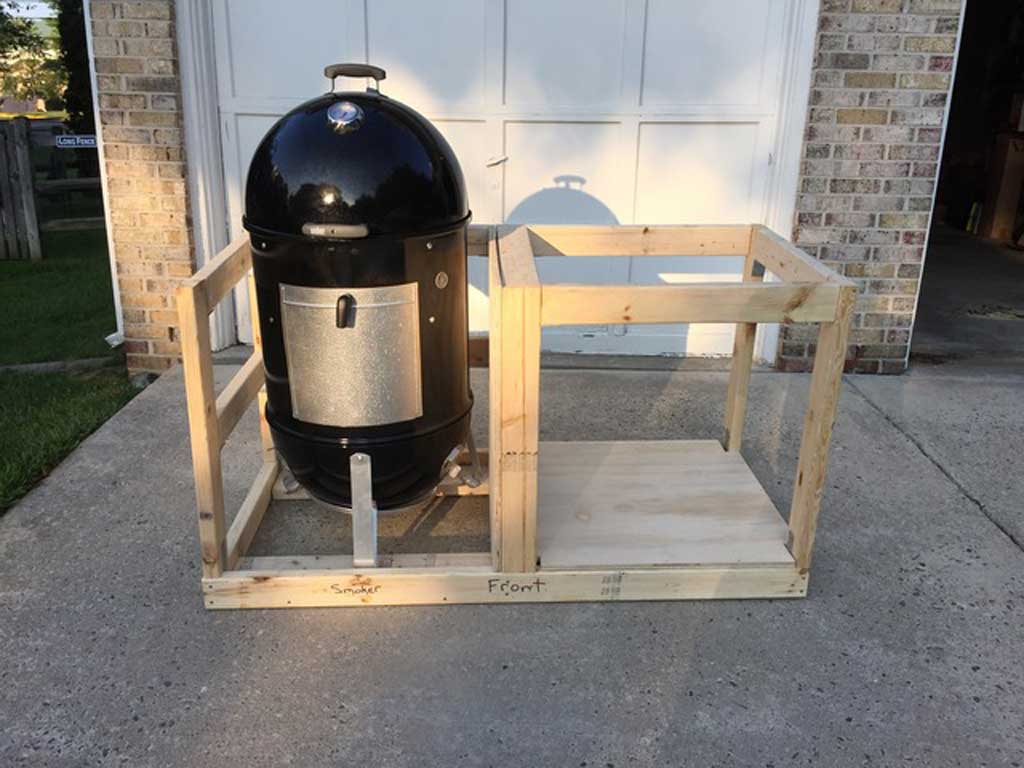
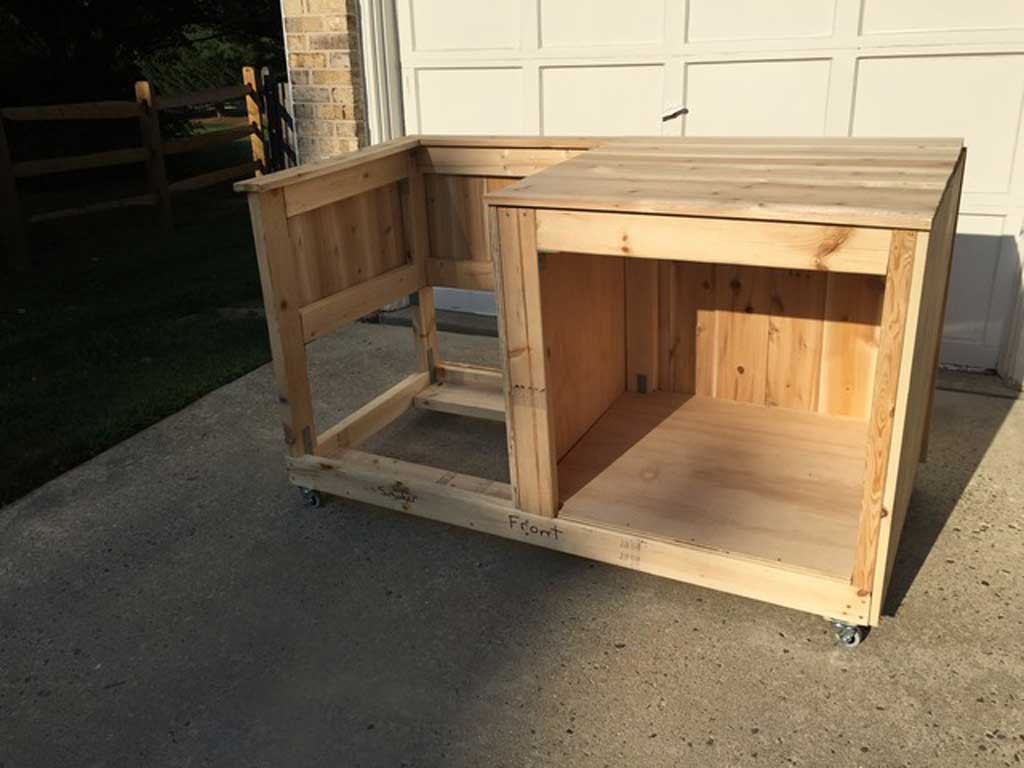

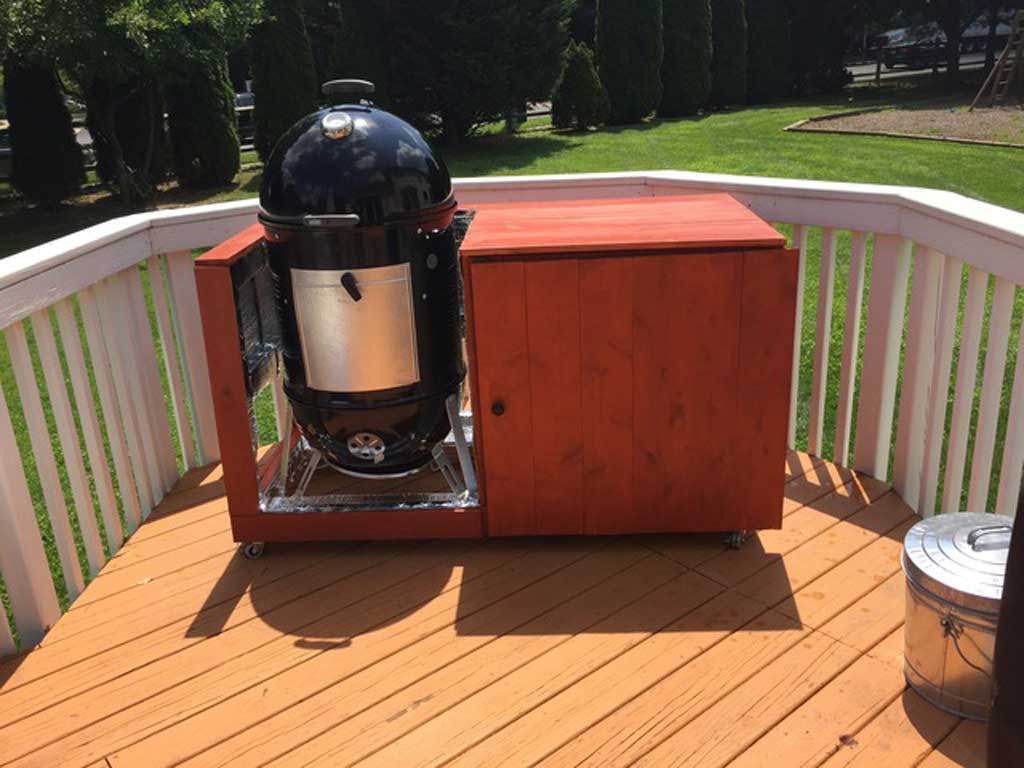
The cabinet on the right provides handy storage, the casters make it easy to move around, and the partial wind break on the side and back with Reflectix lining provides some wind protection. Anthony says the final touch will be a bottle opener mounted on the side. You can get more details about Anthony’s cart on The Virtual Weber Bulletin Board.
SWright from Auburn, WA adapted a Harbor Freight 24″ x 36″ two-shelf steel service cart to hold his 18.5″ WSM.
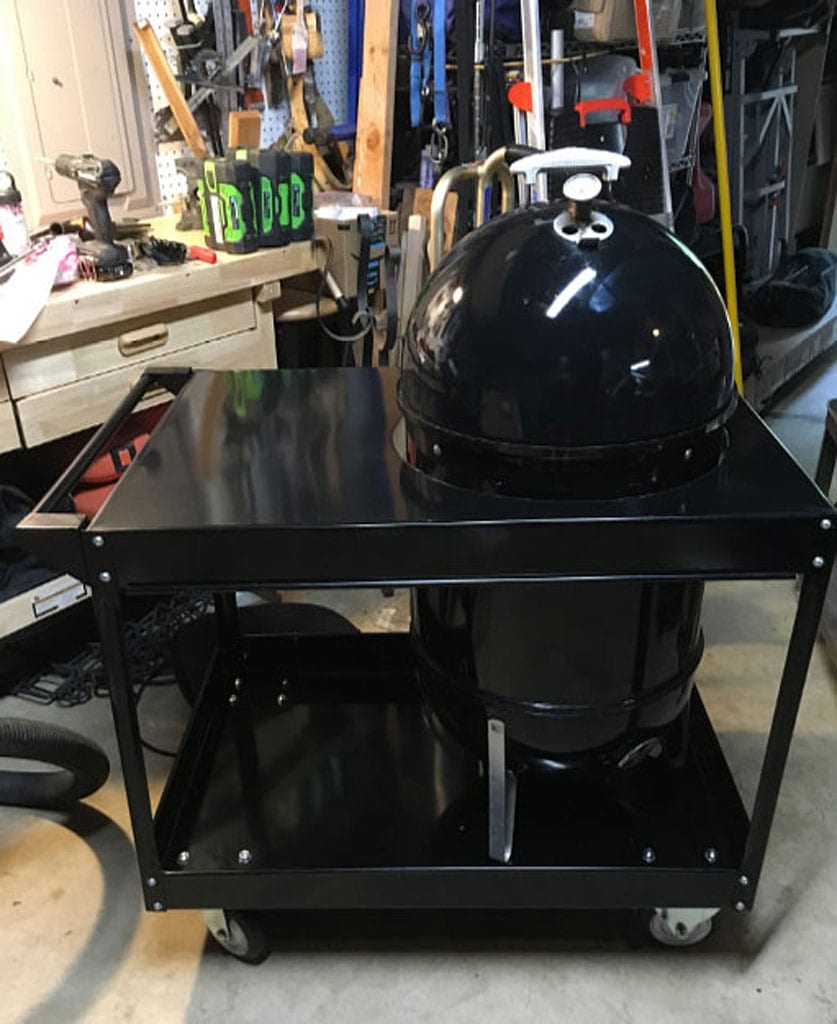
He flipped the top shelf upside down to create a flat work surface, traced a hole large enough to accommodate the cooker, and used a sheet metal nibbler attached to an electric drill to cut the hole. You can get more details about his cart on The Virtual Weber Bulletin Board.
Photo of rolling platform, 2004 by Joel K.
Photos of satellite dish platform, 2009 by Donny Anderson
Photos of ring and casters platform, 2008 by Scott Zanders
Photos of aluminum platform: 2010 by David Verba
Photos of office chair platform, 2007 by Sandee McKinivan
Photo of aluminum-wrapped plywood platform: 2010 by John Kliem
Photo of colorful plywood platform: 2010 by Dan Peter
Photo of welded platform: 2006 by Charlie Noble
Photos of punched angle platform: 2015 by Y. Yang
Photos of plywood round platform: 2013 by Jim Leidigh
Photo of casters on legs, 2004 by Wayne Maxwell
Photos of red wheels on legs, 2010 by Shaun R
Photos of white wheels on legs, 2010 by Paul
Photo of twin WSM cart, 2007 by Brian Moriarty
Photo of stainless/powder coated cart: 2010 by Chris Bjork
Photos of wooden cart: 2015 by Dave Gilbert
Photo of 22.5″ WSM Performer cart, 2012 by Earle Cooper
Photos of bent pipe cart: 2013 by Peter Lindfors
Photo of utility shelf cart: 2013 by Ken Fortune
Photos of wooden cart wtih storage cabinet: 2015 by Charles H.
Photos of red & black dual WSM cart: 2017 by JS Lockwood
Photos of stained cedar WSM cart: 2015 by Anthony N
Photo of Harbor Freight WSM cart: 2019 by SWright


