Summary
- Buy pork loin back ribs weighing 2 pounds or less per slab, if possible.
- Apply a “good overall dusting” of rub and allow ribs to sit at room temperature for 2 hours.
- Make sure all charcoal and smoke wood is fully lit before cooking.
- Cook ribs at 225°F for 3 hours, turn slabs, then increase cooker temp to 250-275°F and cook an additional 1-2 hours until done.
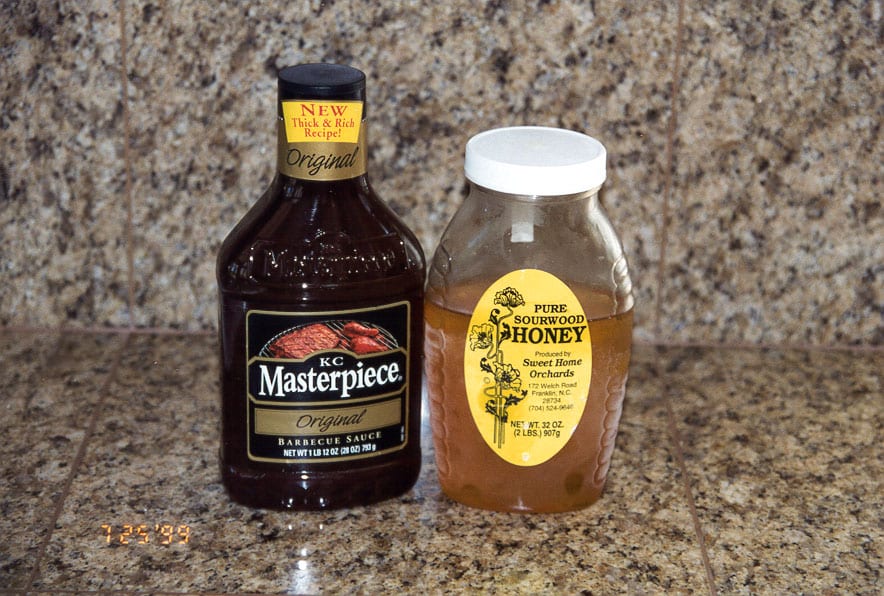
- Remove ribs from cooker and apply KC Masterpiece/honey mixture to both sides of slab before serving.
- Try to follow the BRITU cooking process as closely as possible for authentic results.
Ribs are one of the most popular meats cooked on the Weber Bullet, and for good reason. They’re easy to prepare, they don’t take as long to cook as larger cuts of meat, and the taste—just out of this world!
There are many tasty ways to cook pork loin back ribs, but one of my favorites is the recipe used by Mike Scrutchfield to win the “Best Ribs in the Universe” title at the 1996 American Royal Invitational. This recipe is also referred to as “BRITU”. The recipe was discussed by Mike on The BBQ Forum in 1996 and posted in its entirety in 1999. I first learned about BRITU when the recipe was printed in the California BBQ Association newsletter in April, 1997.
Mike Scrutchfield has graciously granted permission to The Virtual Weber Bullet to reprint the recipe here for your enjoyment. You can learn more about Mike and read his original recipe text at the end of this article.
When using this recipe, it’s important to remember that BRITU consists of a rub recipe and a cooking procedure. They go hand-in-hand, and you can’t separate the two and still say that you’re cooking BRITU ribs. For best results, try to adhere to the cooking procedure as closely as possible.
Some people complain that BRITU ribs taste too salty. One cause is applying too much rub. The recipe says, “Do not over season. A good overall dusting of the spices is all that’s needed.” The key word is “dusting”, so go lighter on the rub than you normally would. Also, you must sauce the ribs as directed after cooking. The sweetness of the sauce balances the saltiness of the rub.
Below are some pictures I took on July 25, 1999 and April 26, 2003 when I prepared ribs using this wonderful recipe.
Select & Prep The Slabs
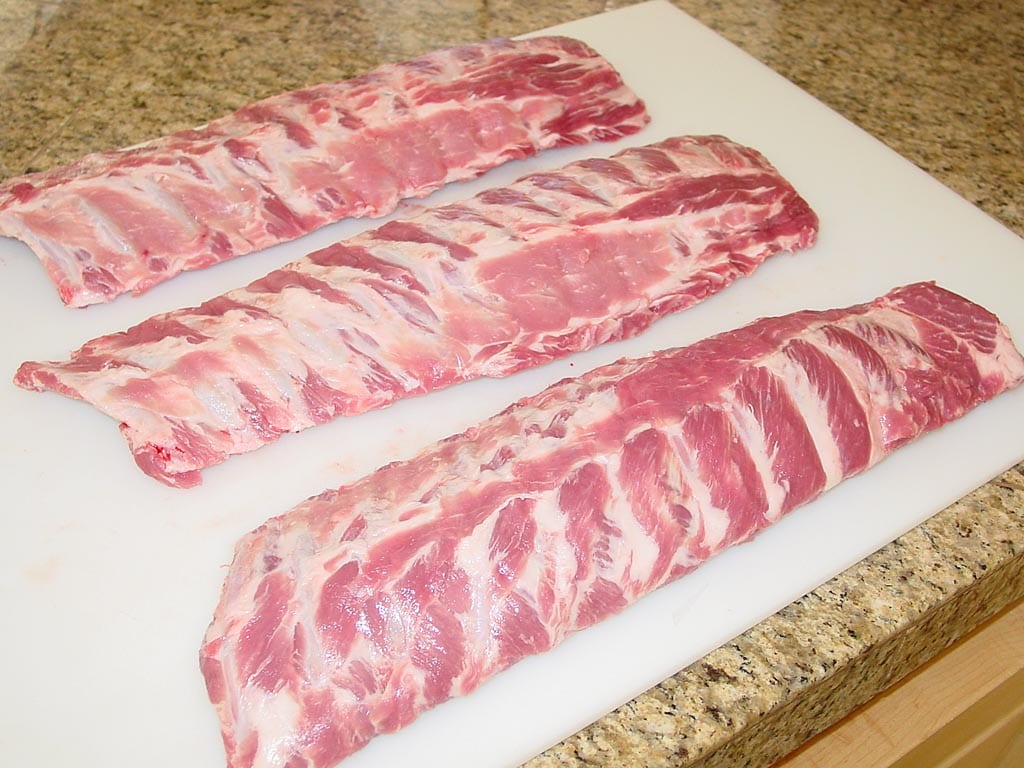
I purchased three untrimmed slabs of pork baby back ribs in Cryovac from my local warehouse store. The weight of each slab was a little over two pounds, the smallest slabs I could find.
I prepped the ribs according to the information you’ll find in the Pork Loin Back Rib Preparation article.
Prepare And Apply The Rub
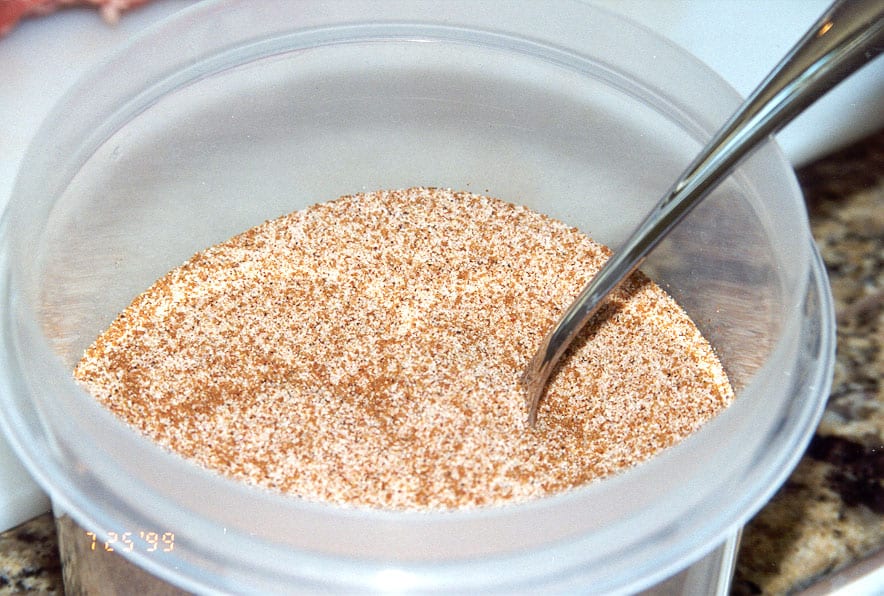

Prepare a 1/4 batch of rub according to Mike Scrutchfield’s recipe. A full batch will render much more than is needed for three slabs of ribs.
Best Ribs In The Universe Rub – 1/4 Batch
- 1/4 cup sugar
- 1/4 cup non-iodized table salt
- 1/8 cup brown sugar, dried
- 4 teaspoons chili powder
- 2 teaspoons ground cumin
- 1 teaspoon Accent (MSG)
- 1 teaspoon cayenne pepper
- 1 teaspoon black pepper, freshly ground
- 1 teaspoon granulated garlic powder
- 1 teaspoon onion powder
Spread the brown sugar out on a rimmed baking sheet pan and let it dry at room temperature for several hours, or place it is a slightly warm oven. Once dried, place brown sugar in a Ziploc bag and break up any clumps using a rolling pin or the bottom of a drinking glass.
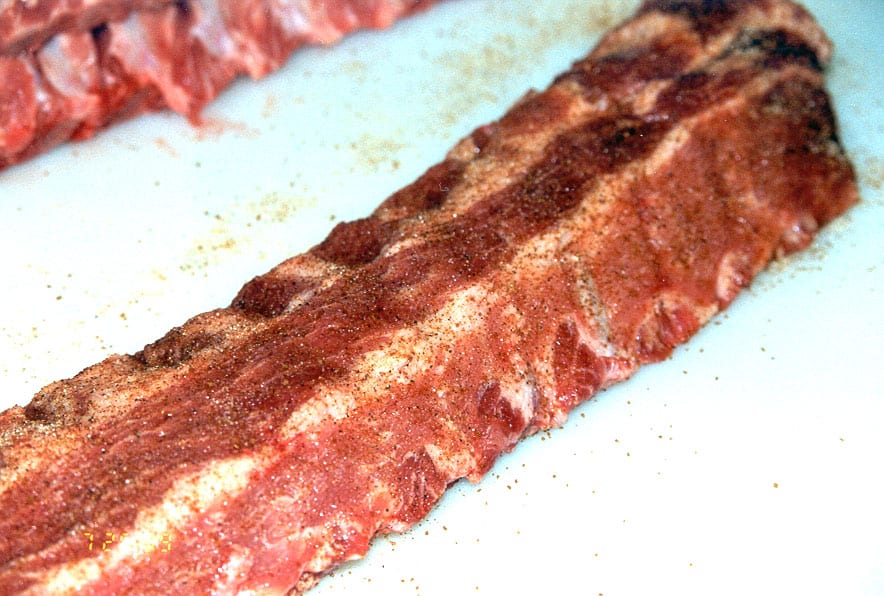
The recipe says to apply “a good overall dusting” of rub to the ribs. The second photo above shows how much rub I applied.
Allow the ribs to sit at room temperature for two hours before cooking. As they do, the salt in the rub draws moisture from the meat, forming a red liquid coating on the surface, as shown in the third photo above.
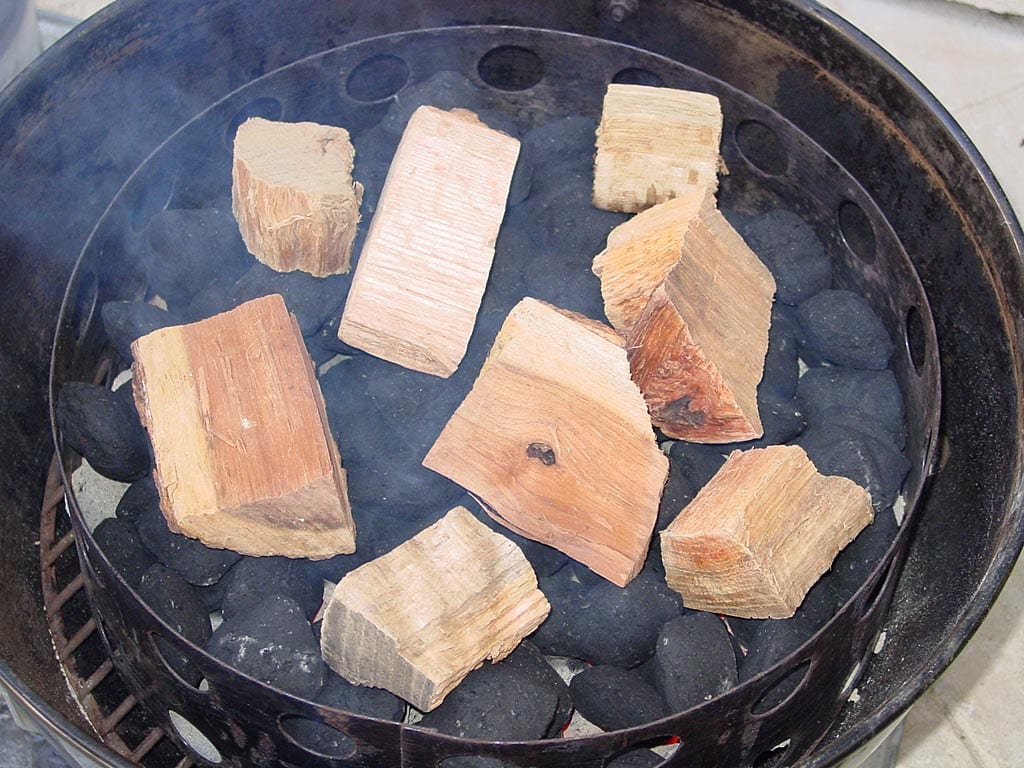
Select The Smoke Wood
Mike’s recipe calls for 4 chunks of white oak and 2 chunks of cherry, each about the size of a tennis ball. My oak chunks were about the right size, but the cherry chunks were too small, so I used 4 small chunks to approximate 2 larger ones.
The recipe also states that the bark should be removed from the wood before use, and that the wood should not be soaked in water.
Some people believe that bark introduces an undesirable flavor to barbecue. Not everyone agrees, of course. Normally, I don’t remove bark from smoke wood, but if you want to stay true to the BRITU recipe, remove the bark.
Fire-Up The Cooker
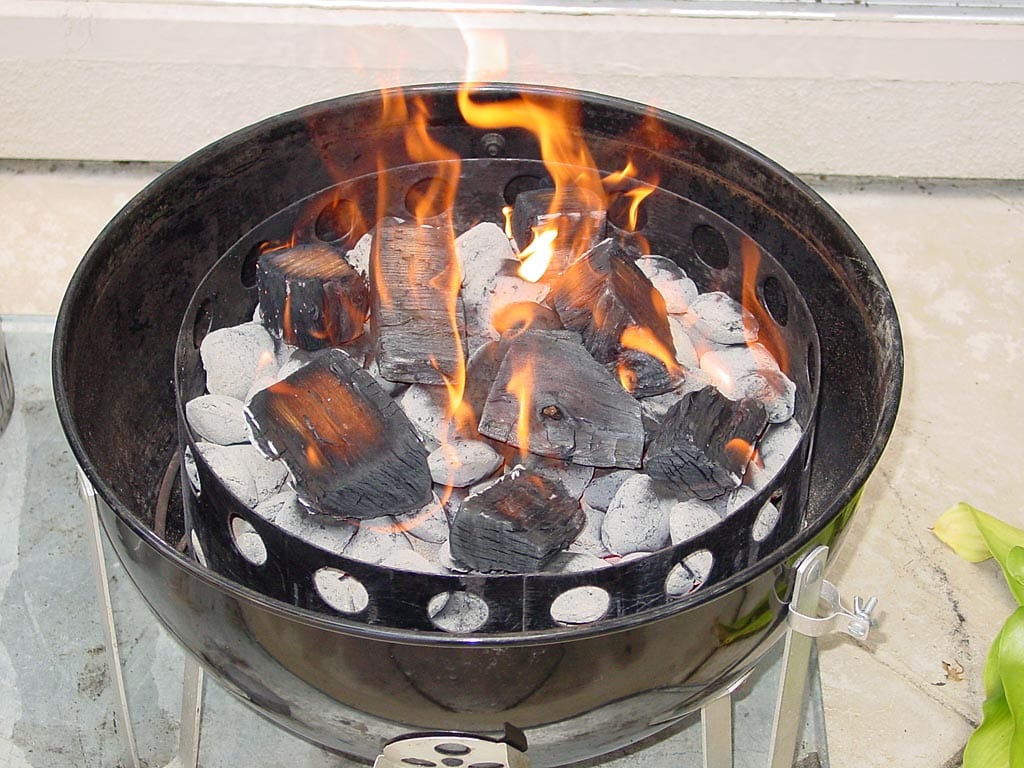
The recipe calls for 10-15 pounds of charcoal and the smoke wood to be lit using a chimney starter about an hour before cooking. All fuel is supposed to be covered with white/gray ash before cooking begins.
I deviate from the process somewhat on this point, but achieve the same end result. I fire the cooker using the Standard Method, lighting a Weber chimney starter full of Kingsford Charcoal Briquets, dumping them into the charcoal chamber when hot, then adding another full chimney of unlit briquettes and the smoke wood chunks over the lit coals.
Note that a Weber chimney filled to the top holds about 5 lb 5 oz of Kingsford charcoal, so two Weber chimneys of Kingsford is sufficient for this recipe.
When the smoke wood is engulfed in flames, but not fully consumed, assemble the cooker. Put the water pan in place and fill it with cool tap water. Close all three bottom vents, but set the top vent fully open and leave it that way during the entire cooking process.
Allow the WSM to sit for about an hour before adding the ribs to the cooker. During this time, the cooker temperature will drop, and much of the smoke wood will be consumed, leaving just the right amount of smoke called for in the recipe.
Total elapsed time from lighting the chimney to putting the ribs into the cooker was two hours.
Cooking Process Described
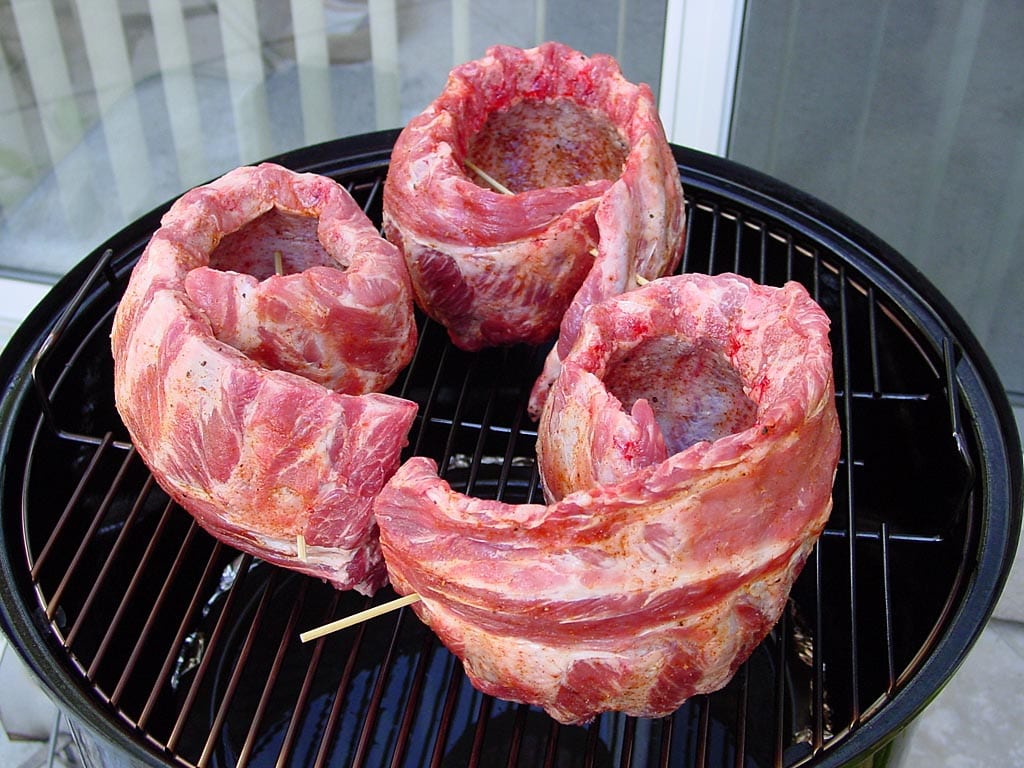
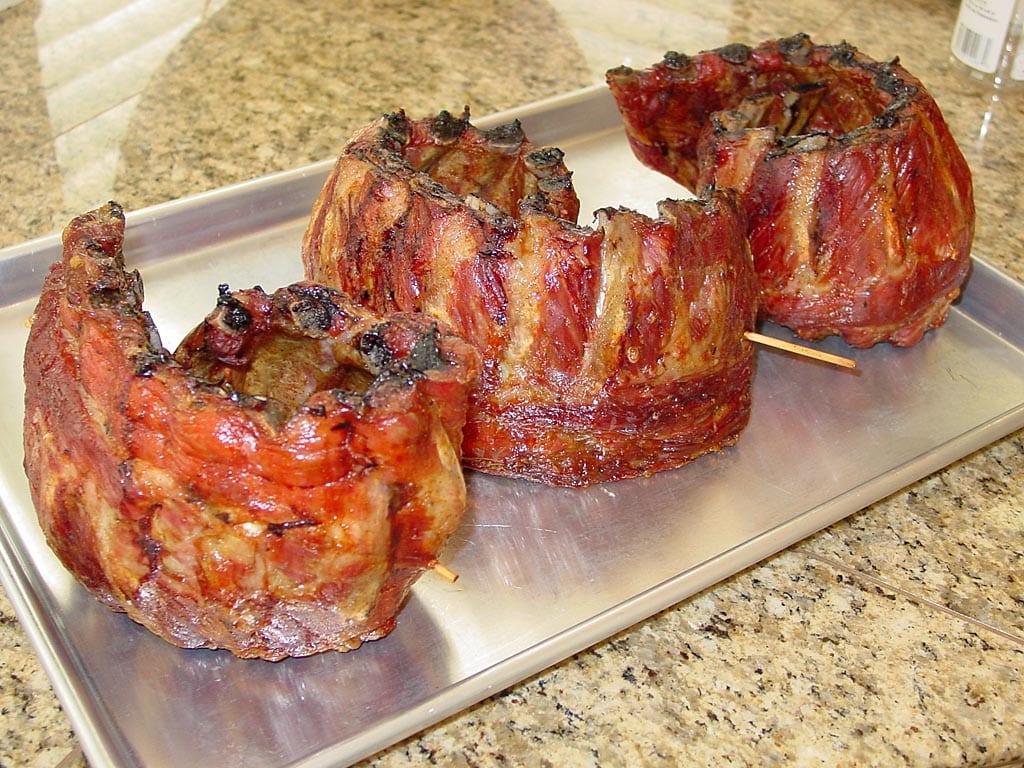
At 11:00am, the three slabs of ribs went into the cooker. Instead of using rib racks, I rolled the ribs and used wooden skewers to secure them in place.
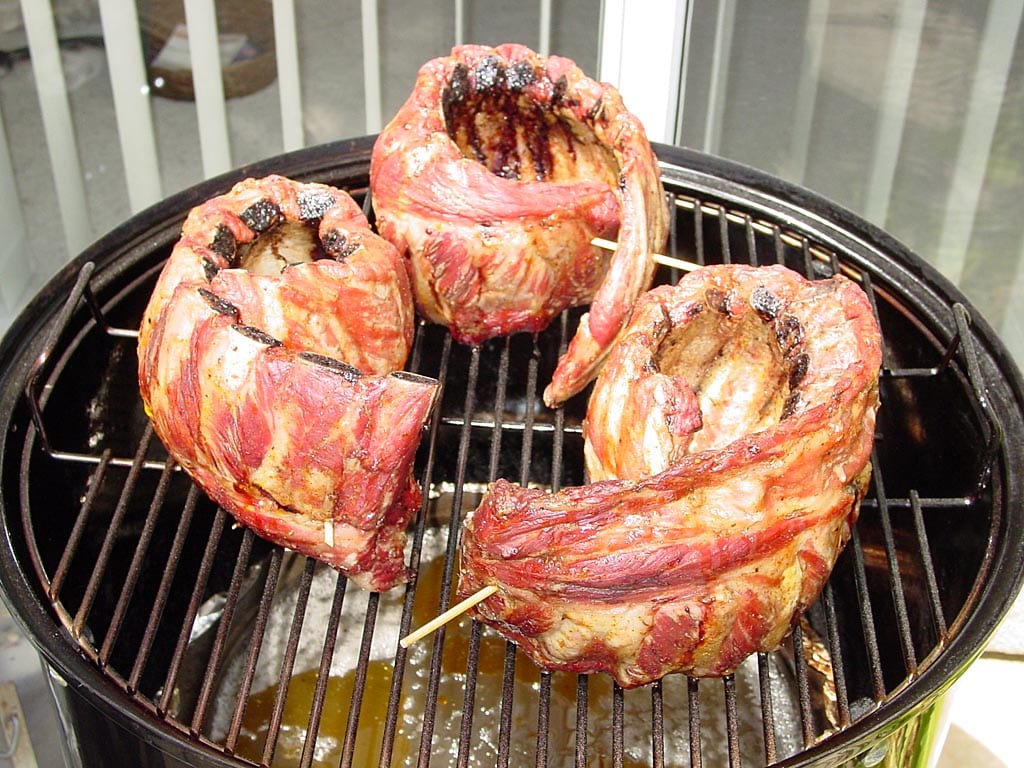
Partially open the three bottom vents to achieve a cooker temperature of 225°F. At the three hour mark, open the cooker for the first time and turn the ribs over, but do not baste them with anything. The second photo above shows how my ribs looked just before turning.
Replace the lid and open the bottom vents to increase the cooker temperature to 250-275°F. Start checking for doneness at the four hour mark and every 15 minutes thereafter. The ribs will be done when they have a nice, brown color and pass the tear test.
Check the water pan every two hours and replenish with hot tap water, as needed.
Here’s how the temperature and vent settings went for the cooking session:
| Time | Lid Temp | Vent 1 % | Vent 2 % | Vent 3 % |
| 11:00 am | – | 0 | 0 | 0 |
| 11:15 am | 233 | 0 | 0 | 0 |
| 11:30 am | 233 | 0 | 0 | 0 |
| 11:45 am | 233 | 0 | 0 | 0 |
| 12:00 pm | 237 | 0 | 0 | 0 |
| 12:30 pm | 250 | 0 | 0 | 0 |
| 1:00 pm | 248 | 0 | 0 | 0 |
| 1:30 pm | 250 | 0 | 0 | 0 |
| 2:00 pm (t) | 249 | 50 | 50 | 50 |
| 2:15 pm | 270 | 50 | 50 | 50 |
| 2:30 pm | 269 | 50 | 50 | 50 |
| 3:00 pm | 280 | 25 | 25 | 25 |
| 3:15 pm | 282 | 25 | 25 | 0 |
| 3:30 pm | 275 | 25 | 25 | 0 |
(t) turned meat over
Note that the vent percentages represent the way I set the vents at the time indicated.
In the table above, you can see that the WSM ran at 233°F for quite a while, close enough to 225°F in my book. At 12:00pm, the sun came over the top of the house and the cooker was in full sun, resulting in the temperature jumping to 250°F. Again, nothing to panic about. As long as I’m within about 25°F of my target temperature, I’m happy.
At 2:00pm, I opened the bottom vents partially to bump the cooker temperature up closer to 275°F. I turned the ribs and checked the water pan. The pan was still quite full, so I did not add water.
Supper Time!
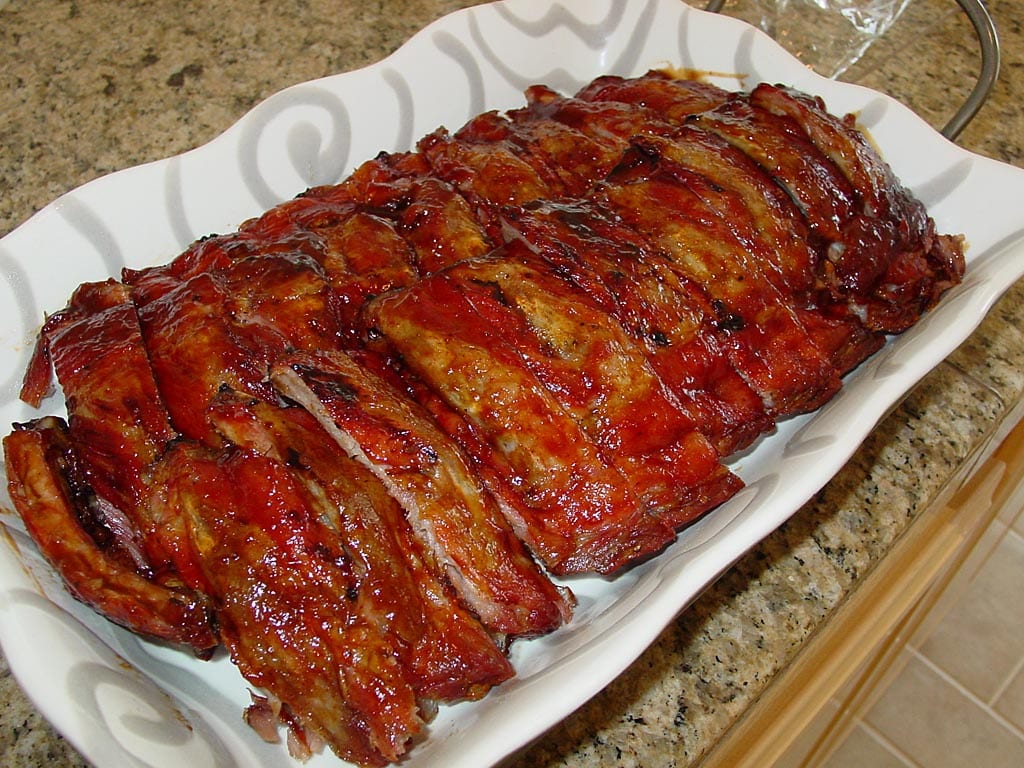
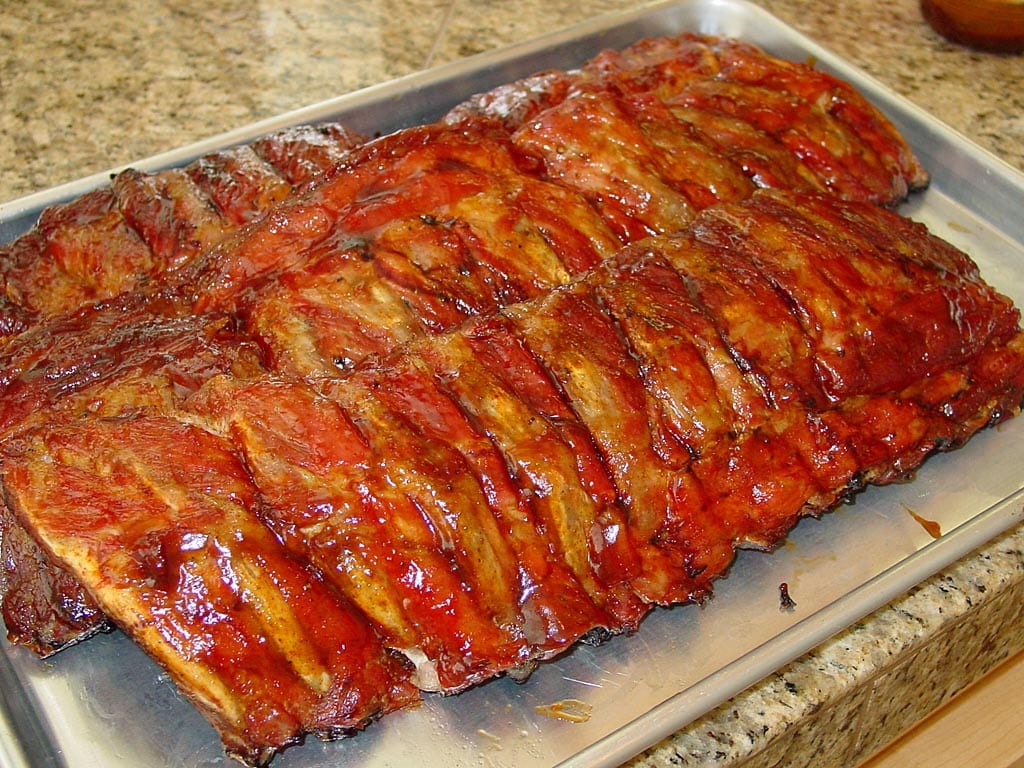
At 3:30pm, the ribs had a nice brown color, the meat has pulled down on the long bones, and a little tug on the bones showed that they would pull apart easily. The first photo above shows how the ribs looked after cooking.
Mike’s recipe calls for saucing the ribs on both sides before serving with a mixture of 5 parts KC Masterpiece Original Flavor barbecue sauce to 1 part honey. While any variety of honey is acceptable, I like to use sourwood honey, sometimes called “the caviar of honeys”. Sourwood honey is difficult to find, unless you live in the Carolinas or Georgia. It can be ordered from several suppliers on the Web. Visit the All About Honey page to learn more about single-flower honeys like sourwood.
Brush both sides of the ribs generously with the sauce mixture and serve immediately. The third photo above shows how the ribs looked after saucing. The fourth photo above shows the ribs cut into individual bones and arranged in a serving dish.
These ribs had a beautiful mahogany color and a light smoky flavor. The meat was firm, not mushy, and pulled cleanly from the bones.
I hope you enjoy trying this great recipe. It’s one of my all-time favorites and I’m sure it will become one of yours, too!
Best Ribs In The Universe – The Original Recipe Text
This recipe and cooking procedure won the prestigious title “Best Ribs in the Universe” at the 1996 American Royal Invitational and the 1993 American Royal Open Bar-B-Que contest as the Overall Grand Champion. They also took “Reserve Grand Champion” at the 1994 American Royal Open.
Meat
Premium Standard Farms Loin Baby Back Ribs, 1-3/4 to 2 lb. size. Membrane on the inner (stomach) side removed. All excess fat trimmed.
Dry Rub
Mix all ingredients thoroughly and store unused in moisture-proof container.
Ingredients List
- 1 cup sugar
- 1 cup non-iodized table salt
- 1/2 cup brown sugar*
- 5 Tablespoons + 1 teaspoon chili powder
- 2 Tablespoons + 2 teaspoons ground cumin
- 4 teaspoons Accent (MSG)
- 4 teaspoons cayenne pepper
- 4 teaspoons black pepper, freshly ground
- Important: 4 teaspoons granulated garlic powder
- Important: 4 teaspoons onion powder
* Dried out on a rimmed baking sheet pan at room temp for several hours, or in slightly warmed oven.
Sprinkle meat two hours before cooking with rub and allow meat to come to room temperature. Do not over season. A good overall dusting of the spices is all that’s needed. The spices will become a nice red, liquid coating after sitting for about an hour, if you used the proper amount.
Basic Cooking Procedure
Smoke ribs in a “water pan” smoker, i.e. Brinkmann or Weber “Smokey Mountain Cooker” (the best!). Start charcoal (10-15 lbs.) and 4 chunks of white oak and 2 chunks of cherry wood (about the size of a tennis ball) at least 1 hour before cooking meat. All fuel should be started in a chimney-style starter, no starter fluid, and all must be gray/white hot. Remove all bark from wood chunks, do not soak.
Very little smoke will be visible. Don’t worry about that! You’ll get the flavor.
Use straight water in the water pan and keep full during the entire cooking process. Control oven temperature of cooker by regulating the bottom vents only. Never, ever completely close the top vent! If you don’t have one, put a thermometer on your cooker. Cook ribs for 3 hours fairly cool at 225°F on rib racks. After 3 hours lift the lid for the first time, flip the slabs end for end, and upside down, and open all the vents on the smoker wide open.
Temperature of the cooker should rise into the 250-275°F range. Peek every half hour to monitor doneness. Ribs will be finished when fairly brown in color and the meat has pulled down the long bones at least 3/4 of an inch (usually another 1 to 2 hours). Remove from cooker and sauce both sides before cutting individual ribs.
I like K.C. Masterpiece sweetened even more (5 parts sauce, 1 part honey), and so do the judges!
This basic cooking procedure is probably the most important of all, and works well with other meats as well. Forget about how much smoke is coming out of the cooker. If you’ve got the wood you like in there burning cleanly, the flavor will be in the meat. Smoke is nothing more than a smoke screen, and any coming out the top of the cooker is flavor lost!
Ribs to ya! Enjoy.
About Mike Scrutchfield
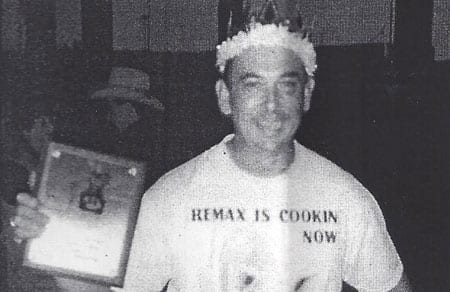
Mike Scrutchfield shows off a first place trophy and crown at the 1993 American Royal Open.
Mike Scrutchfield was a top KCBS competitor in the 1990s, initially competing under the team name “Re/Max Is Cookin’ Now” (Mike was a real estate broker) and later as “Top Secret BBQ”. Mike used the Weber Smokey Mountain Cooker exclusively and won many Grand Championships and First Place awards at contests around the Kansas City area. He claims to have conducted practice cooks for 173 days, taking the results into his office for coworkers to evaluate, before ever turning in a single competition entry. At his first contest, Mike took first place in one meat category and finished in third place overall.
Mike became so successful that Weber featured him in a national advertising campaign. He dreamed of leveraging his success into a barbecue rub and restaurant business, but that was not meant to be. By the late 90s, Mike had given up competition to focus on his real estate business.
But the legend of Mike Scrutchfield lived on, inspiring people like me who were taking up barbecue in the late 90s. I was never interested in competition, but I figured if the Weber smoker was good enough for someone like Mike Scrutchfield in competition, it was certainly good enough for me in the backyard.
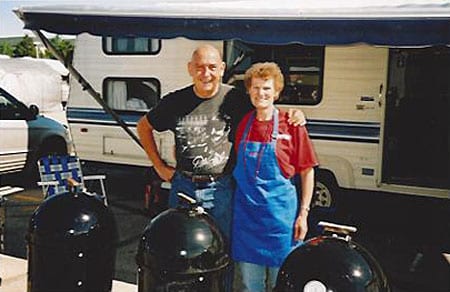
Mike Scrutchfield and Donna McClure of P.D.T. (Pretty Damn Tasty, another epic WSM team from the 1990s) pose with Weber smokers at the Great American Barbecue in Kansas City, Memorial Day Weekend 2005.
As it turns out, there were no “Top Secrets” when it came to Mike Scrutchfield. He freely shared his tips and techniques with anyone who asked, and that’s how BRITU became known to the barbecue community starting in 1996.
Video Interview With Mike Scrutchfield
In 2009, Kyle Laval of The Slabs BBQ Team posted a two-part video interview with Mike Scrutchfield in which he reflects on his past success and discusses his competition barbecue process, choice of smoke wood, internal meat temps, and much more.
More Pork Rib Links On TVWB
- Basic Baby Back Ribs
- Easy Baby Back Ribs
- Baby Back Ribs – Dry Ribs
- Spareribs – Sugarless Texas Sprinkle
- Spareribs – 3-2-1 Method
- Pork Rib Selection
- Pork Loin Back Rib Preparation
- Pork Sparerib Preparation

Rolling Ribs To Increase Capacity
To fit more full-length slabs of ribs in your cooker, try rolling them. Roll each slab into a loose circle, overlapping the ends a bit. Secure the rolled slabs using skewers or kitchen twine, then stand the ribs on edge on the cooking grate. Using this method, you can easily fit four slabs of baby back ribs on each cooking grate. Try this method with spareribs, too.
Bamboo skewers work well for rolled ribs and are very inexpensive. Due to the “low and slow” heat of barbecuing, you don’t need to soak them in water before use. Once inserted through the slab, trim any excess with kitchen shears for easier placement of the slabs in the cooker.
Rolled ribs tend to hold their shape after cooking, so you won’t end up with nice flat slabs. If you try to flatten the slab, the meat will usually tear, so just cut the slabs into short sections or individual bones for presentation to your guests.
With rolled ribs, any areas of meat that touch one another during cooking won’t have that nice brown color and smoke penetration like the rest of the meat. To avoid this, arrange the ends of each slab on the skewer so they won’t touch during cooking. If you end up with splotchy areas of meat, apply sauce generously to both sides of the slabs and no one will notice the difference.
Photos of Mike Scrutchfield: 1993 and 2005 by Bob Lyon


