Summary
- Trim excess fat from two pork butts.
- Inject meat evenly with injection solution.
- Apply yellow mustard and rub to all sides and refrigerate overnight.
- Cook at 225-250°F to an internal temperature of 170°F.
- Apply brown sugar and pork marinade, wrap in foil.
- Continue cooking until tender to 195°F internal temp.
- Open foil, let rest for 30 minutes or until 170°F internal temp before pulling the meat.
Many competition barbecue teams inject pork butts before cooking because it adds flavor and moisture throughout the meat. Teams want to create a “flavor explosion” in the judge’s mouth that will earn the highest score possible. They build layer upon layer of flavor throughout the cooking process by injecting, rubbing, spritzing, foiling with flavorful liquids, and finishing the meat with sauces and seasonings to really make the flavor “pop”.
There are many barbecue experts that teach classes on how to adapt competition techniques to your backyard cooking. One of the best classes is taught by my friend Harry Soo of Slap Yo’ Daddy BBQ in Diamond Bar, California. Harry cooks exclusively with the Weber Smokey Mountain Cooker. He won California Team of the Year two years in a row, has won numerous Grand and Reserve Grand Championships, and 75+ first place finishes in various meat categories. I’ve attended Harry’s hands-on class and I highly recommend it. I guarantee that when you take Harry’s class you’ll learn a lot, you’ll be entertained, and you’ll eat really well, too!
Harry Soo was kind enough to join us on The Virtual Weber Bulletin Board a few years back for a week-long Q&A session where he shared many of his favorite techniques and methods. My recommendation is that you spend some time reading the Q&A from beginning to end, especially the PDF titled The BBQ Wisdom of Harry Soo, then consider signing up for one of his classes in Diamond Bar, California.
Here are some photos I took on April 26-27, 2014 when I tried my hand at making Slap Yo’ Daddy injected pork butt.
Select And Prep The Pork Butts
Purchase two bone-in or boneless pork butts weighing 8-9 pounds each. Trim excess fat and any unsightly bits, but do not completely remove the fat cap and false cap. These will help keep the injection solution inside the pork butt as you inject from the opposite side of the meat.
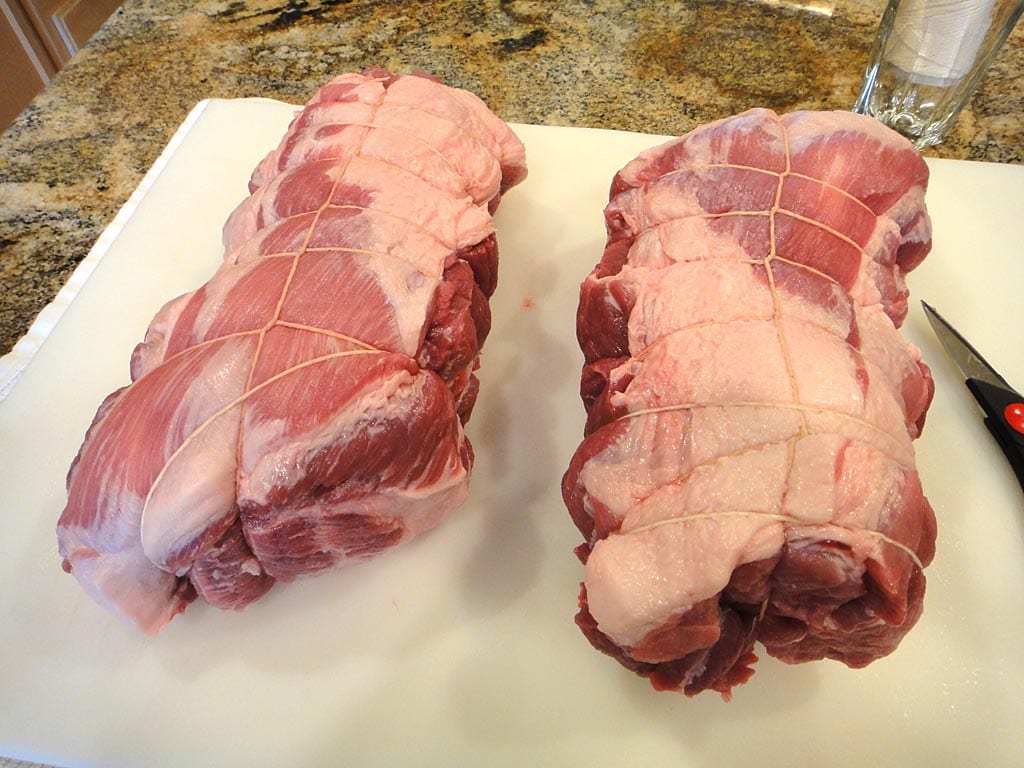
If using boneless butts, tie with kitchen twine after trimming to keep the meat in a compact shape. I tried my hand at a fancy tie job here, but you can learn a simple tying technique by watching the How To Tie A Roast video.
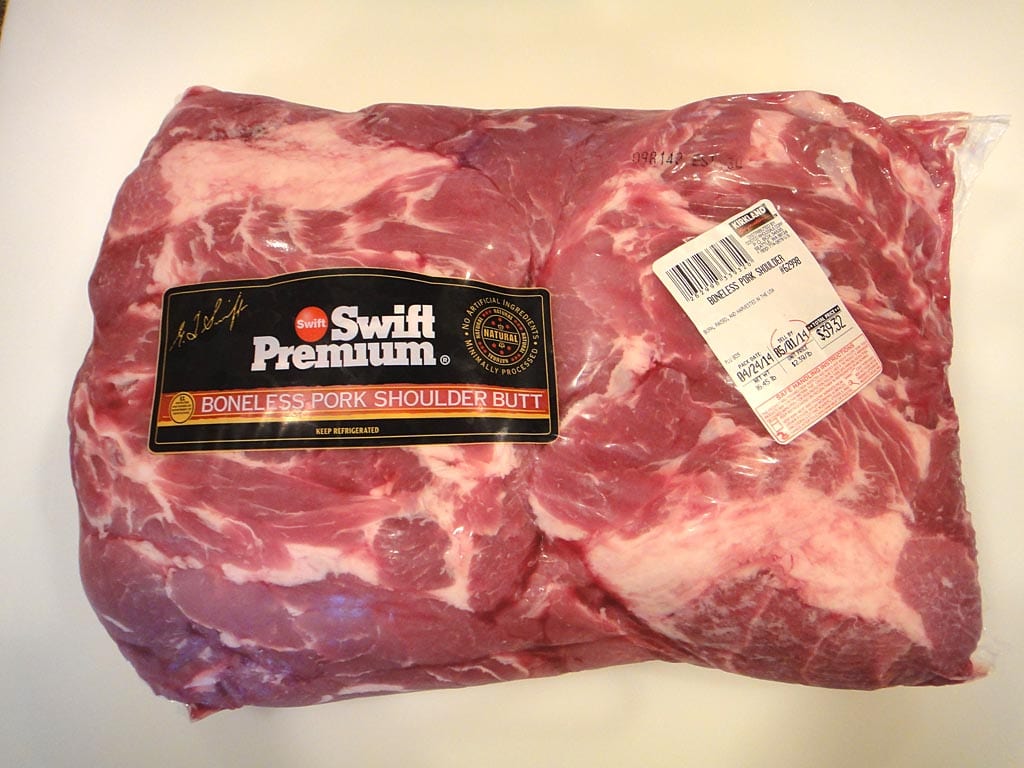
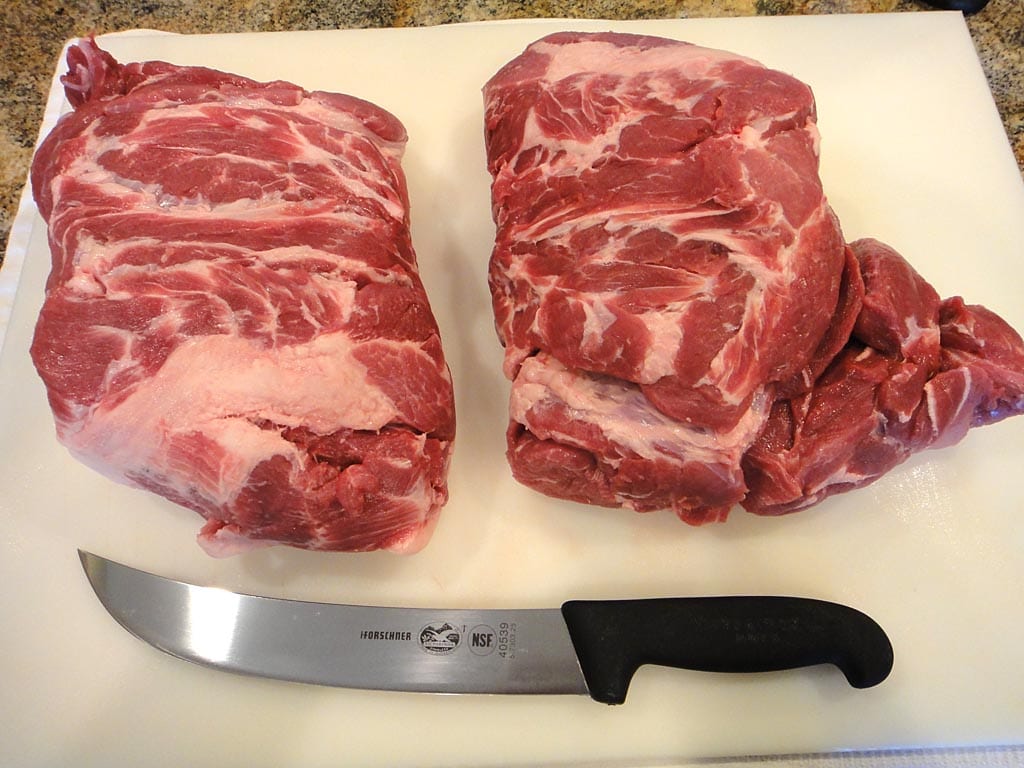
The first photo above shows two boneless pork butts in Cryovac packaging weighing a total of 16.45 pounds. The second photo shows the lean side of the pork butts as they were removed from the packaging. I did very little trimming on these butts, as most of the fat cap was missing. I left the false cap intact and tied the butts, as shown in the third photo.
Inject & Rub The Pork Butts

With the pork butts trimmed and ready to go, it’s time to prepare a batch of SYD pork butt injection.
SYD Pork Butt Injection (Per Pork Butt)
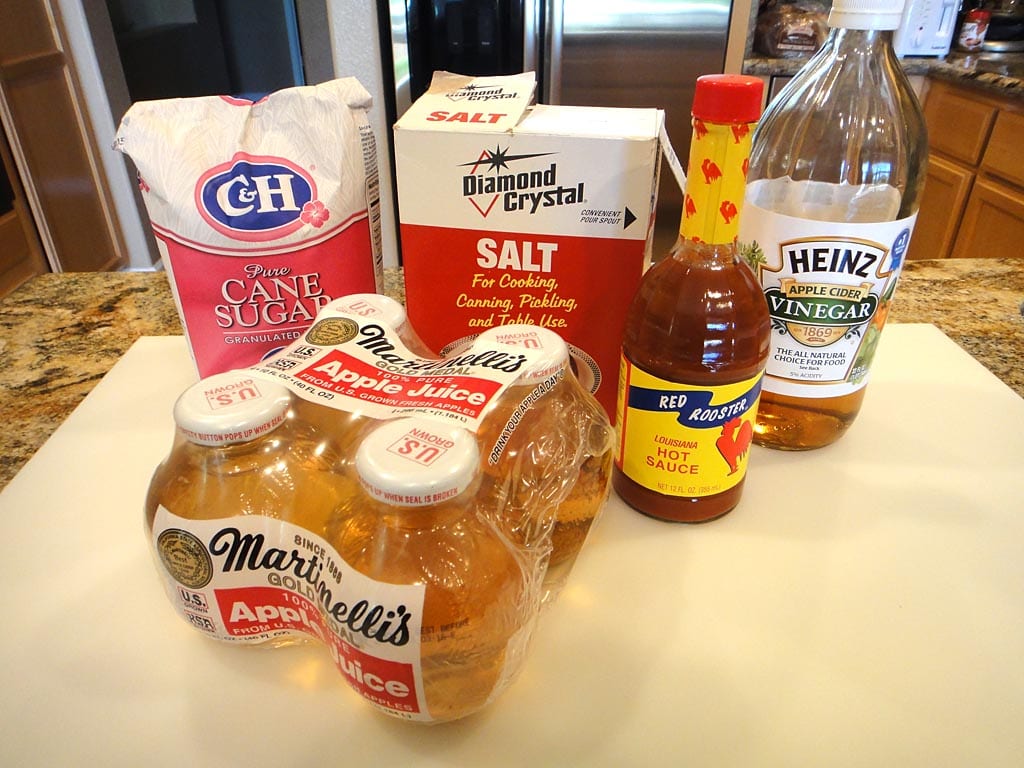
- 2 cups apple juice
- 1/4 cup vinegar (white or apple cider)
- 1-1/4 cups white sugar
- 3 Tablespoons table salt
- 1 Tablespoon Red Rooster Louisiana Hot Sauce
- 1 teaspoon liquid smoke
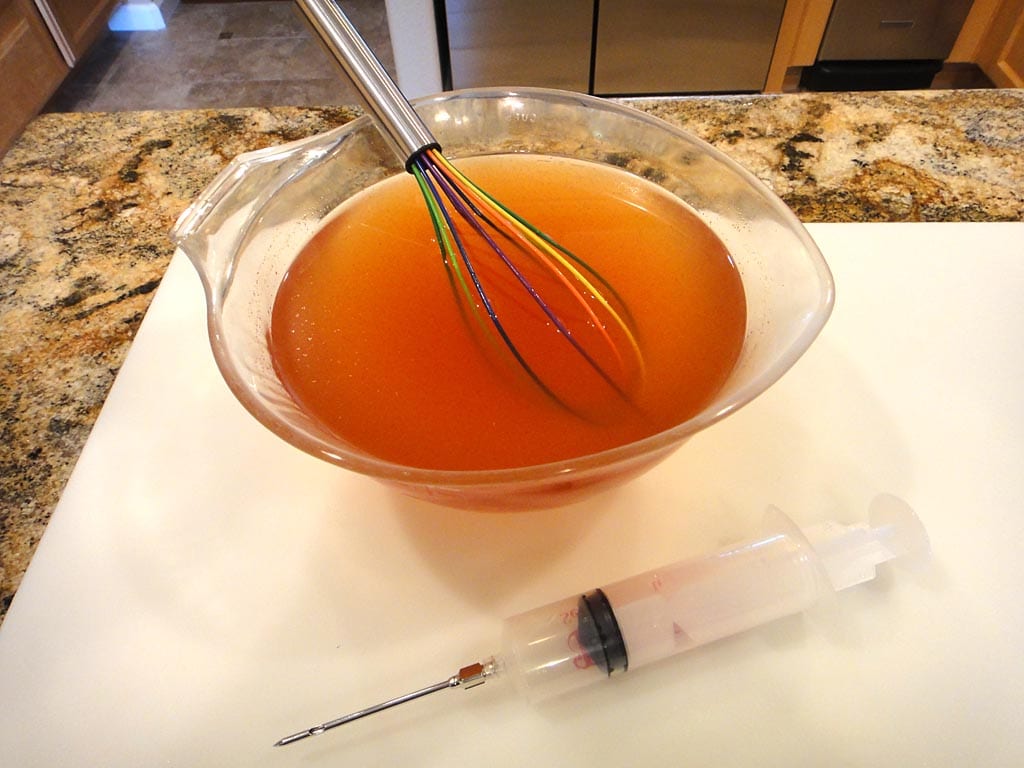
Combine all ingredients and stir until sugar and salt are dissolved.
Next, prepare a batch of SYD All-Purpose Rub.
SYD All-Purpose Rub
- 2 Tablespoons Lawry’s Seasoned Salt
- 2 Tablespoons white sugar
- 2 Tablespoons McCormick Grill Mates Montreal Steak Seasoning
- 1 Tablespoon mild chili powder
- 1 Tablespoon paprika
- 1 Tablespoon granulated garlic
- 1/2 to 1 teaspoon cayenne pepper
Combine all ingredients and mix thoroughly.
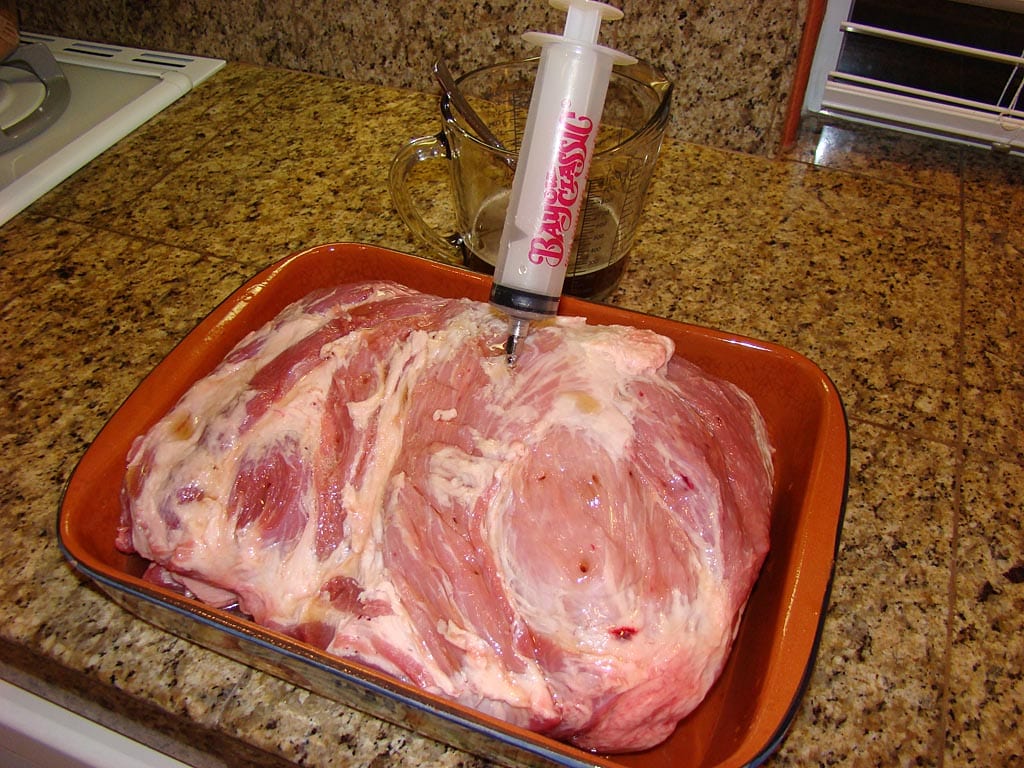
Place one of the pork butts fat side down in a baking dish or food service pan. Inject in 1″ increments in a row across the butt, inserting the needle at an angle deep into the meat. Slowly depress the plunger while pulling the needle out to deposit the solution inside the meat.
When you’ve completed a row, move down 1″ and start a new row. Repeat the process until the entire pork butt has been injected in 1″ increments left to right, top to bottom in a grid pattern.
Any solution that collects in the bottom of the pan can be sucked up with the injector and used again. Your objective is to get as much of the injection solution to stay in the meat as possible, but meat is not a sponge and some of the solution will flow back out into the pan.
Repeat the process with the second pork butt and a second batch of injection solution.
Need a meat injector? Amazon.com carries several good injectors.
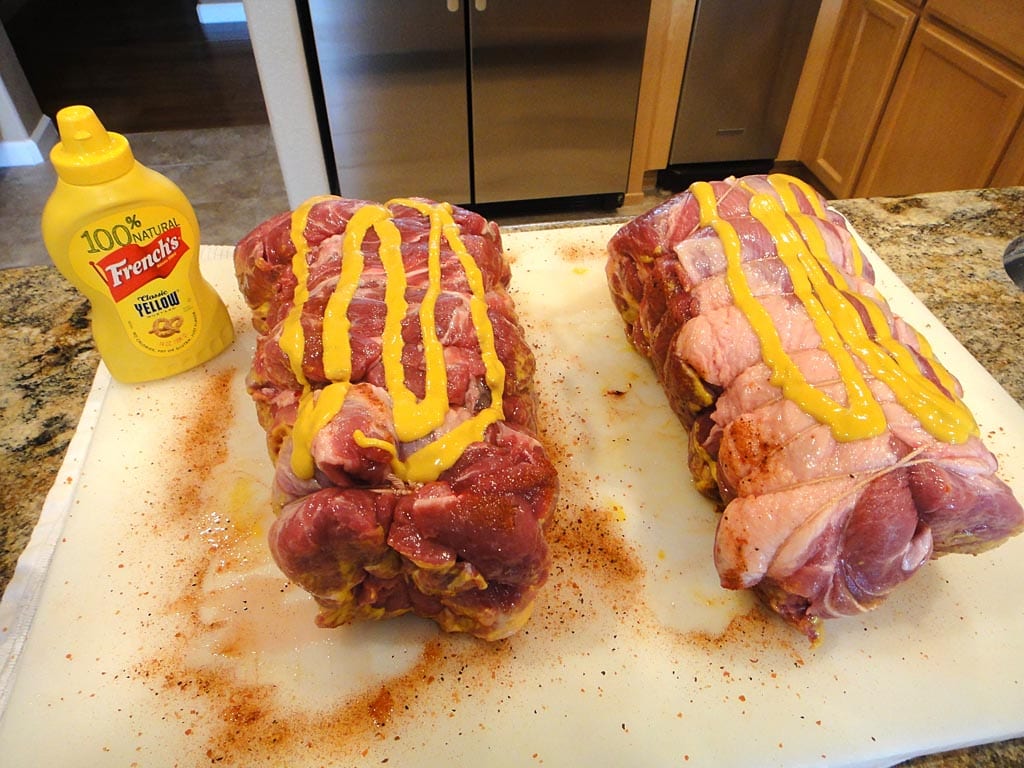
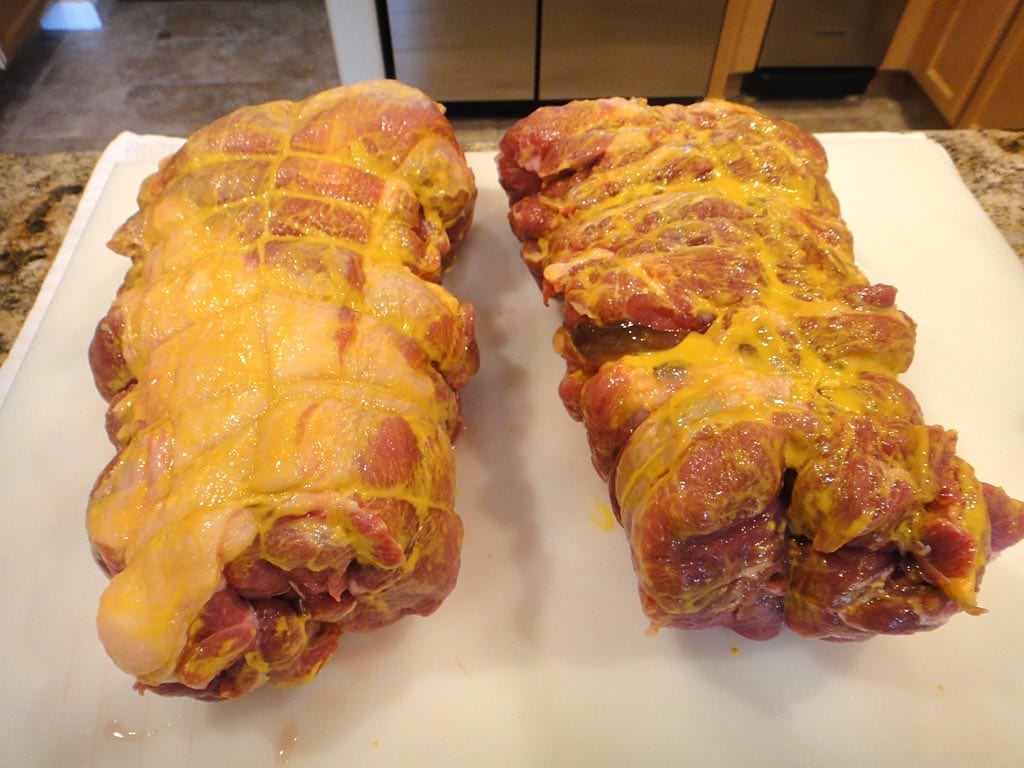
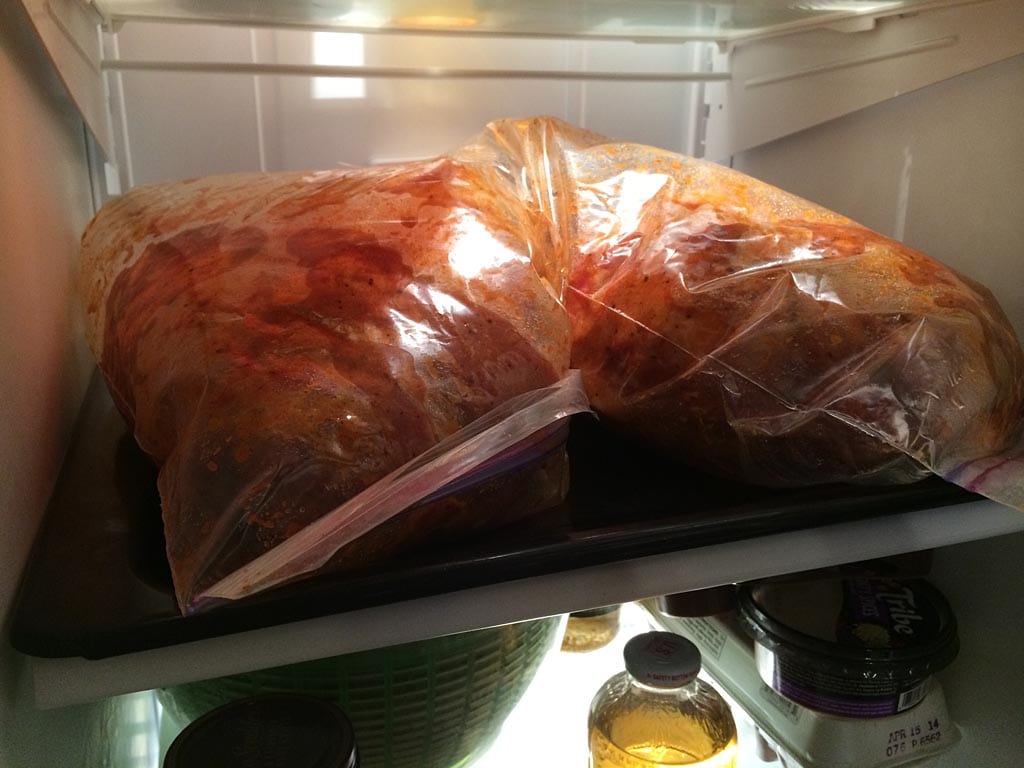
Once the butts are injected, squirt a good amount of yellow mustard on all sides of the meat and rub or brush it around to coat the meat. The mustard helps the rub stick to the meat so a good crust will form during the first few hours of cooking.
Apply a heavy sprinkling of rub to all sides of the meat. Place each butt in a 2-gallon Ziploc bag, place the bags on a rimmed baking sheet pan, and refrigerate overnight.
Select The Smoke Wood
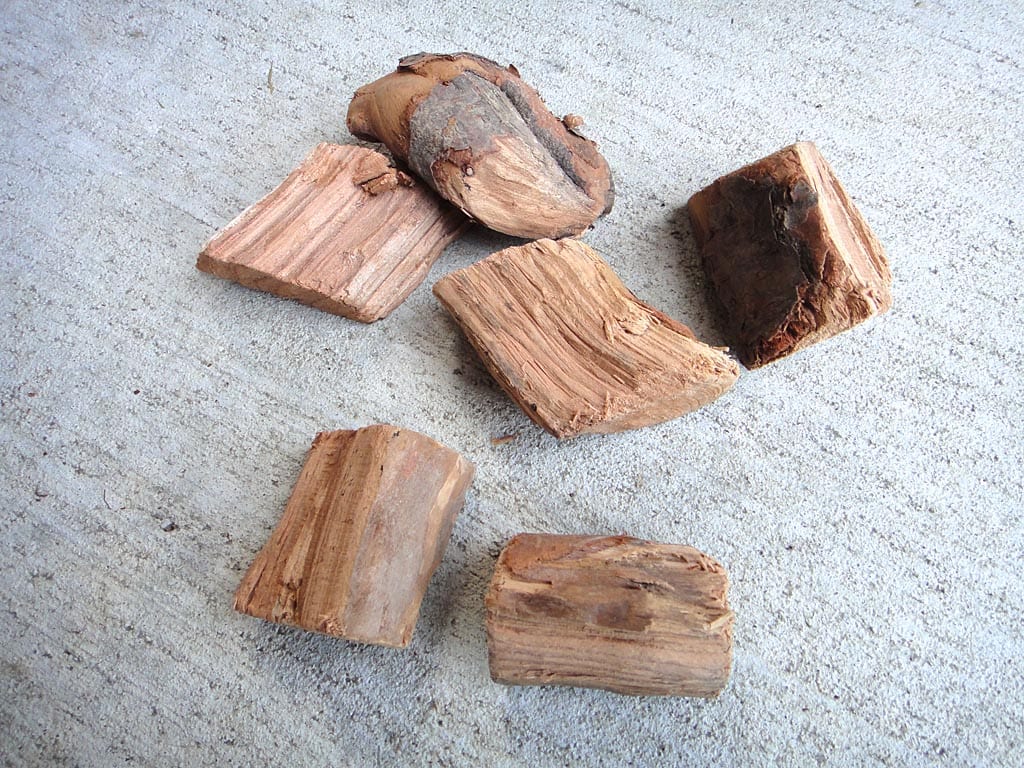
Use apple smoke wood for these pork butts. Cherry, oak, or another mild fruit wood can be used if apple is not available.
I used 6 small chunks measuring 2″ x 2″ x 2″ and buried them in the unlit charcoal.
There is no need to soak the wood or remove the bark before use.
Fire-Up The WSM
Fire-up the cooker using the Minion Method. Fill the charcoal chamber to the top with unlit Kingsford Charcoal Briquets. Bury the wood chunks in the unlit charcoal. Light 20-40 briquettes using a Weber chimney starter and spread them over the unlit briquettes.
Assemble the cooker. Foil the water pan before use for easy cleanup, but leave it empty.
Smoke The Pork Butts
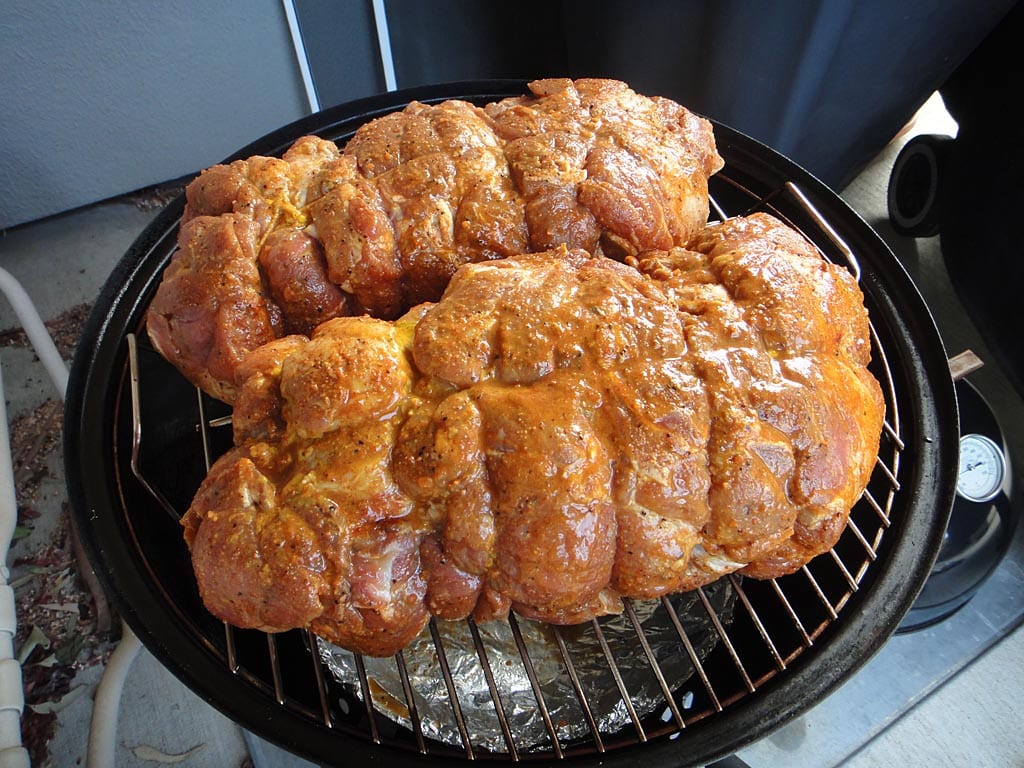


Place the pork butts fat side down in the WSM. Set the 3 bottom vents to 100% open. Open the top vent fully and leave it that way throughout the entire cook.
When the cooker reaches about 225°F, set the 3 bottom vents to 25% open so the cooker settles in at 225-250°F measured at the lid. Adjust the 3 bottom vents as necessary to maintain this temperature range throughout the cooking session.
Cook at 225-250°F. After 2-3 hours, when the rub has set-up on the surface of the meat, spritz occasionally with water or apple juice using a spray bottle.
Cook the butts until the internal temperature measures 170°F using an instant-read thermometer. Since pork butt is made up of a collection of different muscles, check the temperature in 3-4 spots and average the results.
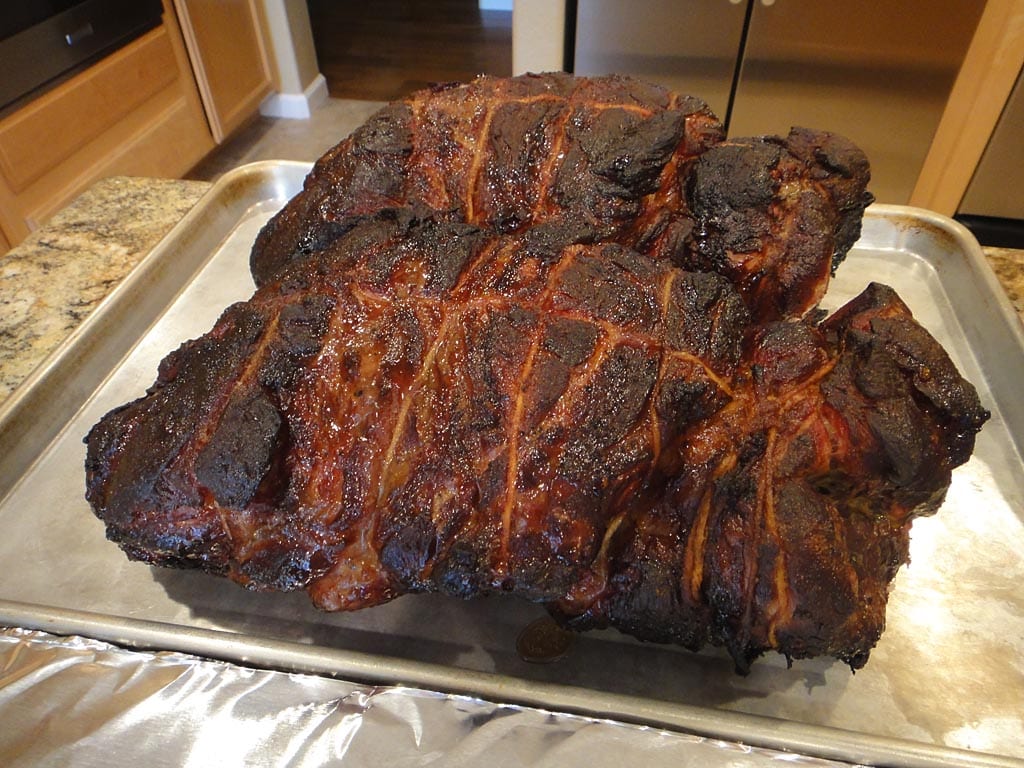
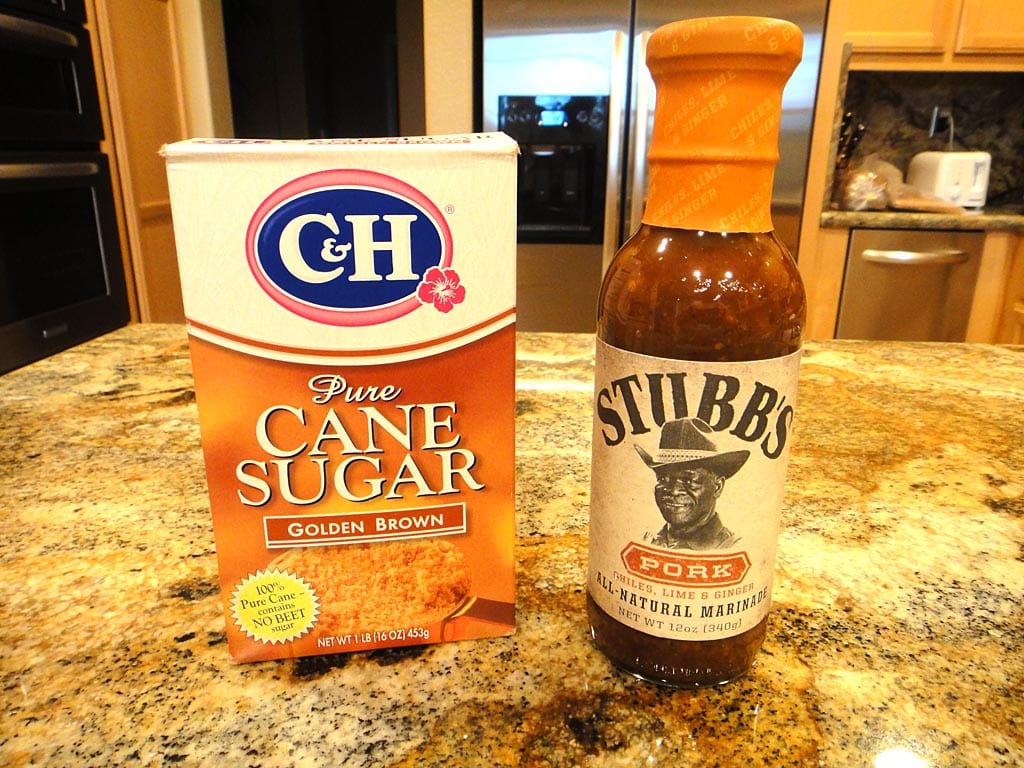
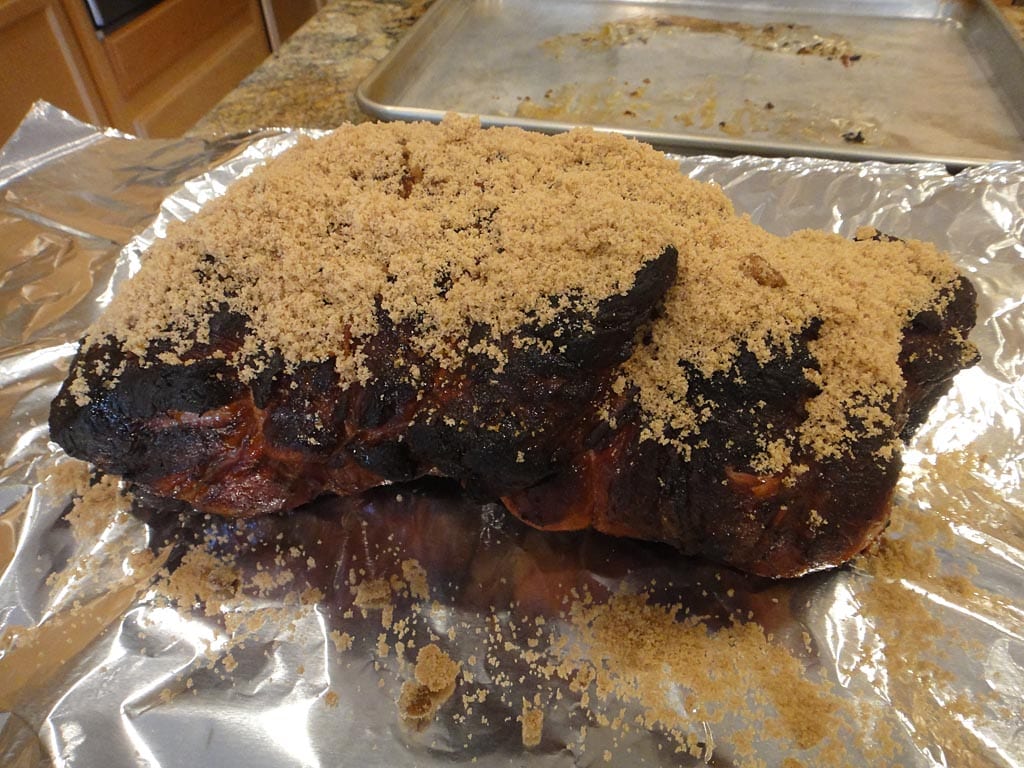
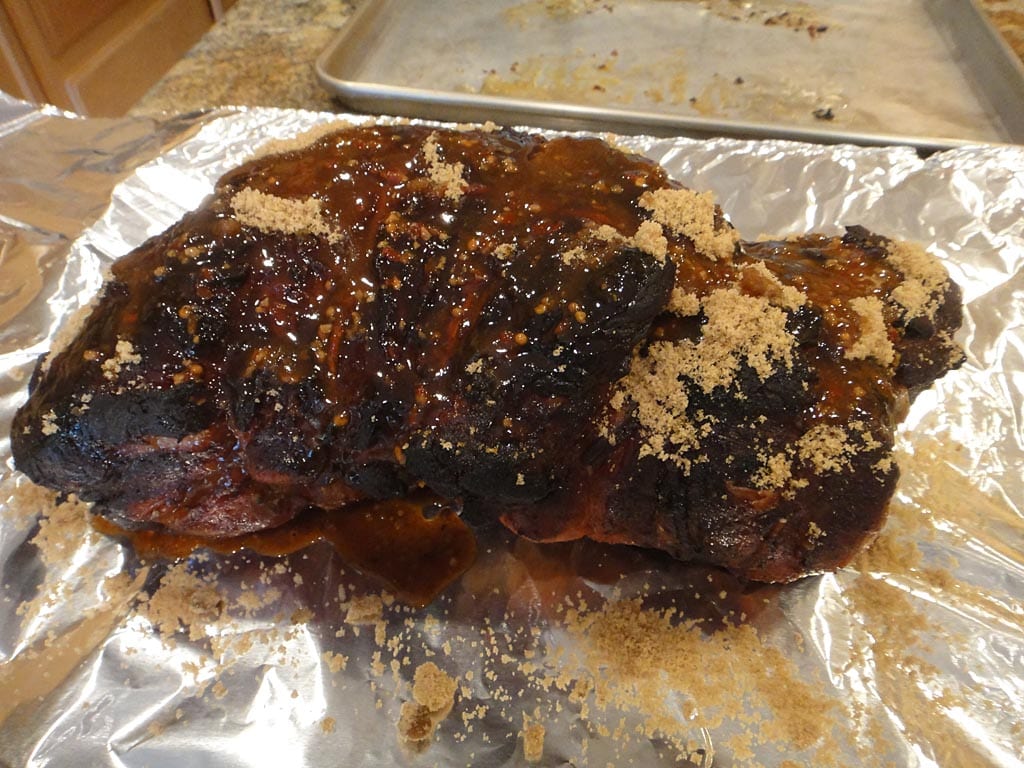
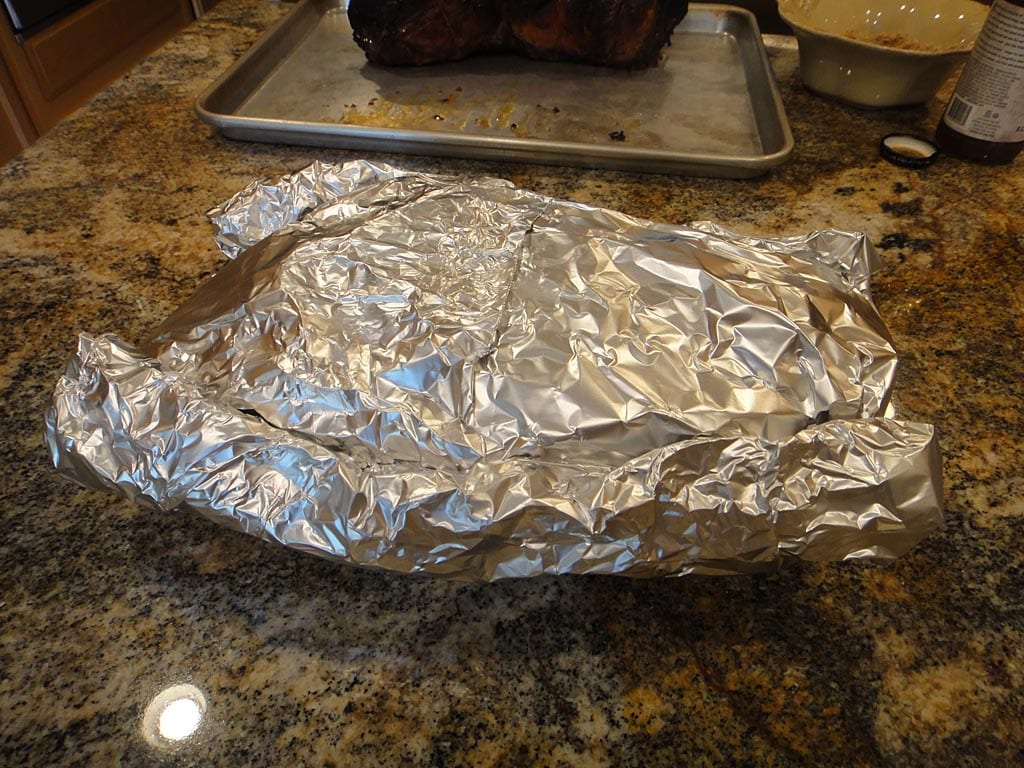
Remove the butts from the cooker. Place one pork butt on two large sheets of wide, heavy-duty aluminum foil. Sprinkle the top side with light brown sugar, then drizzle with a few tablespoons of Stubbs Pork Marinade to add moisture.
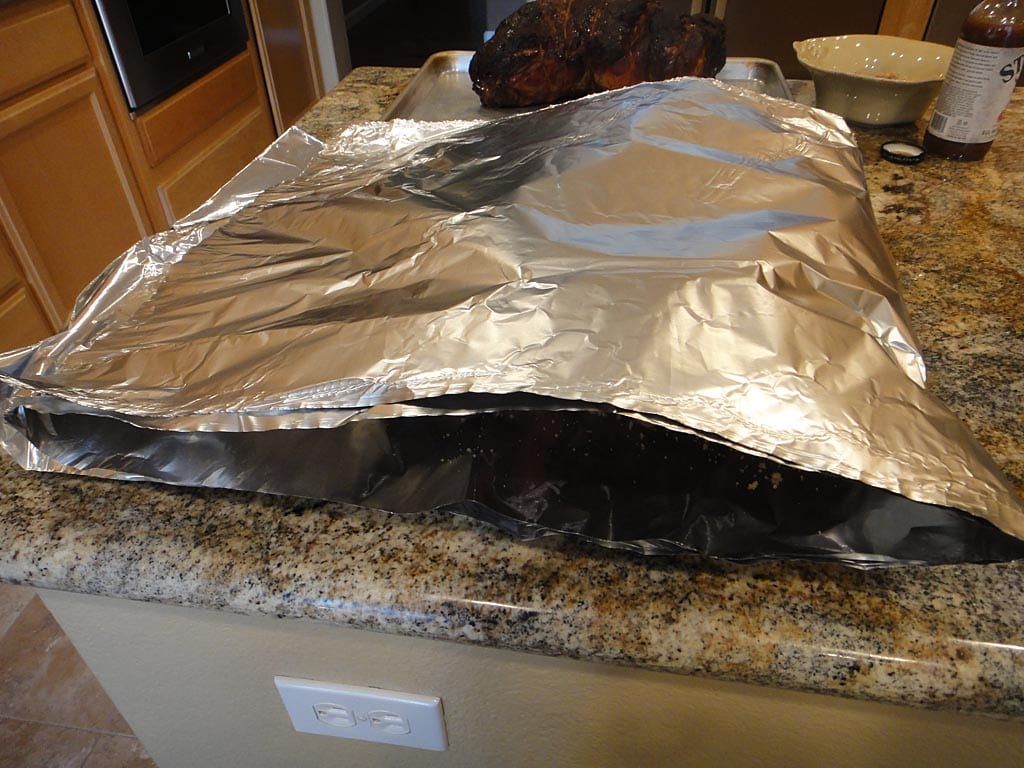
Bring the foil across the top of the butt and fold up the three open sides to create a tight foil package.
Repeat the process with the second pork butt.
Return the foiled butts to the WSM and cook at 225-250°F until the internal temperature measures 195°F. As mentioned before, check the temperature in 3-4 spots and average the results.
There is no need to turn the meat during cooking.
Here’s how the cooker temperatures and vent settings went during my cook. You’ll notice that my cooker ran a bit higher than 250°F, but everything turned out just fine.
| Time | Lid Temp | Meat Temp | Vent 1 % | Vent 2 % | Vent 3 % |
| 8:00 am | – | – | 100 | 100 | 100 |
| 8:20 am | 192 | – | 100 | 100 | 100 |
| 8:45 am | 275 | – | 100 | 0 | 0 |
| 9:15 am | 280 | – | 100 | 0 | 0 |
| 9:45 am | 273 | – | 100 | 0 | 0 |
| 10:30 am | 267 | – | 100 | 0 | 0 |
| 11:00 am (s) | 274 | – | 100 | 0 | 0 |
| 12:00 pm (s) | 265 | – | 100 | 0 | 0 |
| 1:00 pm (s) | 265 | – | 100 | 0 | 0 |
| 2:00 pm (s) | 267 | – | 100 | 0 | 0 |
| 3:00 pm (s)(w) | 267 | 170-175 | 100 | 0 | 0 |
| 4:00 pm | 262 | – | 100 | 0 | 0 |
| 4:30 pm | 262 | 185-192 | 100 | 50 | 0 |
| 5:20 pm | 240 | 195-202 | 100 | 50 | 0 |
(s) spritzed with water
(w) wrapped in foil
Note that the vent percentages represent the way I set the vents at the time indicated.
Pull The Pork
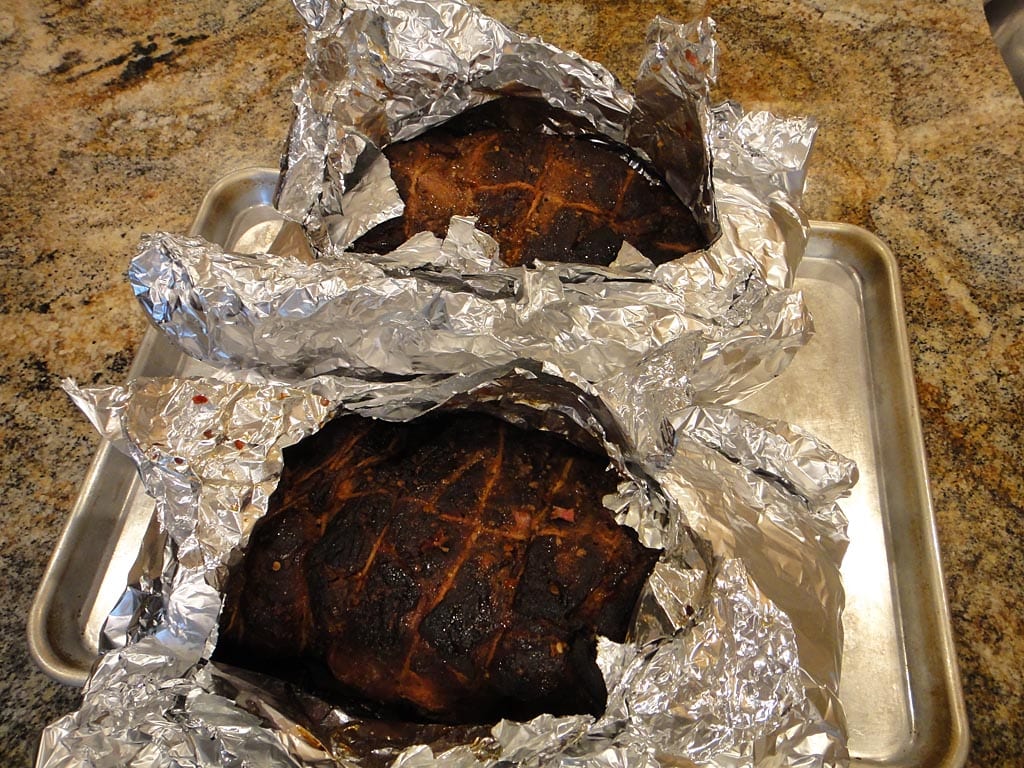
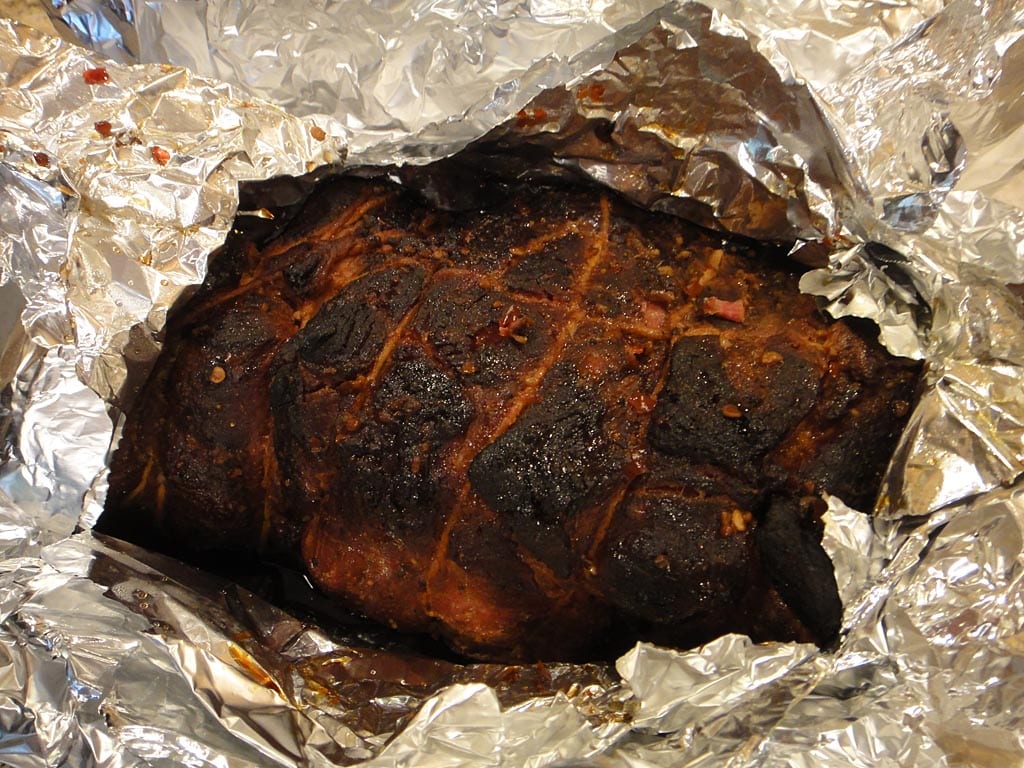
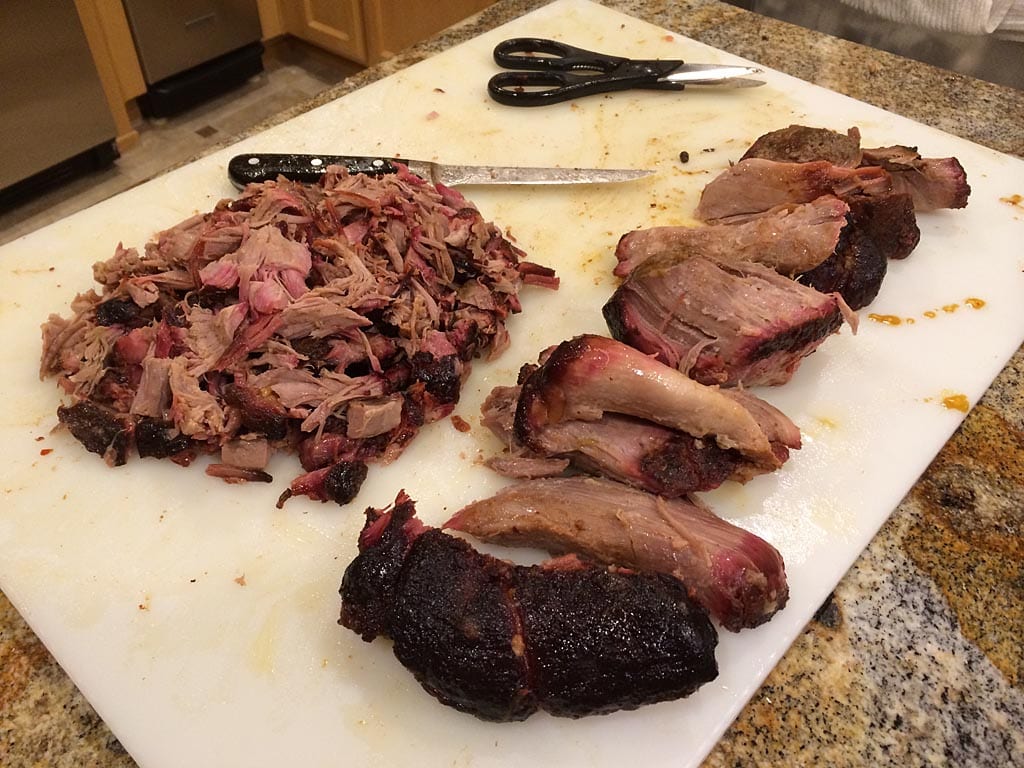

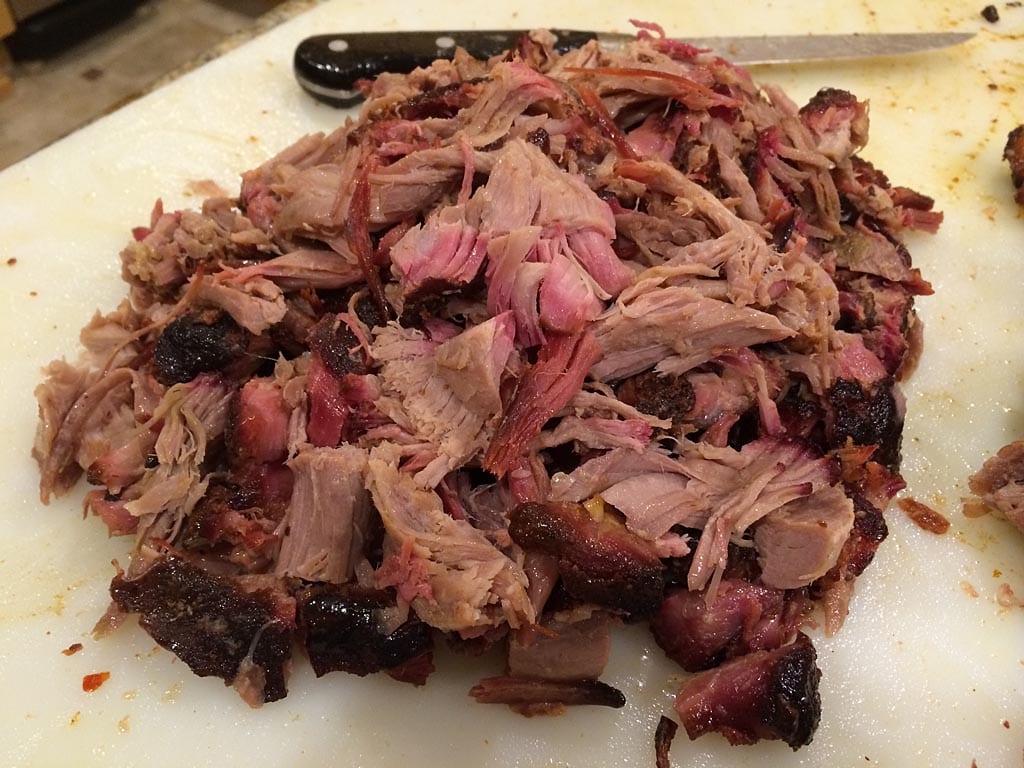
Once the pork butts reach 195°F, remove them from the smoker. To prevent the meat from overcooking, open the foil partially to let out some heat. When the pork butts reach 170°F, the meat is ready to handle. See Pork Butt Selection & Preparation for a description of how to pull pork.
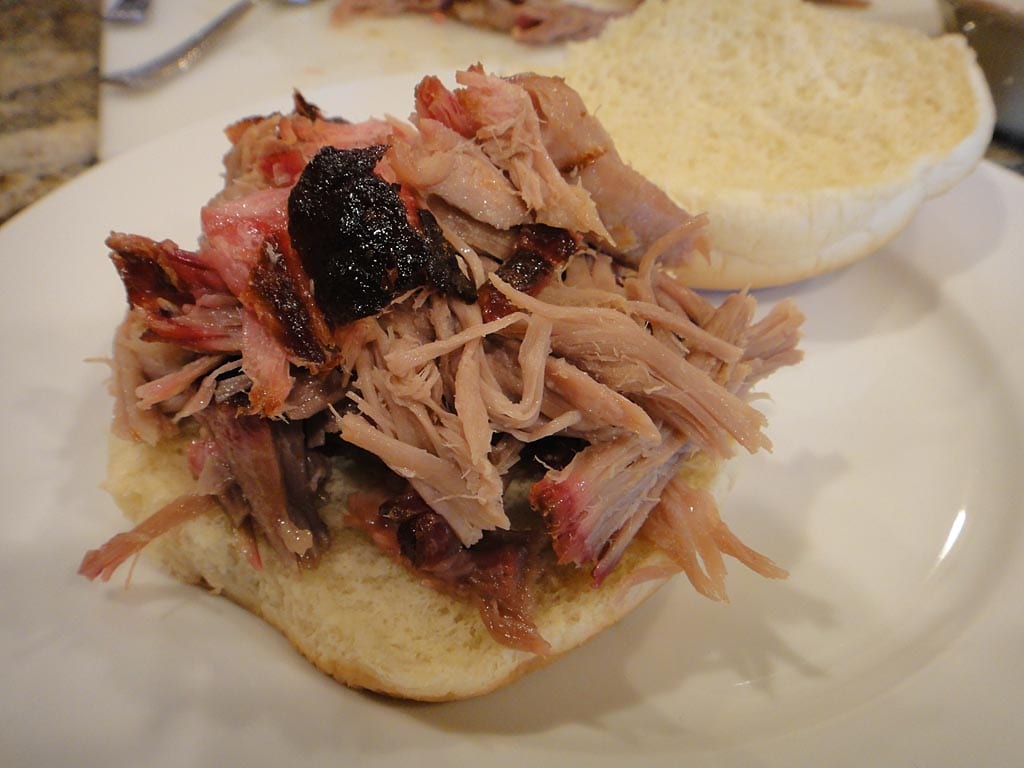
Make sure to mix the pulled pork so everyone gets some of the dark outside meat along with the light inside meat. For additional flavor, season the meat with additional rub and your favorite barbecue sauce.
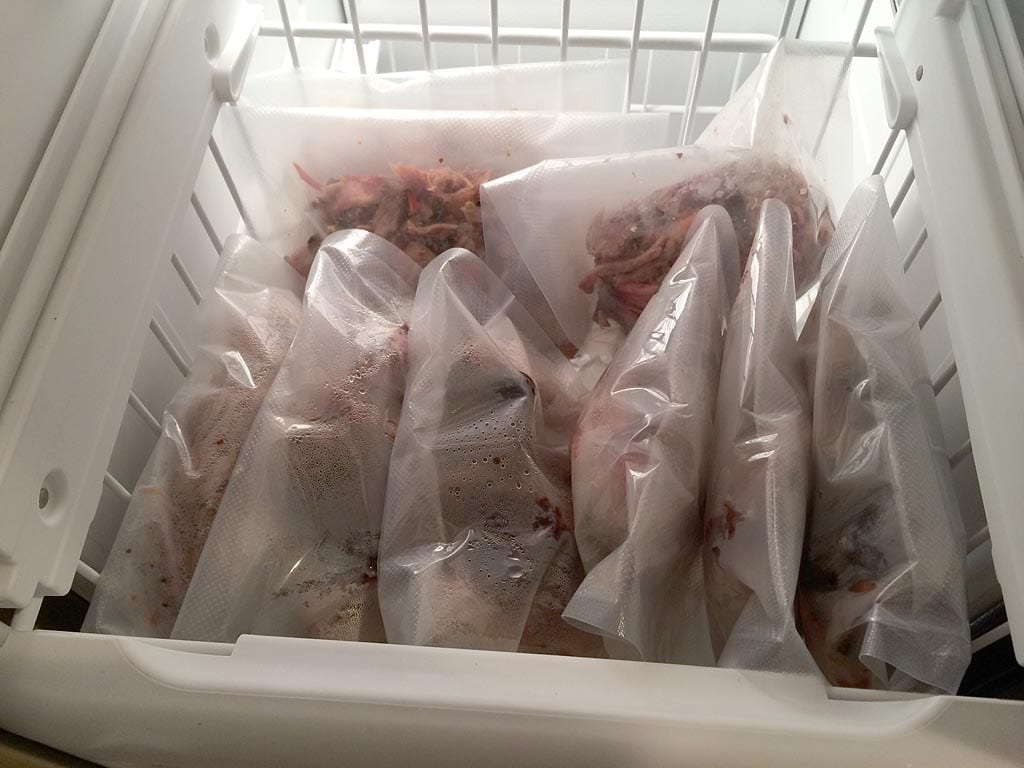
Leftover pork butt can be vacuum-packed in FoodSaver bags and frozen. Just defrost, reheat at 20% power in the microwave, and enjoy!
More Pork Butt Links On TVWB
- Pork Butt – Smoke & Spice The Renowned Mr. Brown
- Pork Butt – Slathered With Mustard & Rub
- Pork Butt – Chris Lilly Big Bob Gibson Championship Injection
- Pork Butt – Untrimmed Direct Heat
- Pork Butt – Buckboard Bacon
- Pork Butts In Foil Pans
- Pulled Pork Butt Servings Calculator
- Pork Butt Selection & Preparation


