Summary
- Buy a whole skinless pork belly and cut into thirds.
- Prepare a cure mixture of Morton Tender Quick and sugar and apply to each piece of pork belly.
- Refrigerator for 7 days, turning once a day.
- Rinse cured meat under cold running water, pat dry, and allow to air-dry in the refrigerator for 8 hours.
- Cold-smoke in the Weber smoker with hickory smoke wood to an internal temperature of 140°F.
- Place smoked bacon in Ziploc bag and submerge in ice water to chill.
- Slice, cook and enjoy.
While the bacon craze seems to have cooled somewhat in recent years, bacon remains one of America’s favorite smoked meats, with an ever-increasing range of products from basic to artisinal, and in a variety of slice thicknesses and smoke flavors. While there are many delicious options available in stores and by mail order, there are some people who want to try making bacon for themselves.
In June 2011, a member of The Virtual Weber Bulletin Board named Bob Correll posted a message titled Bacon Made Easy. In it, Bob described the simple process he uses to make his own bacon. At the time, Bob said, “My hopes are to get more folks making their own bacon, and thought some recipes sound daunting, with all the precise measurements and additional ingredients.”
Well, Bob’s post really took off! At the time of this writing in August 2016, there have been over 400 replies to Bob’s original post and it’s been viewed over 98,000 views.
Here’s the text of Bob’s original post:
I’m not knocking any posts/recipes on bacon making, but if you want to try your hand at curing/smoking bacon, here is an easy way to start.
Buy some Morton’s Tender Quick, locally if available, or online.
For slab bacon, buy a pork belly. For Canadian bacon, buy a pork loin.
Add 1 Tablespoon of TQ for each pound of meat. Rub it on the meat. Add brown sugar and/or spices, if you like. Place it in a plastic bag. Put it in the fridge for 7 days, turning each day.
Day 7, rinse very well in cool water, pat dry, put on a wire cooling rack, place in the fridge for a day, or at least several hours.
Cool smoke to around 145°F internal.
Slice, fry, and enjoy!
I’ve made bacon several ways, for many years, and this is still my preferred method.
Edit to add: After removing from the smoker or grill, bag it air tight and place in ice water to rapidly cool.
You can read Bob’s original post and the 400+ replies to it here.
I asked Bob to take some photos the next time he made bacon using pork belly in his Weber Smokey Mountain Cooker, and he did just that in May 2016. Here are those photos along with a more detailed description of the meat selection, curing and cold-smoking process.
You may notice some minor variations between what Bob wrote in his June 2011 post and how he actually did it in May 2016 (for example, air-drying time in the refrigerator and final internal meat temperature), but those differences aren’t important. The method works fine either way.
Note: It was recently brought to my attention that the Morton salt website says the following about Tender Quick:
“We cannot recommend Morton Tender Quick for use with pork belly or bacon. Due to the differing fat content of individual cuts, the curing time for these items may vary significantly. For this reason, we cannot recommend the appropriate amount of Tender Quick or curing time in this application.”
Keep in mind that many people have used this recipe with great success to make bacon, and there are countless recipes on the Internet using Morton Tender Quick to make bacon with pork belly. Readers should decide for themselves how to proceed.
Purchase A Pork Belly
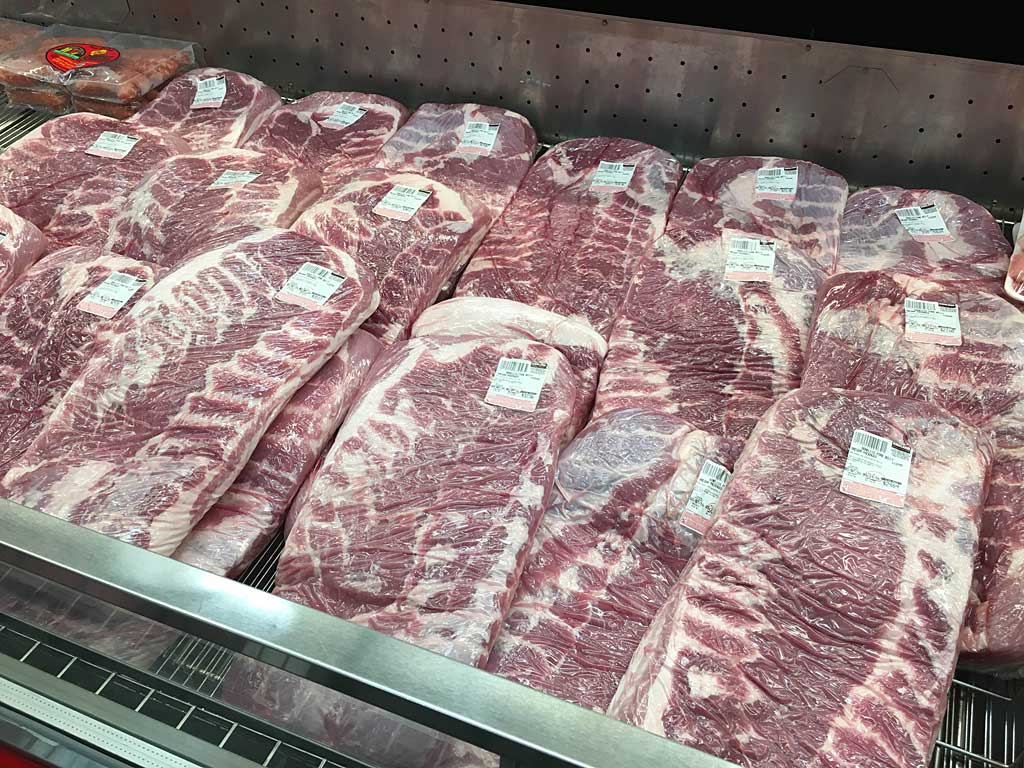
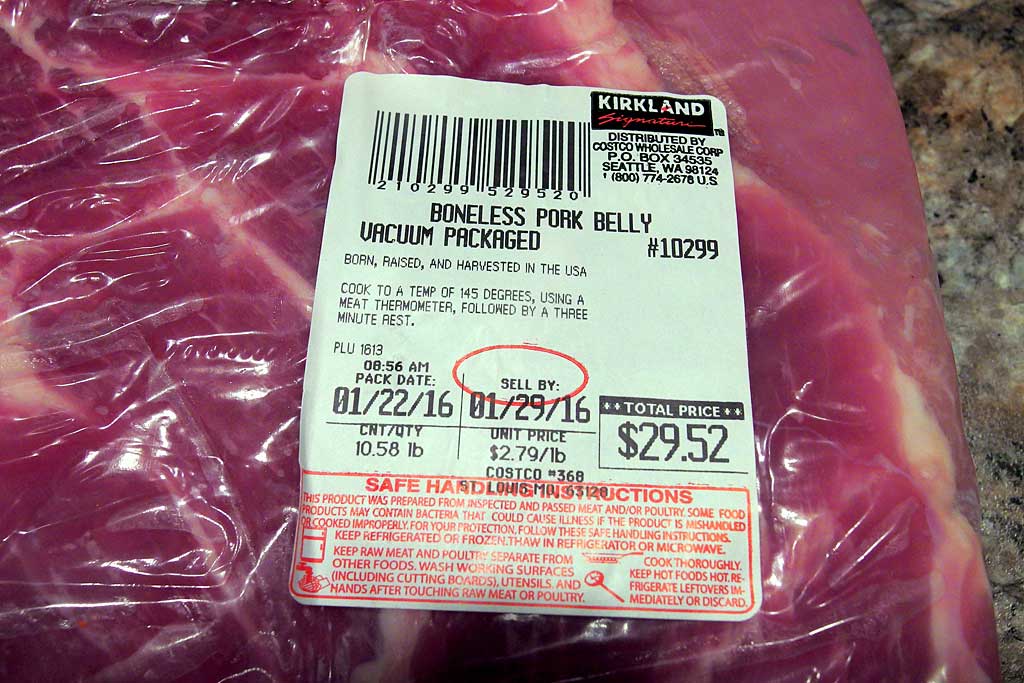
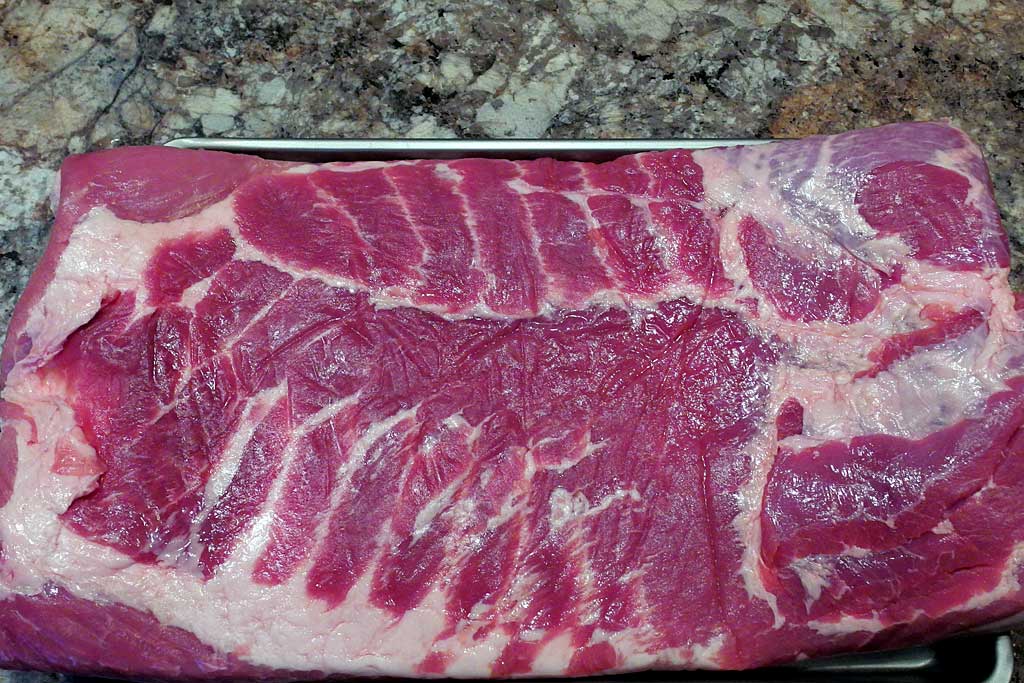
At the time of this writing in August 2016, one of the easiest places to find a pork belly is at Costco. That’s where Bob bought the one shown in these photos. They’re labeled “Boneless Pork Belly” and weigh 9-11 pounds each. If you don’t see whole pork bellies on display at Costco but you do see packages of sliced pork belly on Styrofoam trays, just ask someone in the Meat Department for a whole one.
Bob says it’s hard to determine how lean and meaty a pork belly is in the Cryovac packaging, so he simply chooses the thickest one he can find.
Not every Costco sells pork bellies. Alternative sources include butcher shops, high-end supermarkets, and Asian markets.
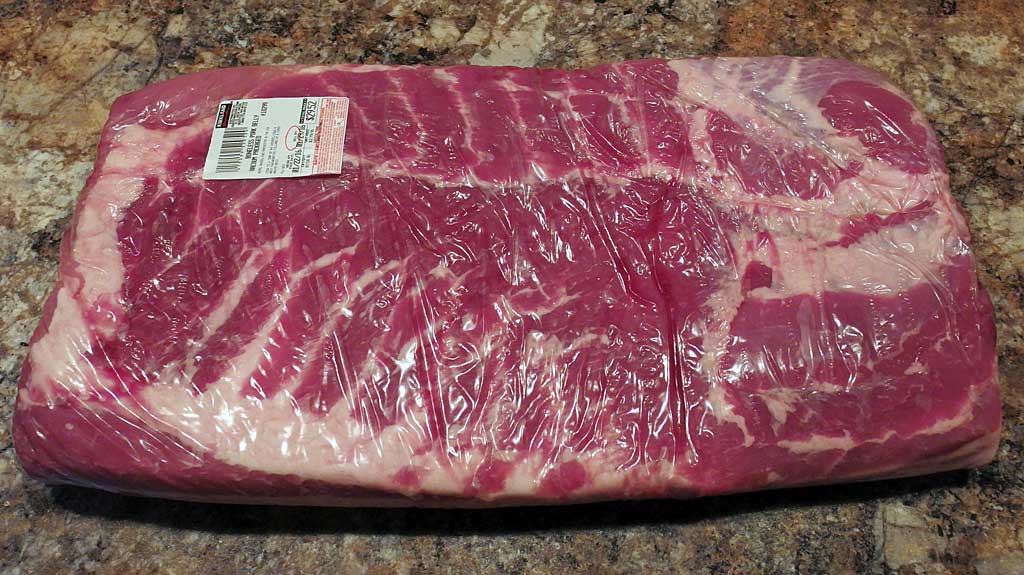
Buy Skinless Pork Belly Whenever Possible
One advantage of the pork bellies at Costco is that they’re sold skinless, meaning that the skin (also known as the rind) has been removed during processing. Skinless pork bellies are desirable because they cure evenly and provide good smoky flavor on both sides of the meat when smoked.
If your pork belly comes skin-on, you have three choices:
- If you have decent knife skills and a sharp butcher knife, your best bet for even curing and smoking is to remove the skin at the beginning of the process. This video shows how it’s done by a professional chef. Don’t worry about removing it in a single piece like the guy in the video, just take care to remove as little of the delicious pork fat under the skin as possible.
- You can cure the pork belly skin-on, then remove it after curing but before smoking. Some people find it’s easier to remove the skin after curing, but you risk uneven curing of the meat itself.
- You can cure and smoke the pork belly skin-on, then remove it after smoking. The skin comes off very easily after smoking, but you risk not only uneven curing of the meat but you lose most of the smoke flavor on the skin side of the meat.
How do you know if your pork belly is skin-on? One side will have a tough exterior layer that looks similar to your own skin. There may be a pink or purple USDA inspection stamp on the skin, and if you see nipples—yes, nipples—you know for sure that you’ve got skin-on pork belly.
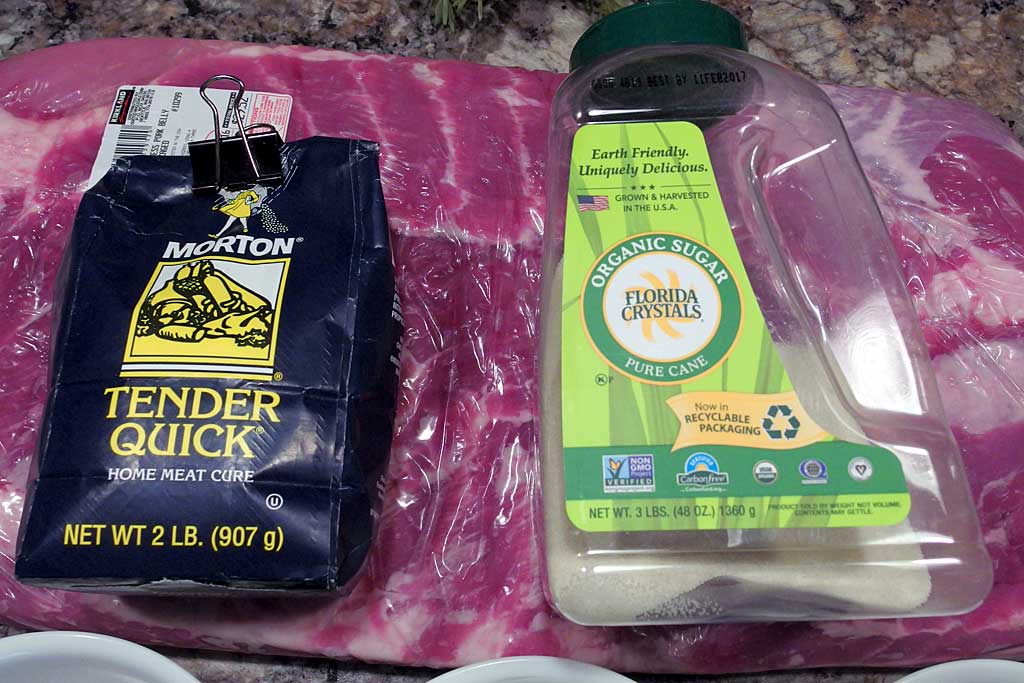
Two Required Ingredients: Morton Tender Quick + Sugar
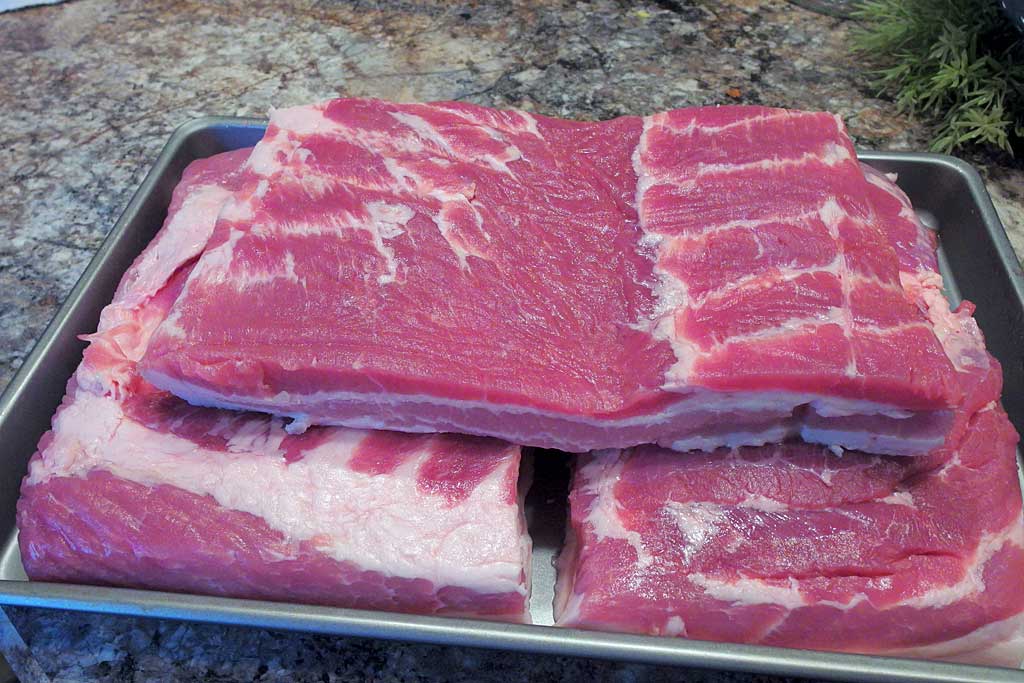
Bob started by cutting the whole pork belly into three pieces of approximately equal size. This allows him to vary the flavor of the cure applied to each piece and makes it easier to fit the pieces into the smoker later.
To prepare the cure, Bob used three bowls—one for each piece of meat—and measured 1 level Tablespoon of Morton Tender Quick Home Meat Cure (MTQ) per pound of meat into each bowl. For this 10.58 pound belly, Bob placed about 3.5 Tablespoons of MTQ into each bowl. (Remember, 1 Tablespoon = 3 teaspoons, 0.5 Tablespoon = 1.5 teaspoons.)
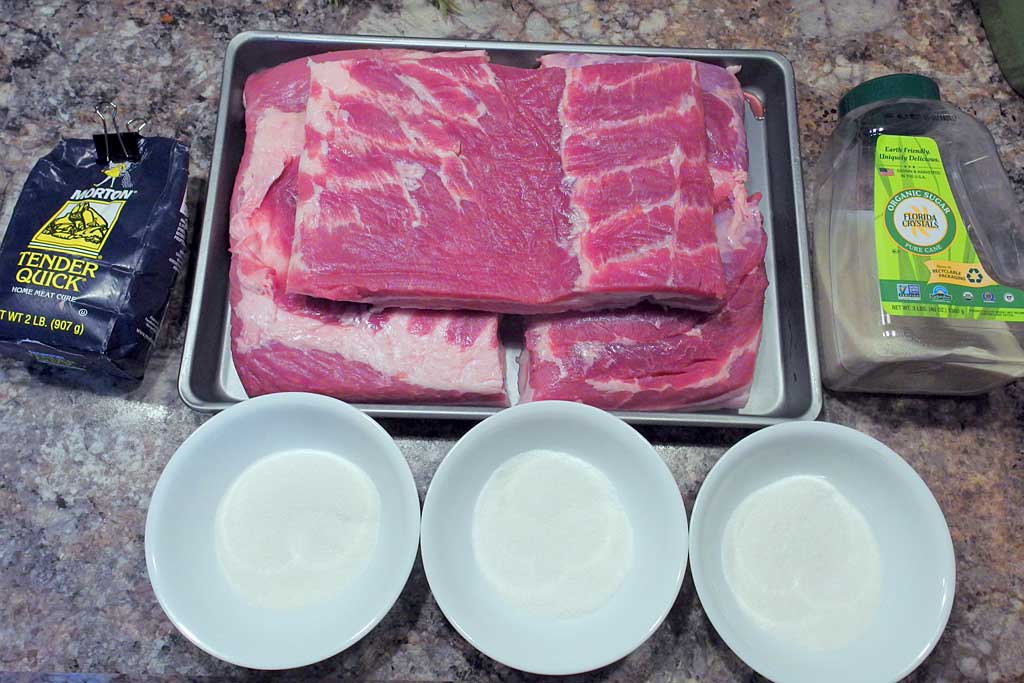 Next, Bob added an equal amount of sugar to each bowl and mixed well. For this pork belly, Bob used the same organic cane sugar on all three pieces, about 3.5 Tablespoons per bowl. If you want to try making different flavors of bacon, use white sugar in the first bowl, brown sugar in the second, and maple sugar in the third.
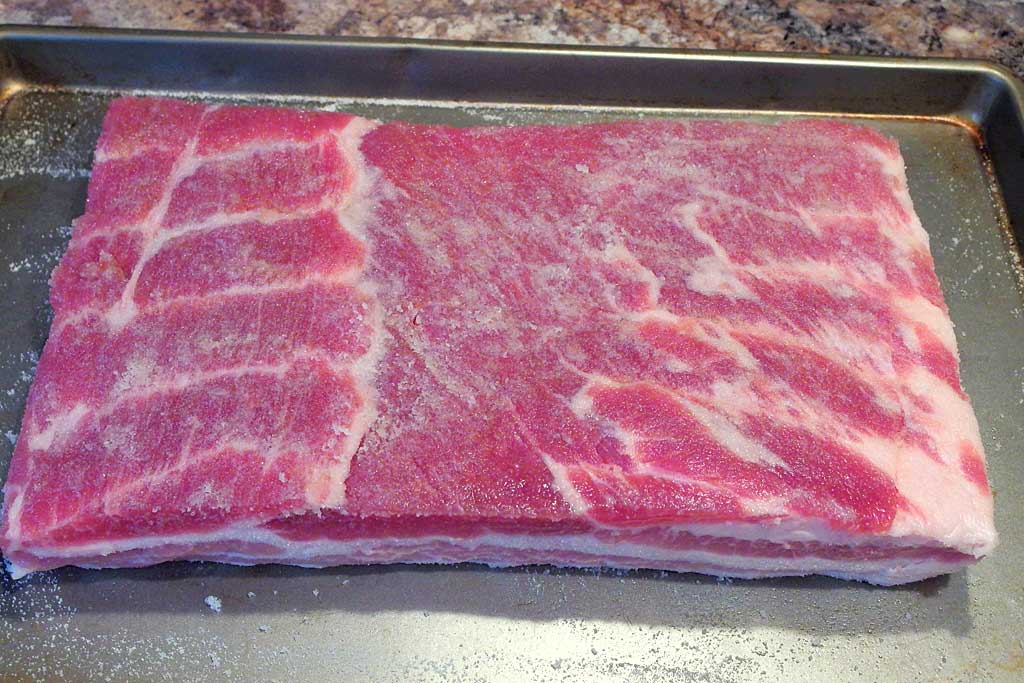
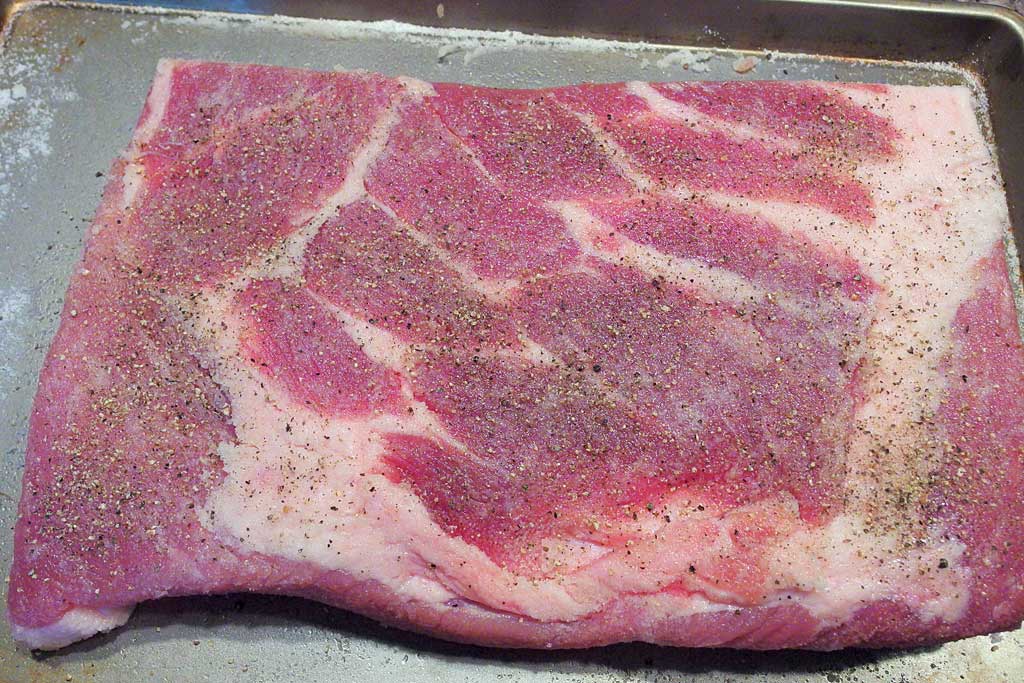
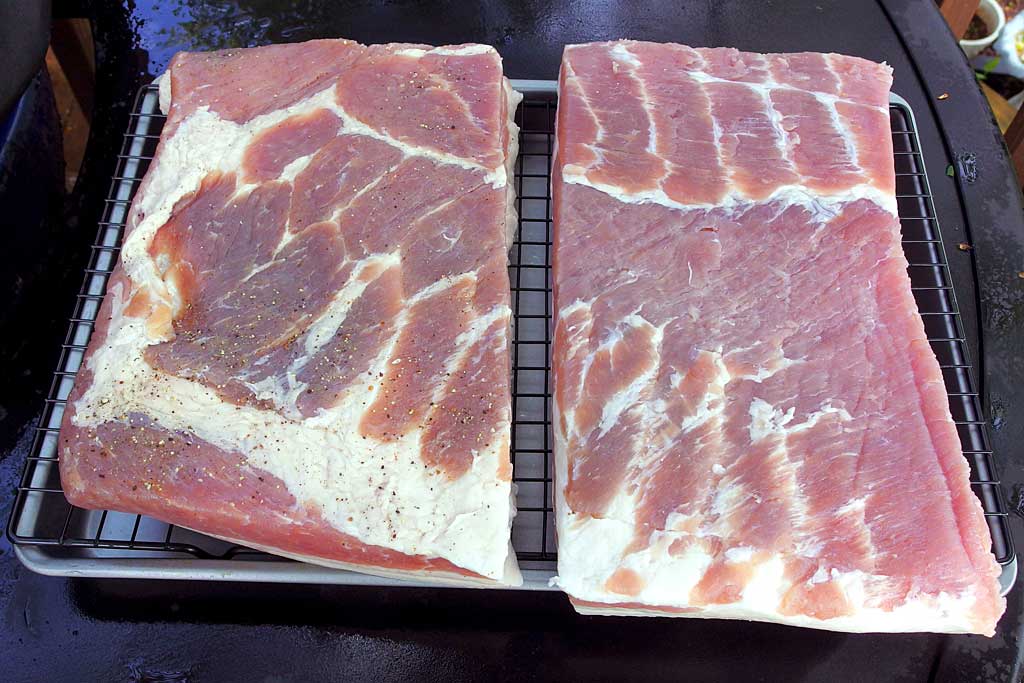
Place a piece of pork belly on a rimmed baking sheet pan and rub the cure mixture evenly on all sides. If you want to sprinkle black pepper onto any of the slabs, as an optional ingredient, do it now and to your taste.
This photo shows the cure applied to one piece of belly.
This photo shows another piece with cure and black pepper applied.
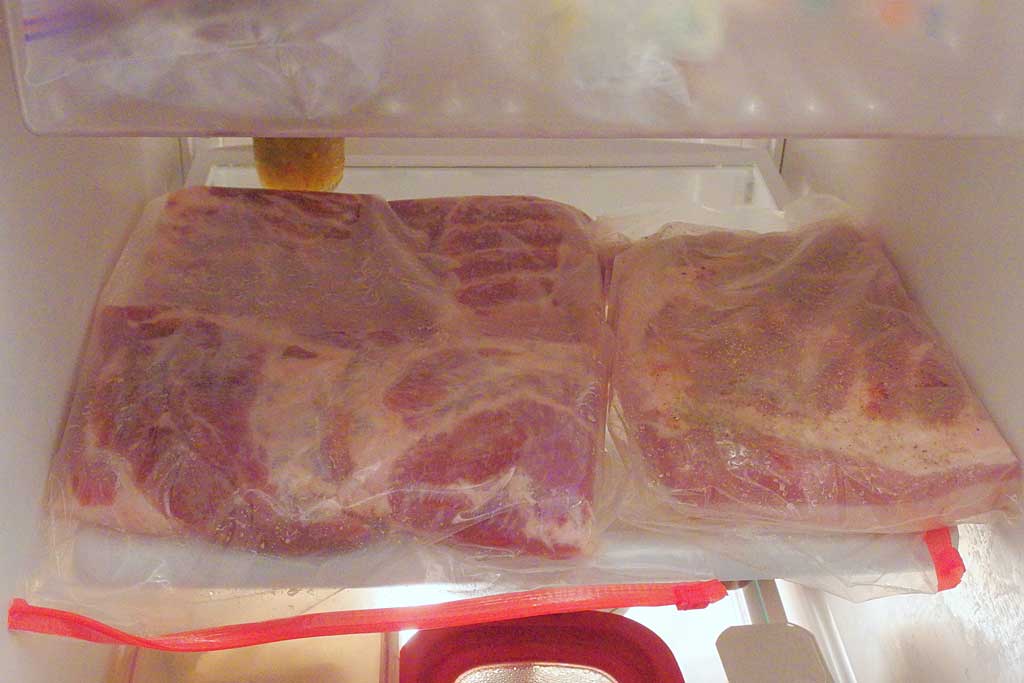
Place the piece of pork belly into a Ziploc bag along with any cure left in the bottom of the baking sheet. Seal the bag, pressing out as much air as possible, and place in the refrigerator on a rimmed baking sheet pan in case the bag leaks.
Repeat the process with the remaining pieces of pork belly.
Allow the pork belly to cure in the refrigerator for 7 days. Flip the bags over once a day to promote even curing. Some liquid will accumulate inside the bags as moisture is drawn out of the meat, which is normal.
Morton Tender Quick contains a mixture of salt, sugar, sodium nitrate and sodium nitrite (curing agents), and propylene glycol (keeps the mixture uniform). It is available in many supermarkets and online stores including Amazon.com.
Rinse & Dry The Pork Belly
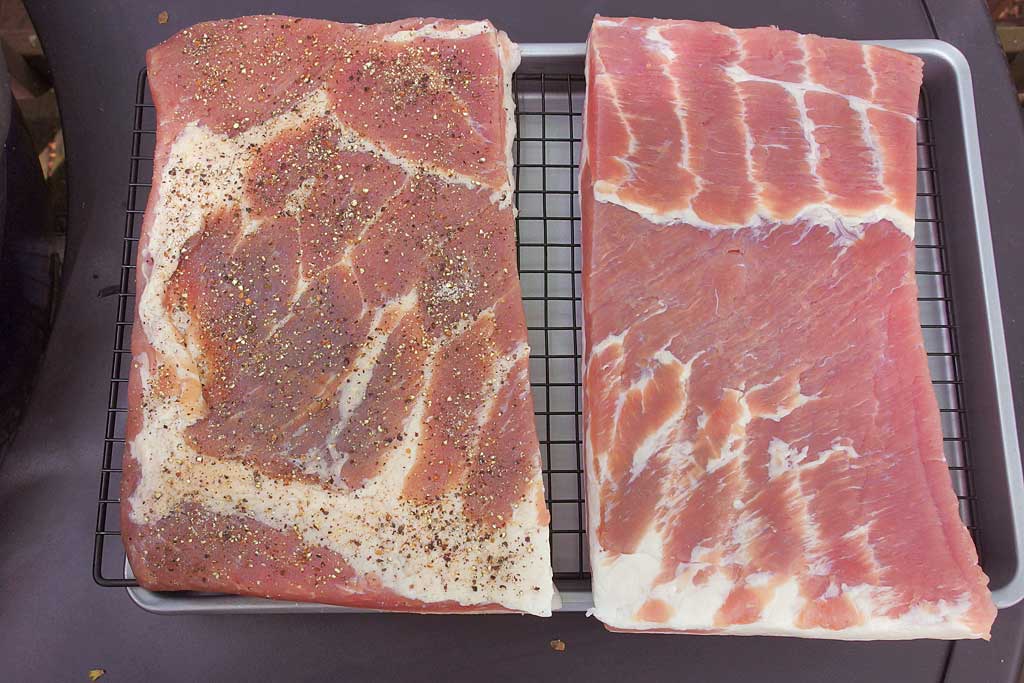
After 7 days, the pork belly should be fully cured. The meat is cured when it feels firm to the touch. If you have any doubts, there’s no harm in letting the meat cure for an additional day or two.
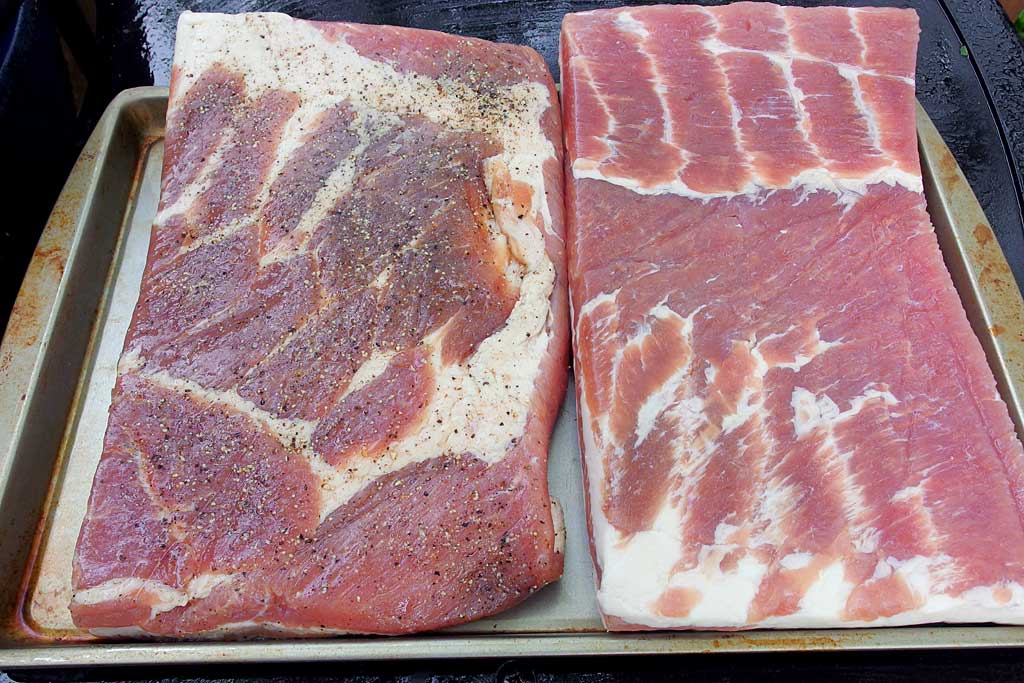
This photo shows how the meat looks after curing.
Bob gave each piece a thorough rinse under cold running water to remove excess cure, then patted the meat dry with paper towels. If you’re sensitive to salty foods, you can take the optional step of soaking the pieces in cold water for an hour or two after rinsing to remove more salt. Before you soak the meat in water, you can test it for saltiness by trimming off a small piece, frying it, and tasting it.
This photo shows how the meat looks after rinsing.
Next, Bob placed the pork belly pieces on a wire cooling rack over a rimmed baking sheet pan and allowed the meat to dry uncovered in the refrigerator for 8 hours. This causes a pellicle to form, a sticky layer resulting from water-soluble proteins being drawn to the surface of the meat by the rub. This layer attracts and holds smoke particles during cooking.
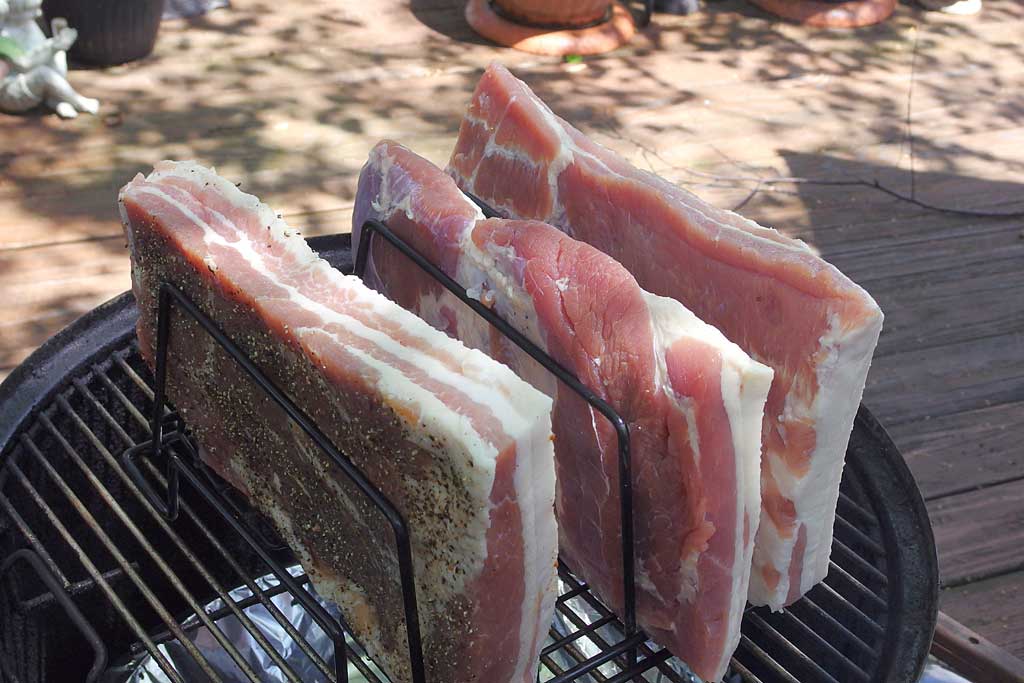
This photo shows how the meat looks after 8 hours of drying in the refrigerator. Bob has pressed some additional black pepper into the piece on the left before it goes into the smoker.
Cold-Smoke The Pork Belly
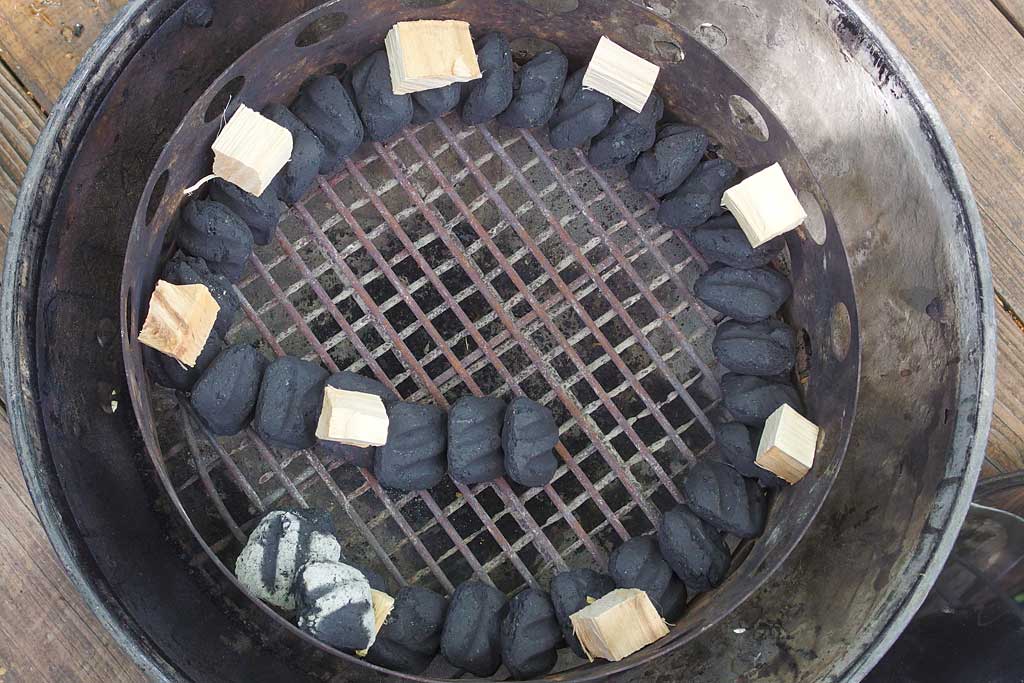
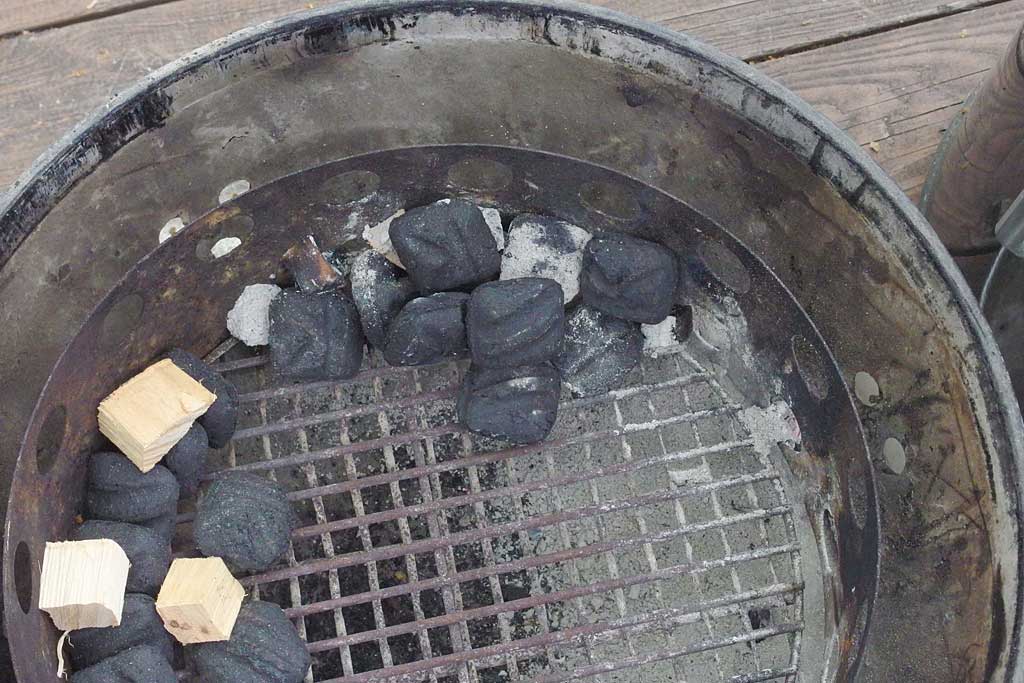
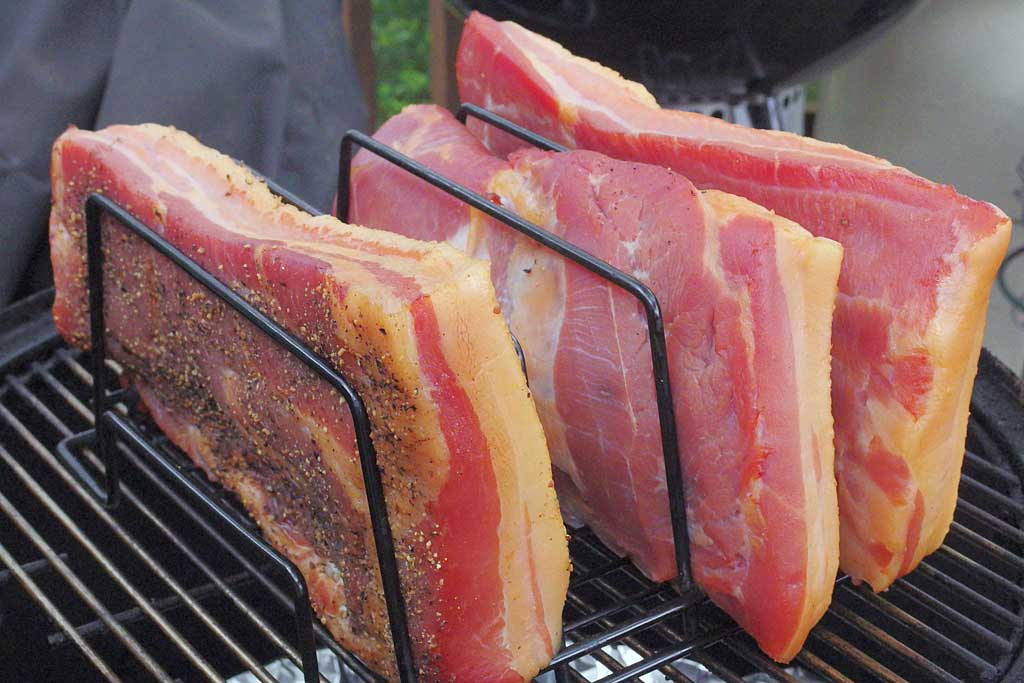
Bob used the Snake Method in the Weber Bullet to cold-smoke the pork belly. He arranged Kingsford Original Charcoal Briquets in a single row around the inside edge of the charcoal chamber, periodically placing small chunks of hickory smoke wood on top of the briquets, then placed two lit briquets on top of a hickory chunk at the head of the snake to start the cold-smoking process.
Bob placed the three pieces of pork belly into a rib rack on the WSM top cooking grate. He cold-smoked the meat at about 135°F for 6 hours, then broke the snake, piled a few briquets together to bump-up the cooker temperature to about 160°F, and left the meat in the cooker for another 3 hours until it reached an internal temperature of 140°F when measured with an instant-read thermometer.
Cool & Refrigerate The Bacon
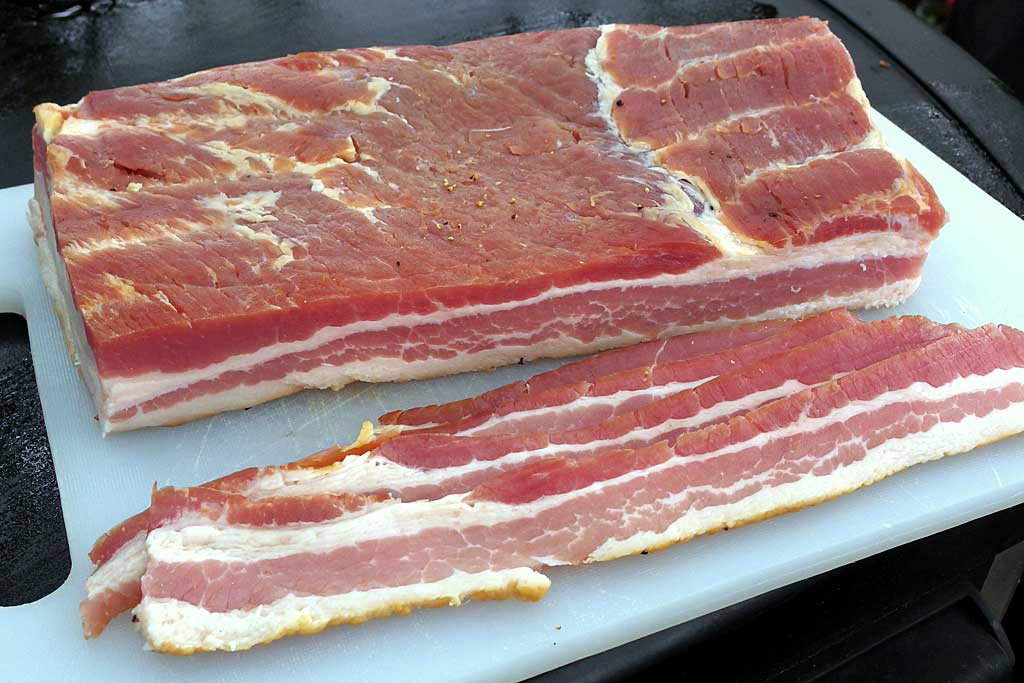
Congratulations! You just made bacon!
Remove the bacon from the cooker. Place it in a Ziploc bag, squeezing out as much air as possible, and submerge it in ice water to chill it quickly.
Once the meat is cold, store some in the refrigerator to enjoy now and put some in the freezer to enjoy later. To prevent freezer burn, wrap the meat tightly in aluminum foil, then place it in a Ziploc freezer bag, again squeezing out as much air as possible. Better yet, use that FoodSaver vacuum sealer languishing away somewhere in the back of a kitchen cabinet.
Slice & Cook The Bacon
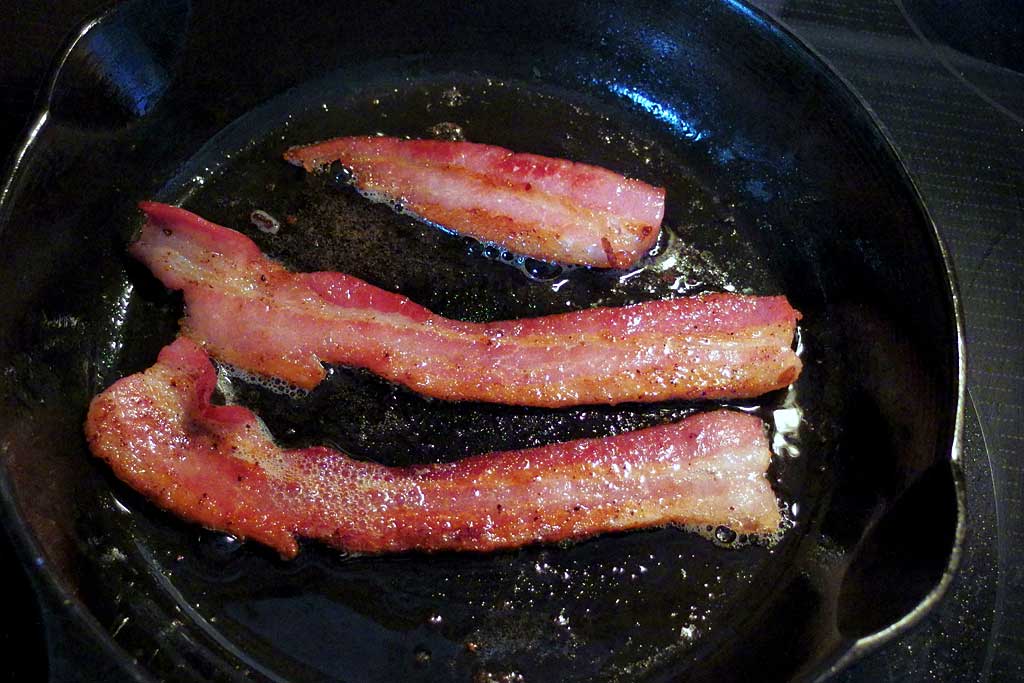
If you’re lucky enough to have an electric meat slicer, now is the time to dig it out and use it. If you don’t, just do your best using a sharp butcher knife. Regardless of whether you go electric or manual, the meat will slice best when very cold. A 15-20 minutes visit to the freezer usually does the trick.
As for cooking the bacon, Bob says, “The best way that I’ve found to keep the sugar from burning is to fry at a lower heat and turn often. Oven ‘frying’ at around 350°F is a great way to make any bacon, but tend and turn the slices. Parchment paper on a rimmed baking sheet pan works well. Strain off the grease and save in the fridge, if you would like to use it for other purposes.”


