Summary
- Use 1-1/2 chimneys of fully lit Kingsford Charcoal Briquets.
- Remove the water pan from the cooker.
- Roast chicken skin-side down on top cooking grate at max temperature for 30 minutes.
- Turn chicken skin-side up and cook another 15-30 minutes until 160-165°F in the breast, 170-175°F in the thigh.
- Brush lightly with sauce once at the end of cooking.
- Let rest for 5 minutes before serving.
After years of cooking chicken halves in many different ways using the Weber Smokey Mountain Cooker, I have reluctantly come to this conclusion:
I cannot smoke chicken halves “low and slow” at 225°F and get skin that’s worth eating.
I can get moist, tender meat. I can get smoky, flavorful meat. I can get beautiful skin that looks delicious. But all too often, the skin is soft and rubbery, especially on the breast and thigh. This is one of the biggest complaints that people have about chicken that’s barbecued “low and slow”.
What I’ve learned is that the problem has to do with the cooking temperature. Chicken skin has a thin layer of fat under it, and when it’s cooked at high temperature, the fat crisps the skin somewhat. When cooking at “low and slow” barbecue temperatures, this fat just melts away without getting hot enough to crisp the skin.
The best way to achieve chicken skin that’s worth eating is to cook the chicken at a higher temperature. Here are some photos I took on June 8, 2014 when I cooked high-temp chicken on the Weber Bullet.
Video: Hot & Fast Chicken
This video demonstrates the steps described in this article.
Preparing The Chicken
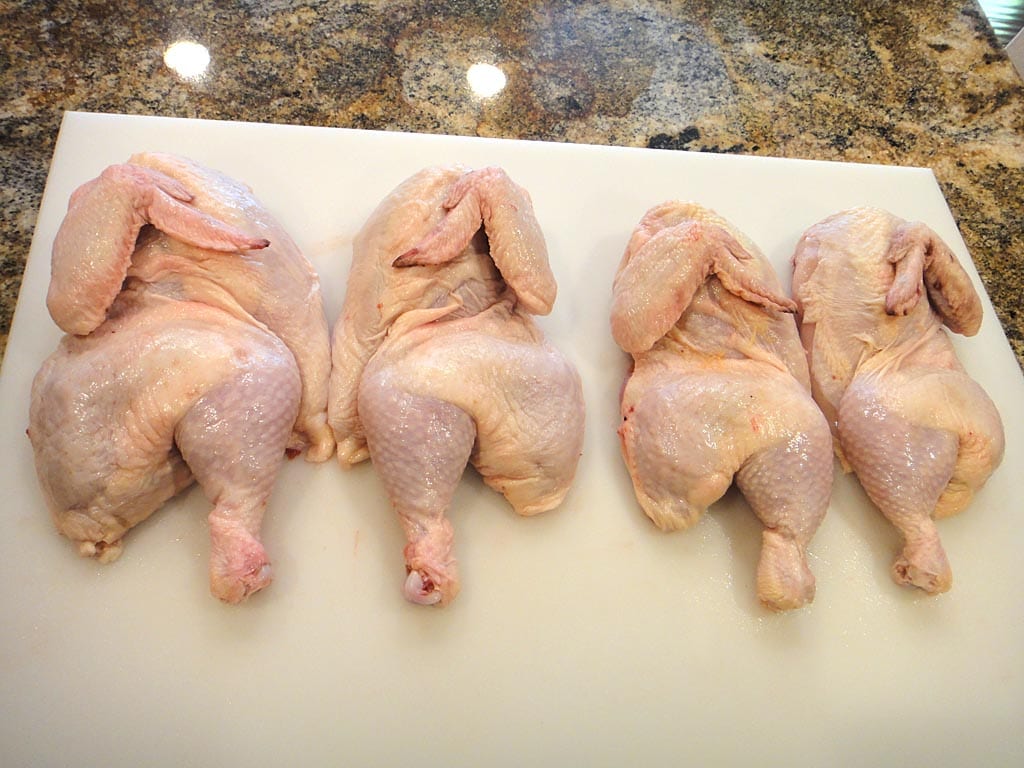
Purchase two whole chickens weighing 3-4 pounds each. Butterfly the chicken by removing the backbone and breastbone then separate into halves.
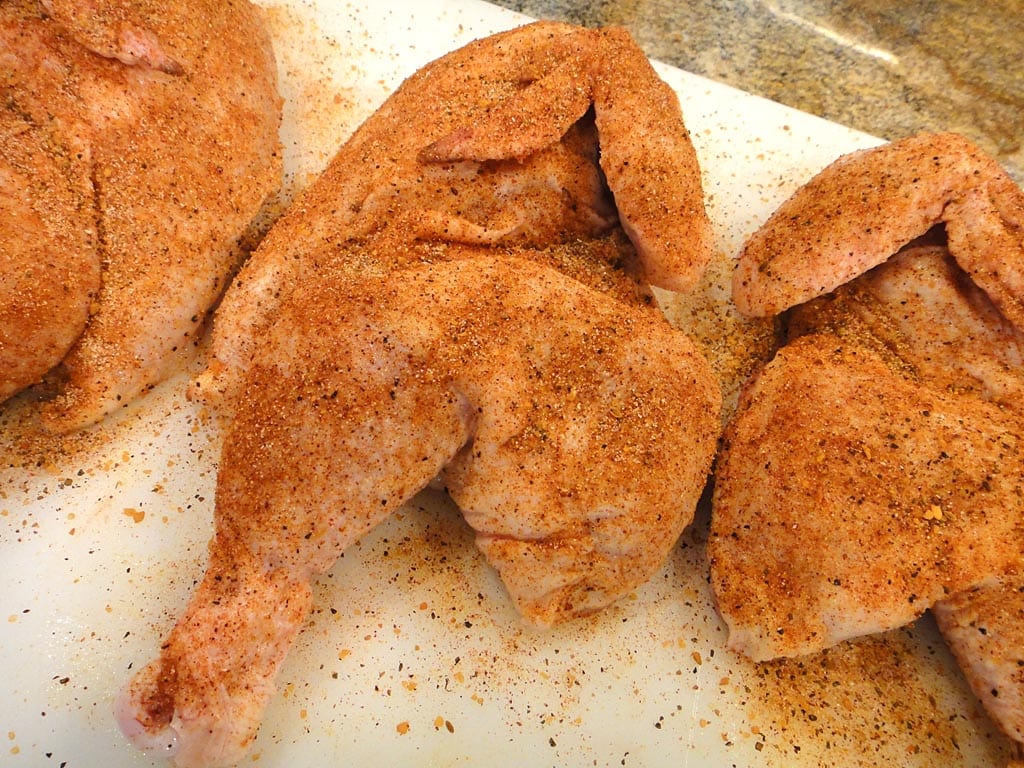
About 30 minutes before cooking, generously sprinkle both sides of the chicken with a favorite rub. For this chicken, I used Slap Yo’ Daddy BBQ All-Purpose Rub.
SYD BBQ All-Purpose Rub
- 2 Tablespoons Lawry’s Seasoned Salt
- 2 Tablespoons McCormick Grill Mates Montreal Steak Seasoning
- 1 Tablespoon white granulated sugar
- 1 Tablespoon mild chili powder
- 1 Tablespoon paprika
- 1 Tablespoon granulated garlic powder
- 1/4 teaspoon cayenne pepper
Combine thoroughly. Makes about 1/2 cup of rub.
Allow the chicken to sit at room temperature while you fire-up the Weber Smokey Mountain Cooker.
Learn More Later: Chicken Selection & Preparation and How To Butterfly A Chicken
Firing-Up The Cooker
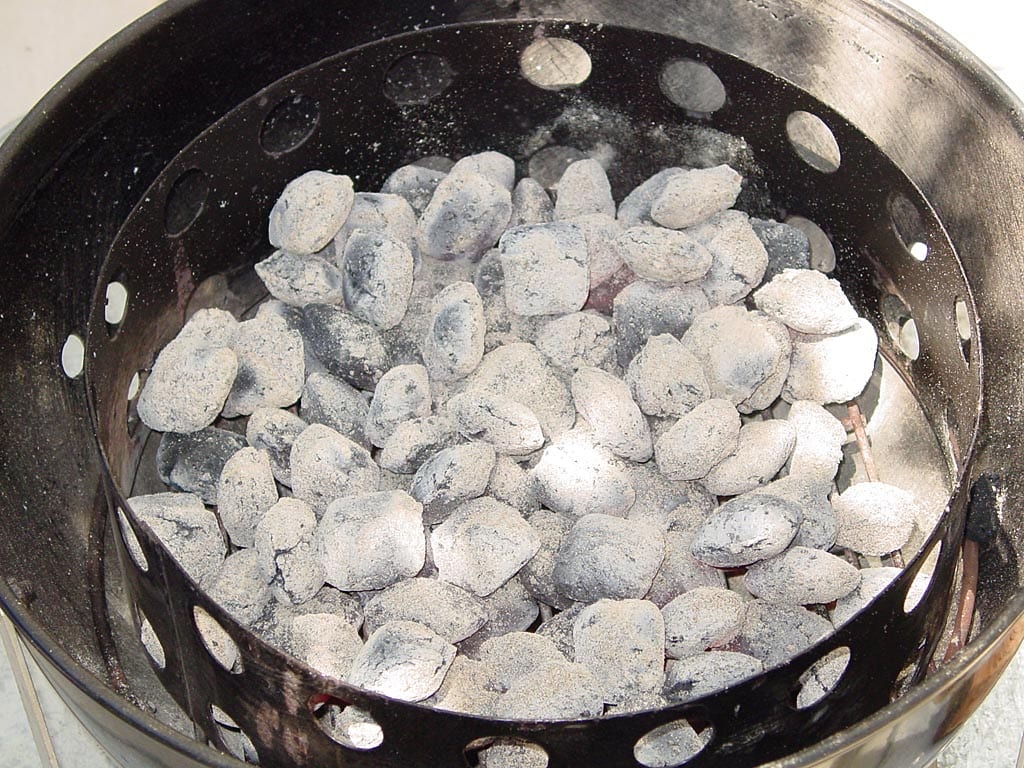
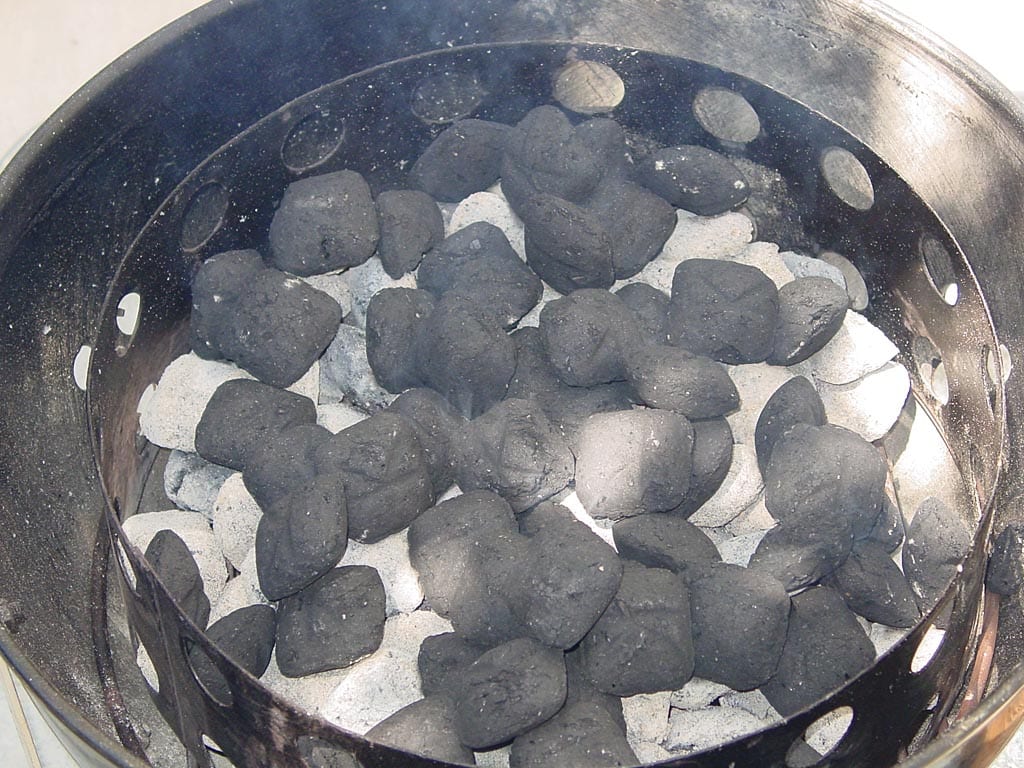
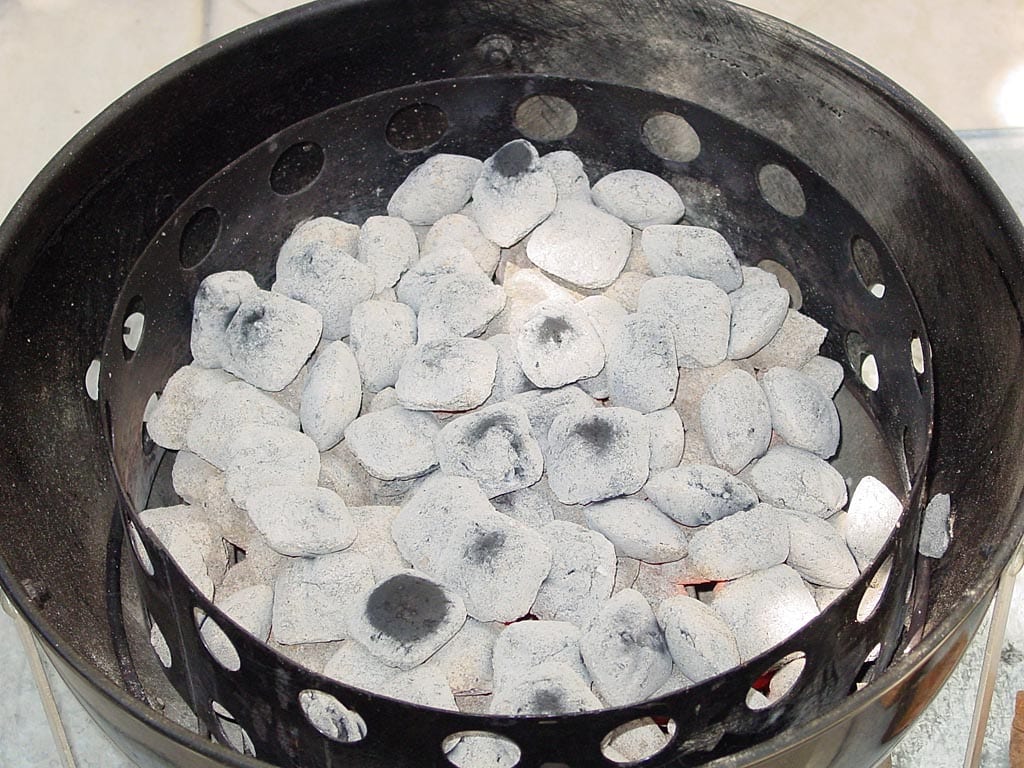
Light a full Weber chimney starter of Kingsford Charcoal Briquets. Spread the hot coals evenly over the charcoal grate. Measure another 1/2 chimney of charcoal and spread these over the hot coals. When all the coals are ashed over, you’re ready to start cooking.
Cooking The Chicken At High Temp
Assemble the WSM, but remove the water pan—you will be cooking the chicken directly over the hot charcoal.
Open the top vent and the 3 bottom vents fully and leave them that way throughout the entire cooking session. You want the WSM to run as hot as possible.
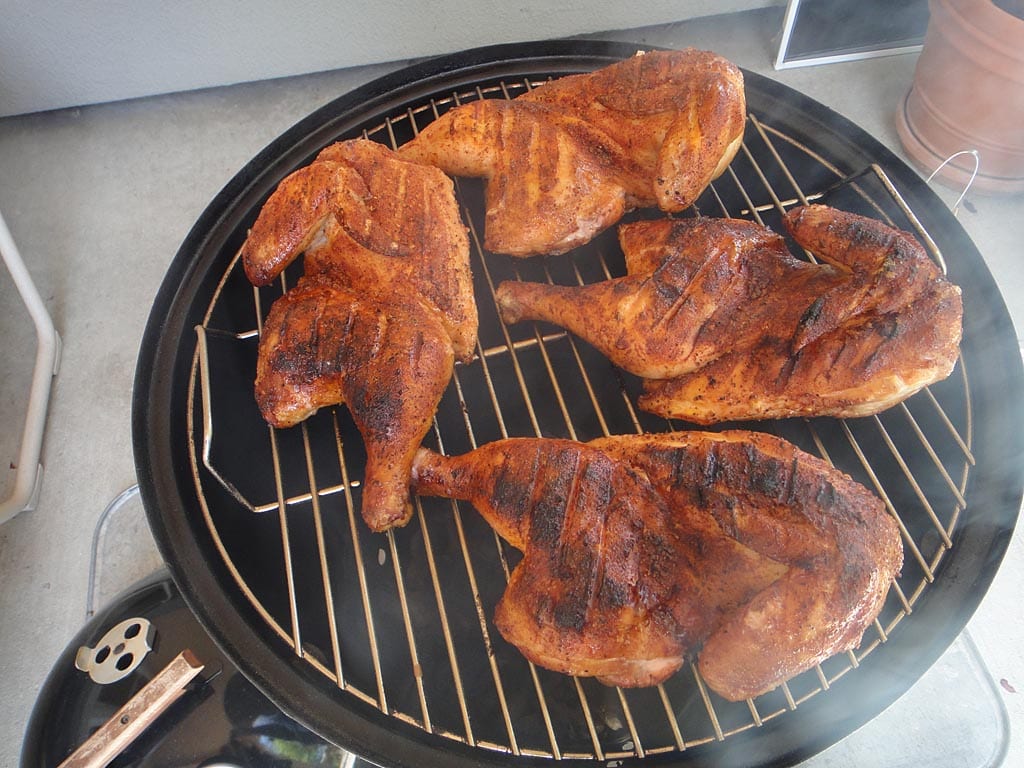
Place the chicken skin-side down on the top cooking grate and replace the lid.
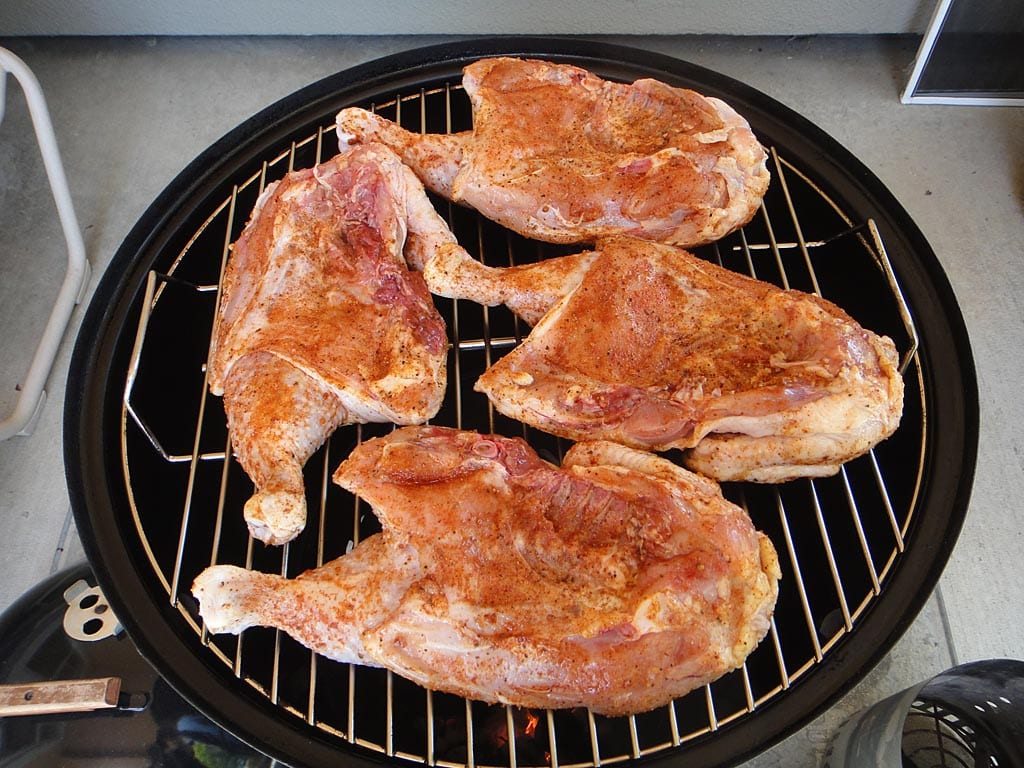
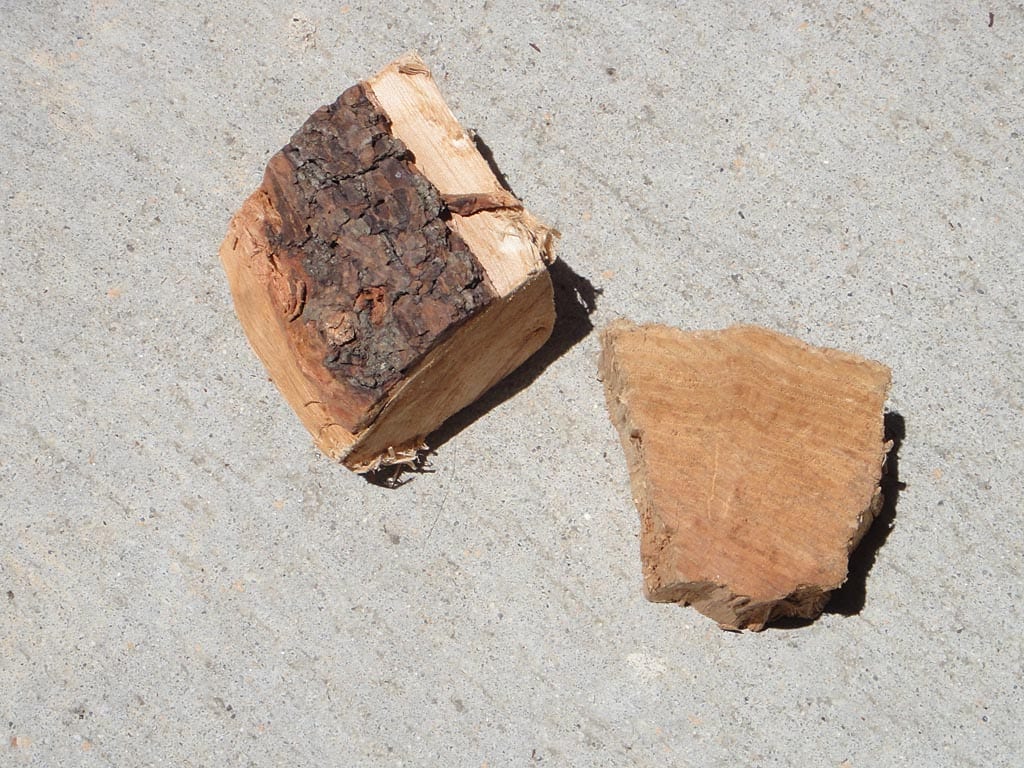
Add 2 chucks of mild smoke wood on top of the hot coals. Each chunk should be small, for example 3″ x 2″ x 2″ or similar. I used cherry wood, but oak, apple, or other mild fruit wood is acceptable. There is no need to soak the wood or remove the bark before use.
Cook the chicken skin-side down for 30 minutes, then turn skin-side up. Continue cooking until the meat registers an internal temperature of 160-165°F in the thickest part of the breast, 170-175°F in the thigh with an instant-read thermometer. This may take an additional 15-30 minutes of cooking.
Here’s how the temps and vent settings went during the cooking session.
| Time | Lid Temp | Vent 1 % | Vent 2 % | Vent 3 % |
| 2:05 pm | – | 100 | 100 | 100 |
| 2:15 pm | 307 | 100 | 100 | 100 |
| 2:25 pm | 310 | 100 | 100 | 100 |
| 2:35 pm (t) | 310 | 100 | 100 | 100 |
| 2:45 pm | 312 | 100 | 100 | 100 |
| 2:55 pm (b) | 310 | 100 | 100 | 100 |
| 3:05 pm | 310 | 100 | 100 | 100 |
(t) turned the chicken
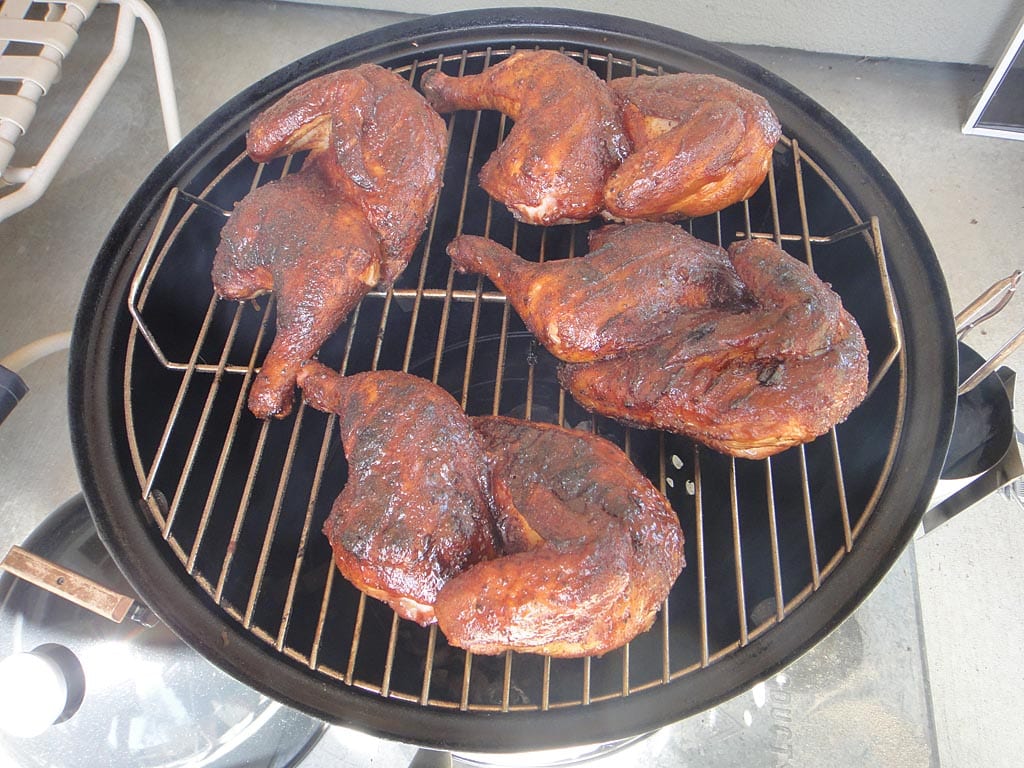
(b) basted with barbecue sauce
Note that the vent percentages represent the way I set the vents at the time indicated.
Might Be The Best You’ve Ever Made
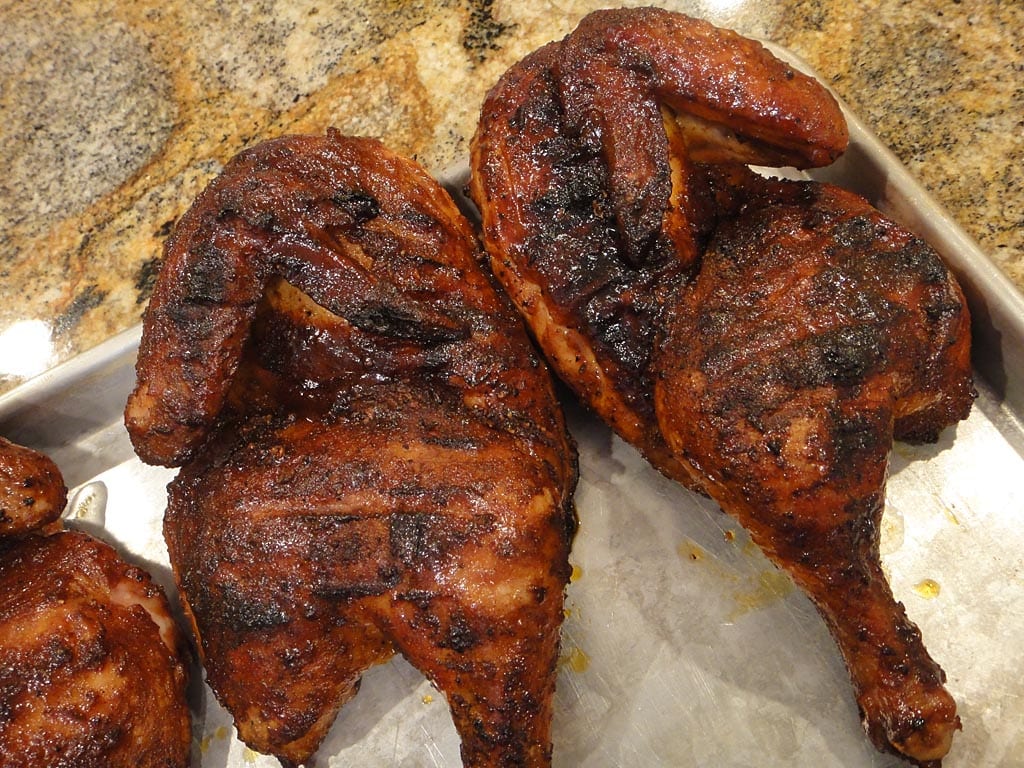
Toward the end of cooking, brush the chicken lightly with a favorite barbecue sauce. I used Kinder’s Mild BBQ Sauce, a local brand in the San Francisco Bay Area.
 Let the chicken rest for 5 minutes before serving.
The chicken shown here took 1 hour to cook at about 310°F. If you can run the WSM even hotter, say 350-360°F, you may be able to shorten the cooking time even more.
The photo below shows the finished product. It had a beautiful mahogany color and looked very appetizing. The chicken was moist and tender, as expected, and had a light, smoky flavor with just a little heat from the rub and sauce. As for the skin, it had some nice charring in spots, the fat was well-rendered, and it was tender enough to bite through and enjoy.
When I served this chicken to my wife, she sat quietly and took several bites before proclaiming, “This might be the best chicken you’ve ever made.” In my book, there is no higher praise than that, and I had to agree, it was pretty darned tasty!
So try this high-heat chicken method soon…I think you’ll like it! We certainly did!
More Chicken Links On TVWB
- Basic Barbecued Chicken
- Basic Marinated Chicken
- Beer Can Chicken
- Cornell Chicken
- Cornish Game Hens – Peach Glaze
- Pulled Chicken Sandwiches
- Alabama-Style Chicken Sandwiches With White Sauce
- Boneless Skinless Chicken Breasts
- Buffalo Wings – Smoked & Deep Fried
- Chicken Selection & Preparation
- How To Butterfly A Chicken


