Summary
- Choose two whole chickens weighing 3.5 – 4 pounds each.
- Butterfly the chicken and split into halves.
- Brine for 1-2 hours, pat dry, then apply rub.
- Light the WSM using the Standard Method and use mild smoke wood.
- Smoke-grill the chicken on bottom cooking grate at 325-375°F, basting with Cornell sauce 3 times and flipping halfway through cooking, until chicken reaches 170-175°F in thigh.
- If skin is not browned enough, crisp directly over hot coals.
- Let chicken rest uncovered 5 minutes before serving.
Robert C. Baker was an inventor and professor at Cornell University from 1957 to 1989 who was deeply involved in poultry science throughout his life. In 1970, he founded Cornell’s Institute of Food Science and Marketing and served as its first director. During his career, he helped develop chicken nuggets long before McDonald’s ever dreamed of them, as well as turkey ham and poultry hot dogs. But in grilling and barbecuing circles, Baker is best known for his world-famous Cornell Chicken, which has been served at his family’s Baker’s Chicken Coop at the New York State Fair in Syracuse, NY since 1949, and discussed in the video below.
The original sauce recipe consists of cooking oil, cider vinegar, salt, pepper, poultry seasoning, and a beaten egg. In 2008, Cook’s Country magazine re-imagined the recipe by brining the chicken for 2 hours, tweaking the sauce by using a good quality olive oil, augmenting the poultry seasoning with some fresh herbs, dropping the egg, and using Dijon mustard for flavor and as a thickener.
Here are some photos I took on August 26, 2012 when I smoke-grilled the Cook’s Country version of Cornell Chicken in the Weber Smokey Mountain Cooker Smoker.
Select & Prep The Chickens
Choose 2 whole chickens weighing 3.5 – 4 pounds each. Remove the neck and giblet package, trim any excess fat from around the cavity opening, butterfly the chickens, and then cut into halves.
Learn More Later: Chicken Selection & Preparation and How To Butterfly A Chicken
Brine The Chicken Halves
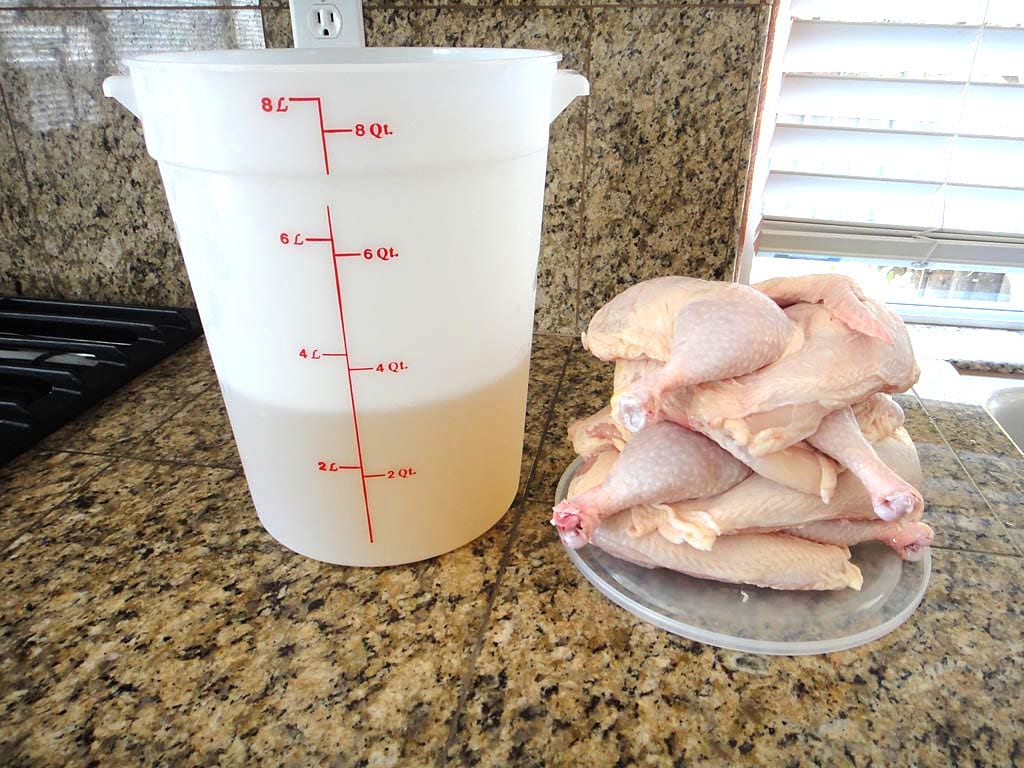
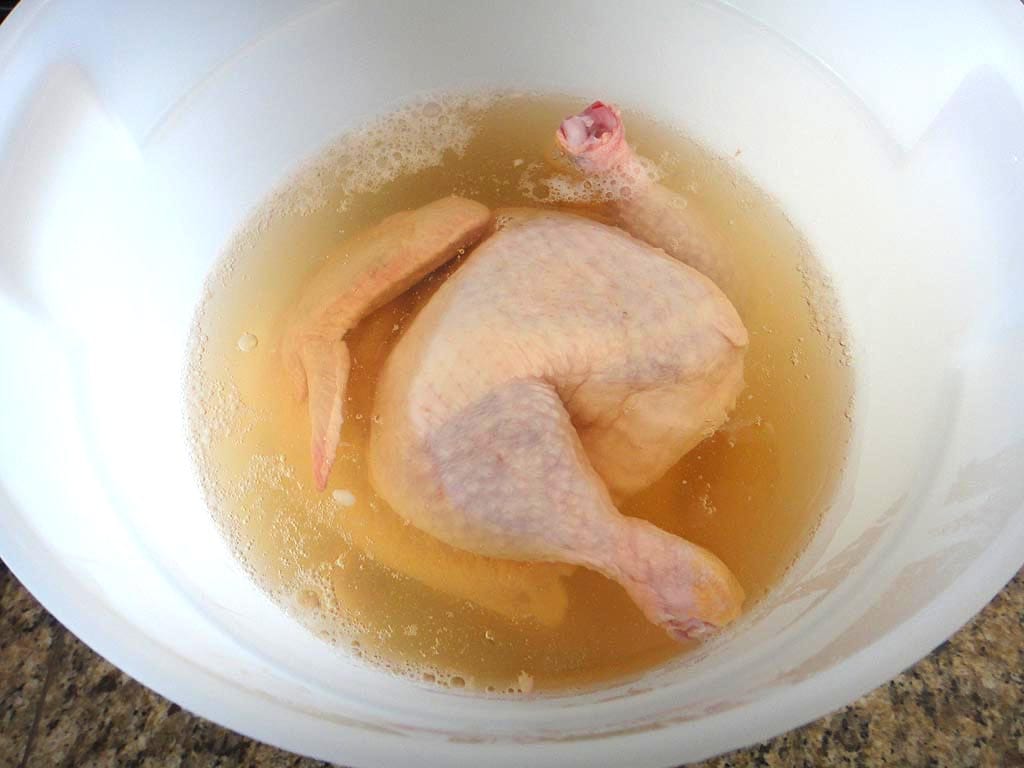
Place 2 quarts of cold water, 3-1/2 cups cider vinegar, and 1/4 cup table salt into a non-reactive container appropriate for brining. Stir to dissolve the salt, add the chicken halves, and refrigerate for 1-2 hours. I brined the chicken shown here for 1 hour.
Learn More Later: All About Brining and Food Grade Plastic Containers For Brining
Prepare the Rub and Sauce
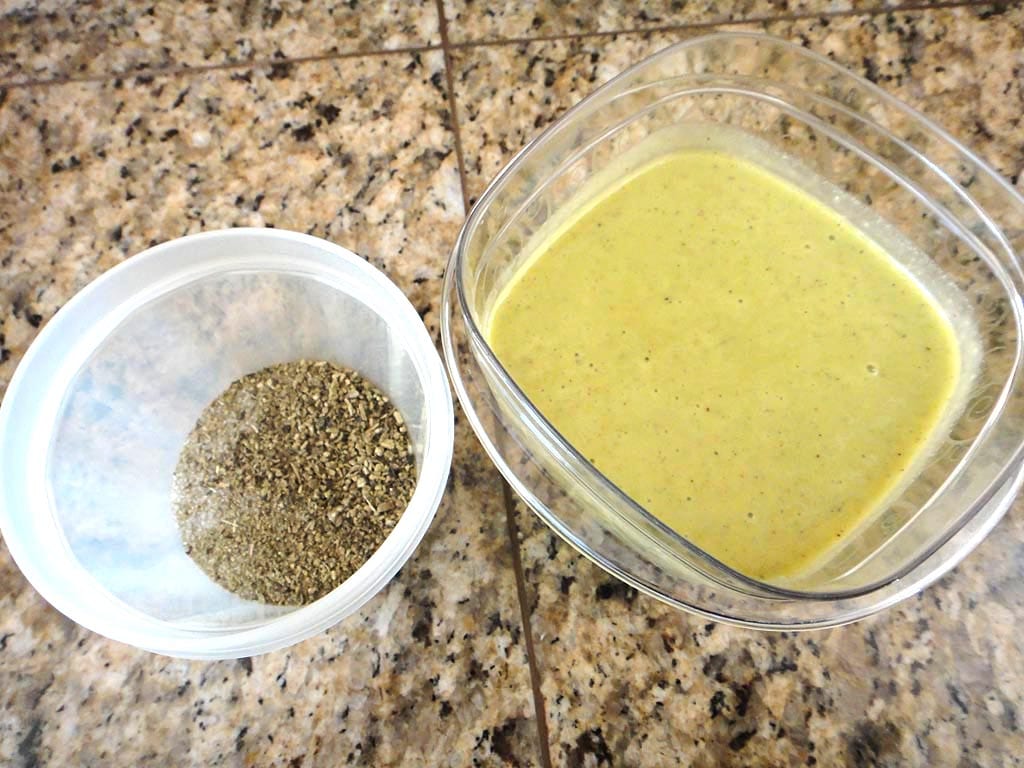 While the chicken is brining, prepare the chicken rub and Cornell sauce.
Cornell Chicken Rub
- 1 Tablespoon poultry seasoning
- 2 teaspoons table salt
- 2 teaspoons black pepper, freshly ground
Combine rub ingredients in a small bowl and set aside.
Cornell Chicken Sauce
- 1/2 cup cider vinegar
- 3 Tablespoons Dijon mustard
- 1 Tablespoon chopped fresh sage leaves
- 1 Tablespoon chopped fresh rosemary
- 1/2 cup olive oil
- 1/2 teaspoon table salt
- 1/2 teaspoon black pepper, freshly ground
Place vinegar, mustard, sage, rosemary, salt, and pepper in blender and process until smooth, about 1 minute. With blender running, slowly add oil until incorporated. Transfer sauce to a bowl for basting later in the cooking process.
Rub The Chicken
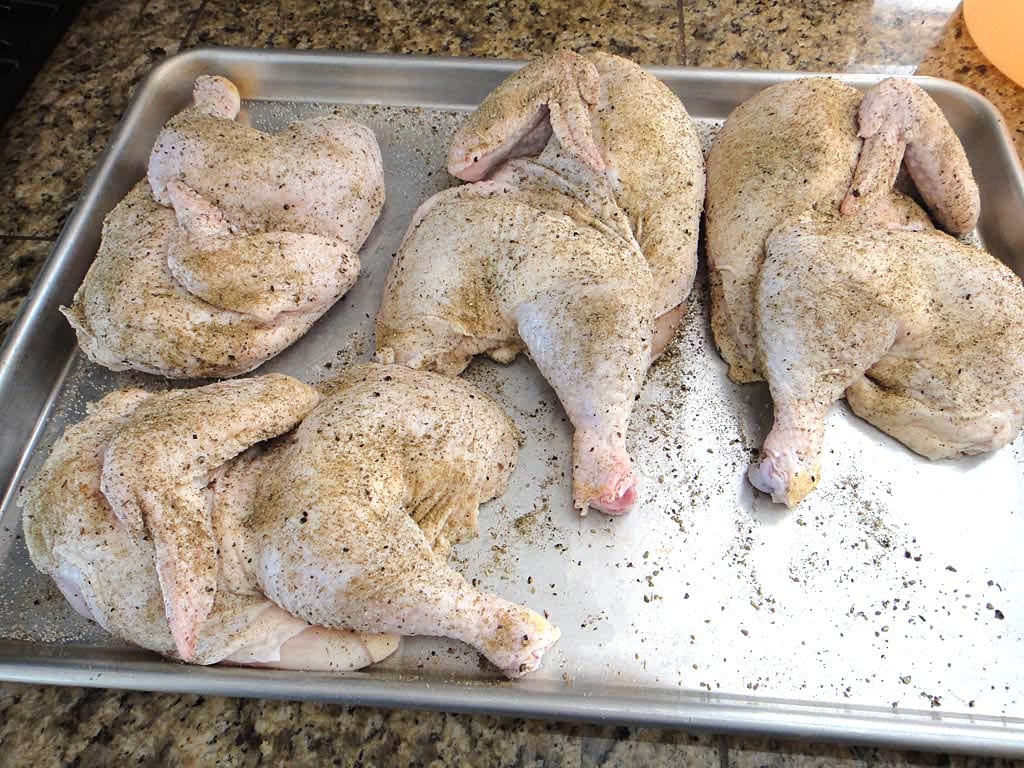 After 1-2 hours, remove the chicken halves from the brine and pat dry with paper towels. Sprinkle both sides with rub and let sit at room temperature while you fire-up the Weber Bullet. Alternatively, you can put the chicken back in the refrigerator and hold it for up to 8 hours before cooking.
Select The Smoke Wood
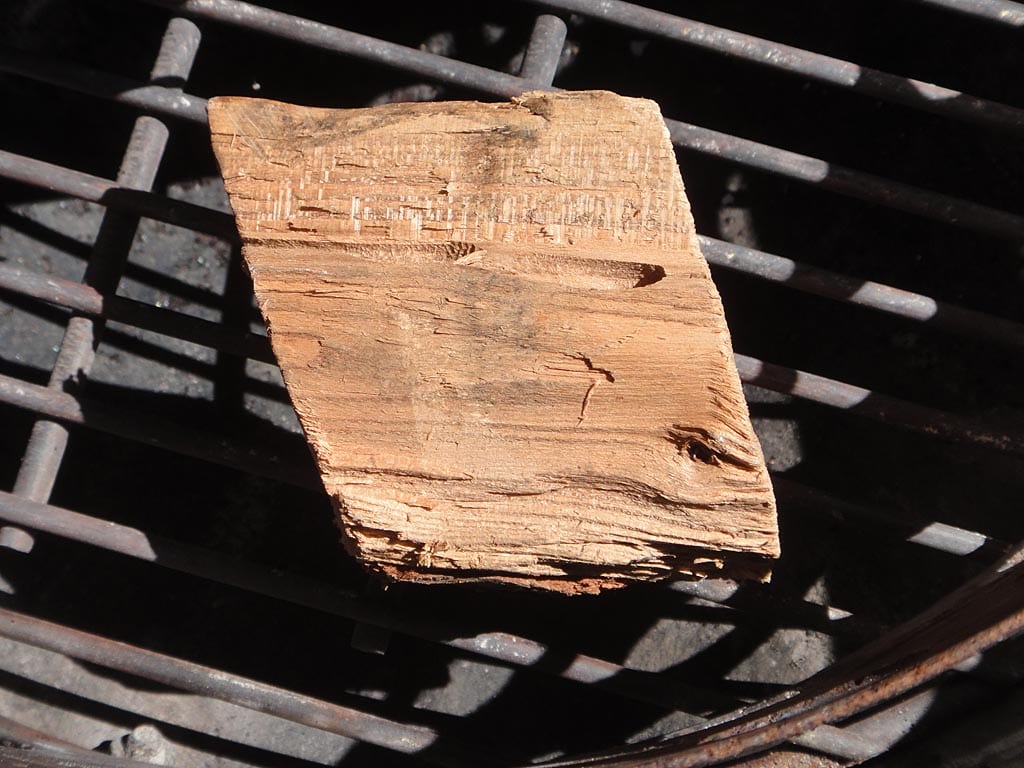 Use two fist-sized chunks of mild smoke wood for this chicken. The smoke flavor should compliment the Cornell sauce, not overwhelm it. I used two chunks of apple wood. There’s no need to soak the chunks in water before use.
Fire-Up The Cooker
If you have two Weber chimney starters, fill both to the top with Kingsford Charcoal Briquets and light. When flames are licking at the briquettes at the top of the chimney and you see signs of gray ash forming, dump all the hot coals into the charcoal chamber and spread them out evenly.
Otherwise, light the WSM using the Standard Method. Light a full Weber chimney starter of Kingsford Charcoal Briquets, spread them evenly within the charcoal chamber, then add another full chimney of unlit briquettes on top of the lit charcoal. When all the charcoal is lit, you’re ready to cook the chicken.
Smoke-Grill The Chicken
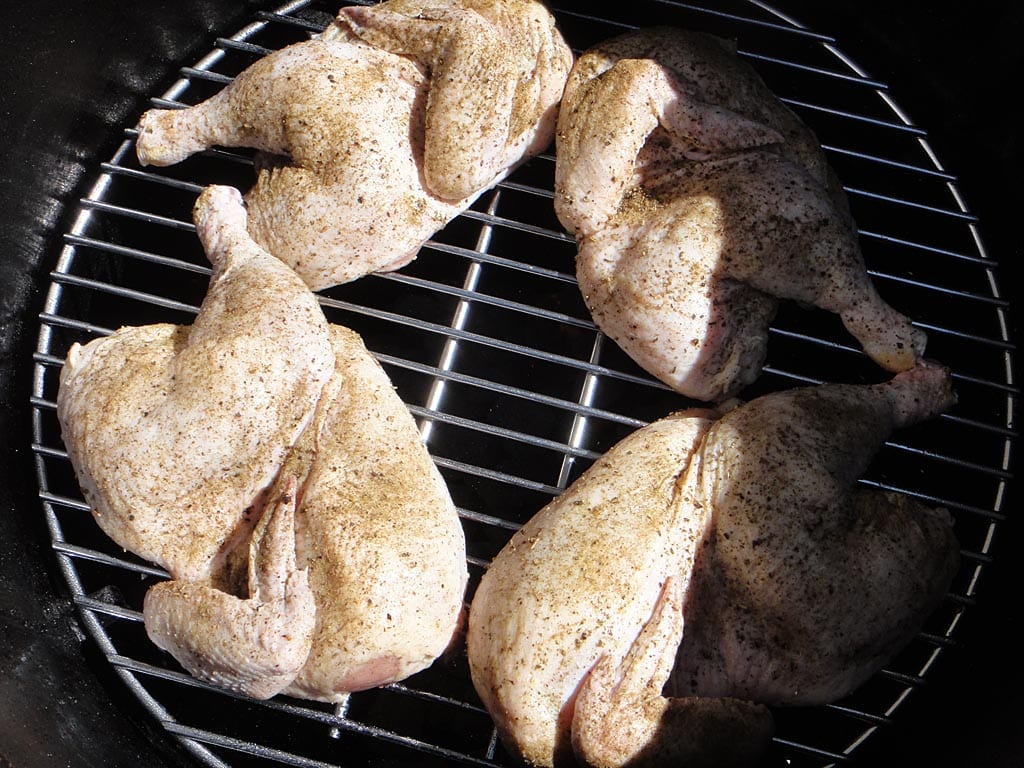
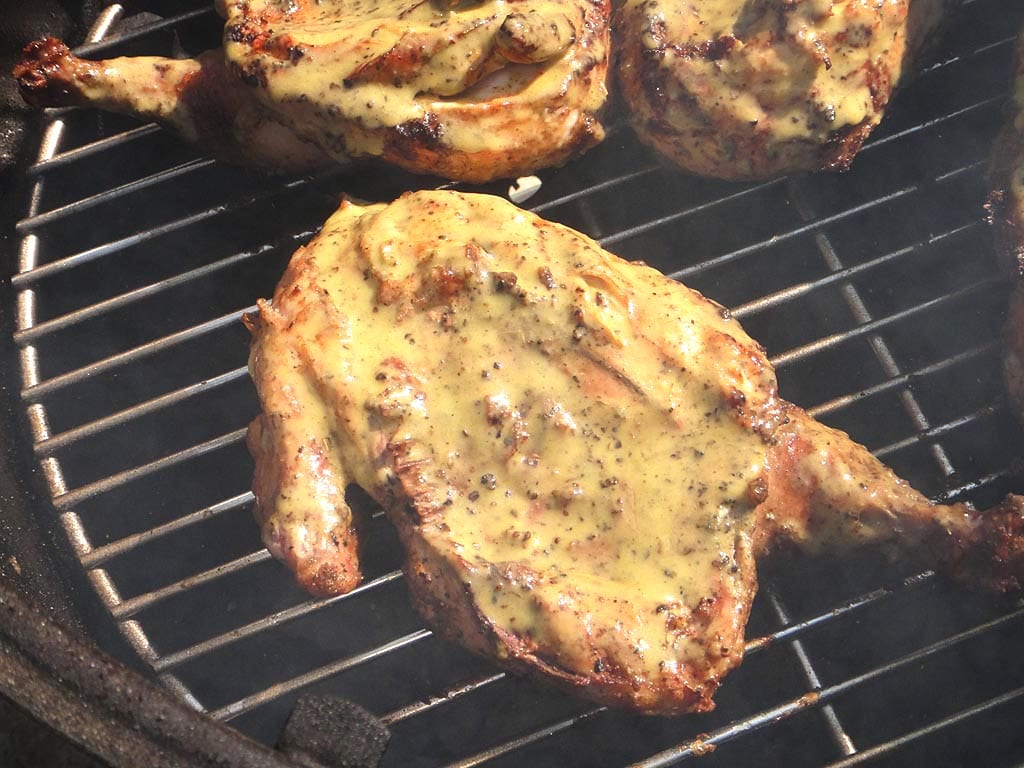
Assemble the cooker but leave the water pan out of the cooker.
Arrange the chicken halves skin-side up on the bottom cooking grate. Immediately baste the chicken with some of the sauce.
Put the lid on the cooker. Place the smoke wood on the hot coals.
Set the top vent to 100% open and all 3 bottom vents to 100% open and leave them that way throughout the entire cooking process. Allow the cooker to run in the range of 325-375°F.
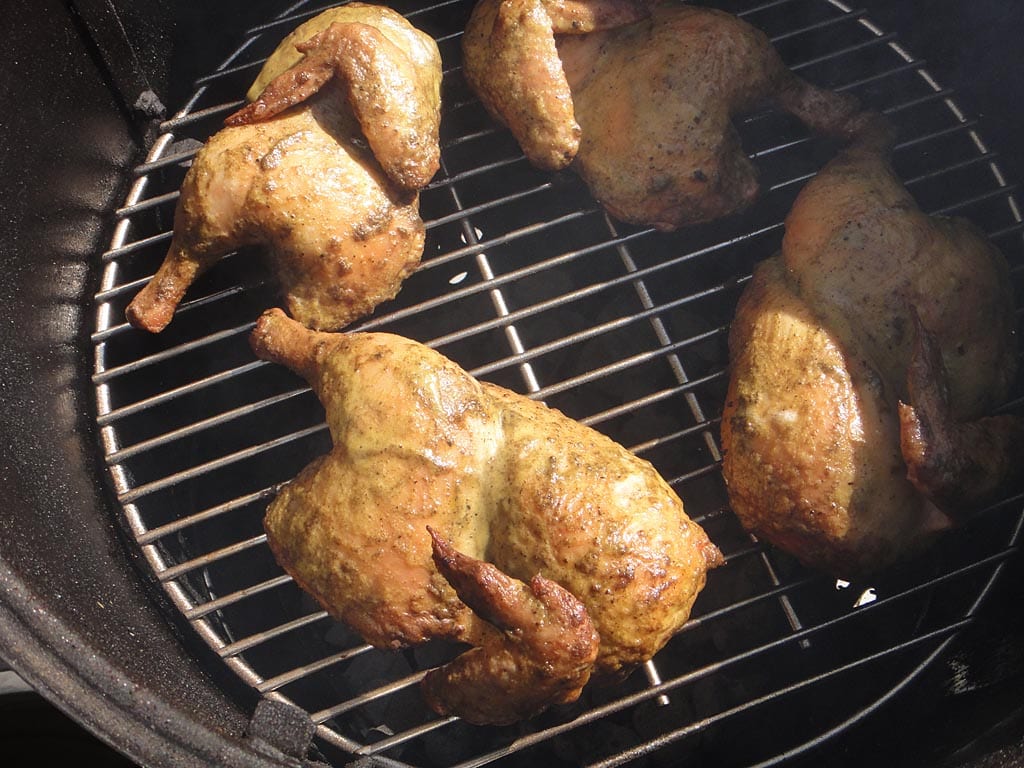
Cook the chicken for about 15 minutes, then baste again with sauce. Cook another 10-15 minutes until the bottom side is browned and the thigh registers 120°F with an instant-read thermometer. Flip the chicken skin-side down and baste with sauce. Cook another 20-25 minutes until the skin is browned. The chicken is done when the breast registers 160-165°F and the thigh registers 170-175°F.
Here’s how the temperature and vent settings went for the cooking session:
| Time | Lid Temp | Meat Temp | Vent 1 % | Vent 2 % | Vent 3 % |
| 3:30 pm | – | – | 100 | 100 | 100 |
| 3:40 pm | 382 | – | 100 | 100 | 100 |
| 3:45 pm (b) | 345 | – | 100 | 100 | 100 |
| 4:00 pm (t)(b) | 342 | 128 | 100 | 100 | 100 |
| 4:15 pm | 340 | 172 | 100 | 100 | 100 |
(b) basted chicken
(t) turned meat over
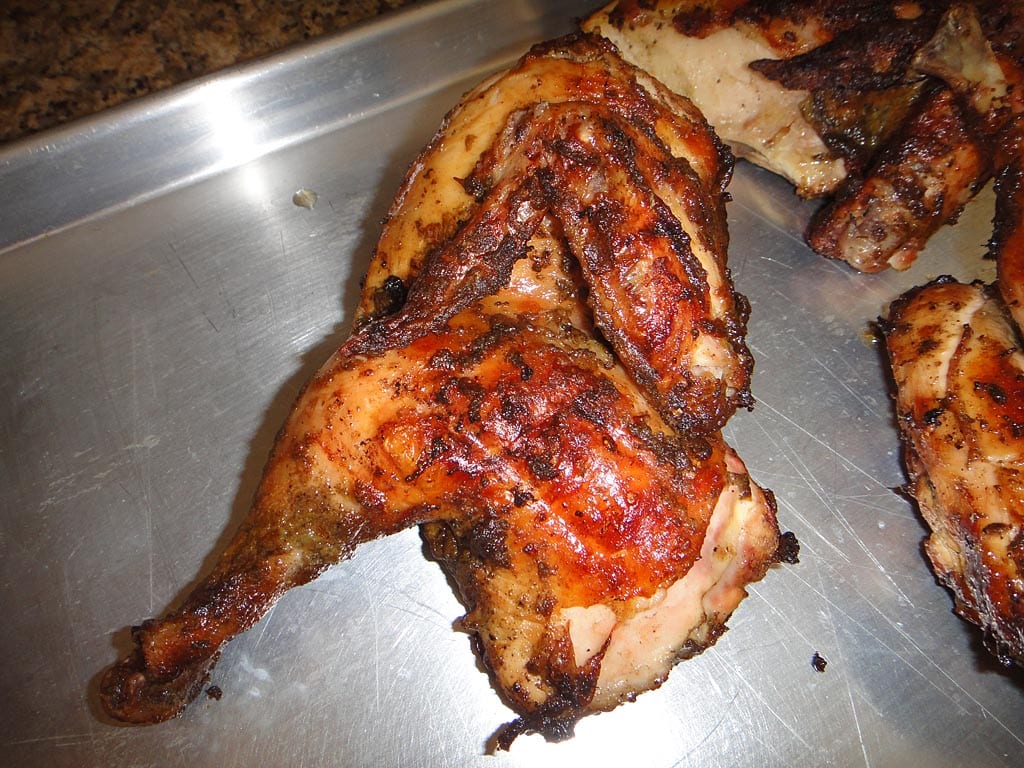
Crisp The Skin Directly Over Hot Coals
If the chicken hits 170-175°F in the thigh but the skin is not as browned as you would like, remove the middle cooking section and place the cooking grate directly over the hot coals. Watch the chicken closely, it will only take a few minutes to brown and crisp the skin.
Rest The Chicken Before Serving
Remove the chicken to a rimmed baking sheet pan and let rest uncovered for 5 minutes before serving. Photo 9 shows how the chicken looked coming right out of the Weber Smokey Mountain Cooker. Photo 10 shows a piece that was crisped directly over hot coals to further brown the skin.
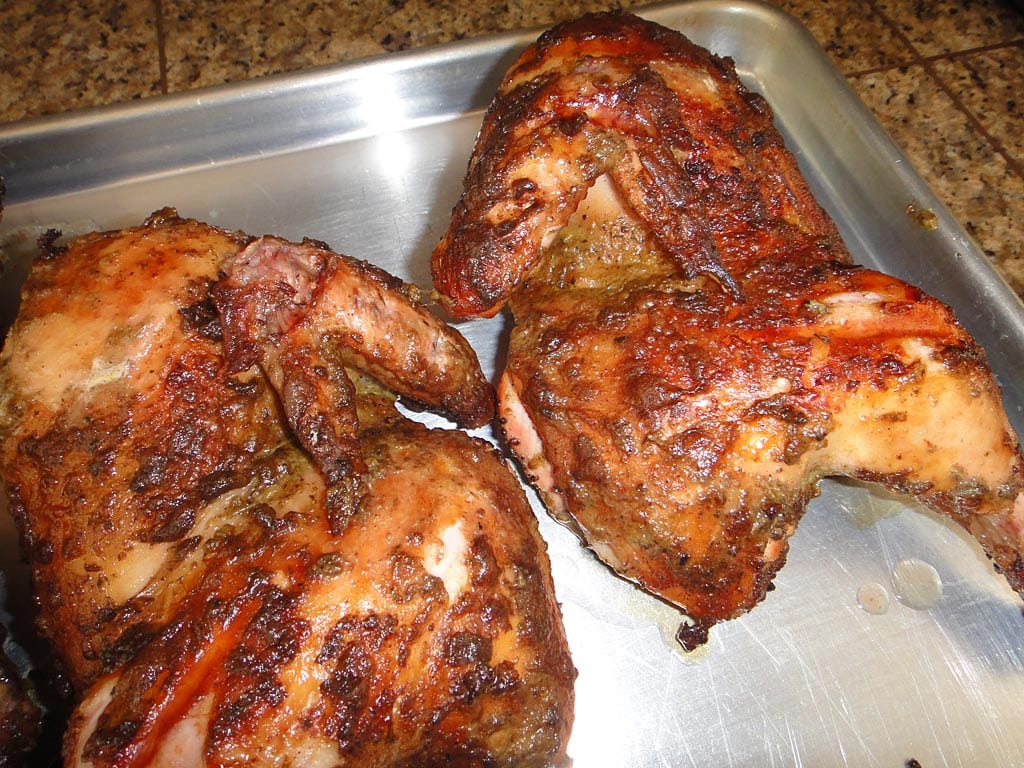
This version of Cornell Chicken was very moist, due to the brining. It had good flavor from the fresh herbs and was not too vinegary. The skin was nicely browned and the fat well-rendered.
If you’ve not tried Cornell Chicken, do yourself a favor and give it a shot, I think you’ll like it!
More Chicken Links On TVWB
- Basic Barbecued Chicken
- Basic Marinated Chicken
- Beer Can Chicken
- Hot & Fast Chicken
- Cornish Game Hens – Peach Glaze
- Pulled Chicken Sandwiches
- Alabama-Style Chicken Sandwiches With White Sauce
- Boneless Skinless Chicken Breasts
- Buffalo Wings – Smoked & Deep Fried
- Chicken Selection & Preparation
- How To Butterfly A Chicken


