Summary
- Select a whole, untrimmed “packer cut” brisket weighing 10-12 pounds.
- Trim excess fat, leaving a 1/8″ – 1/4″ fat cap.
- Apply wet rub and refrigerate overnight.
- Barbecue at 225-250°F to 170°F internal temperature.
- Wrap in foil and cook in a 300°F cooker or oven to 205°F internal temperature.
- Let the meat rest for at least 30 minutes before serving, or hold in an empty cooler for 2-4 hours.
- Separate the flat and point portions, and slice the flat across the grain 1/4″ – 3/8″ thick.
In his book Paul Kirk’s Championship Barbecue Sauces, Paul Kirk writes, “Barbecue pastes, or wet rubs, are not very common anymore, but they are on the comeback trail. A wet rub is really a combination of a dry rub and a marinade—it’s a paste you apply to your meat before barbecuing.”
I got inspired to try a wet rub with brisket after reading a post by Rick H. on The Virtual Weber Bulletin Board. Rick combined a variety of dry rub ingredients with Worcestershire sauce to make a paste, and I adapted his recipe to come up with what you’ll find below.
The one thing I want you to take away from this topic is that you can make your own wet rub by combining your favorite dry rub ingredients with a flavorful liquid like Worcestershire sauce, orange juice or even a favorite soft drink or beer. Use just enough liquid to achieve the consistency of a paste so that when you apply it to the meat it sticks to the surface.
Here are some pictures I took on July 4-5, 2001 when preparing this brisket.
Prepping The Brisket
I bought a whole untrimmed USDA Choice brisket in Cryovac from a local butcher shop. It weighed 11.23 pounds.
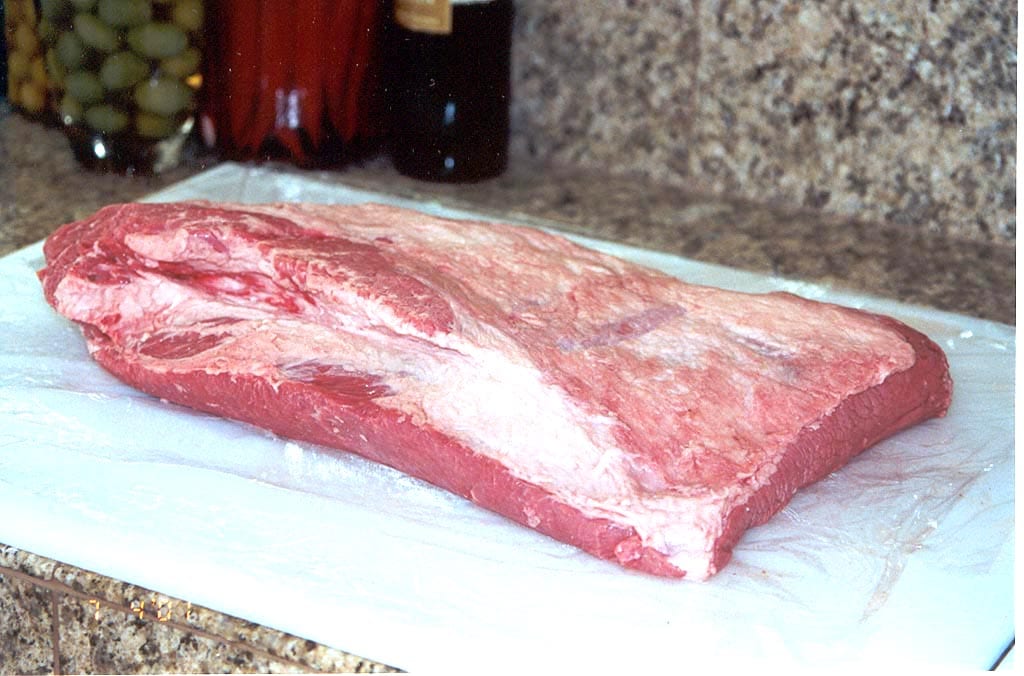
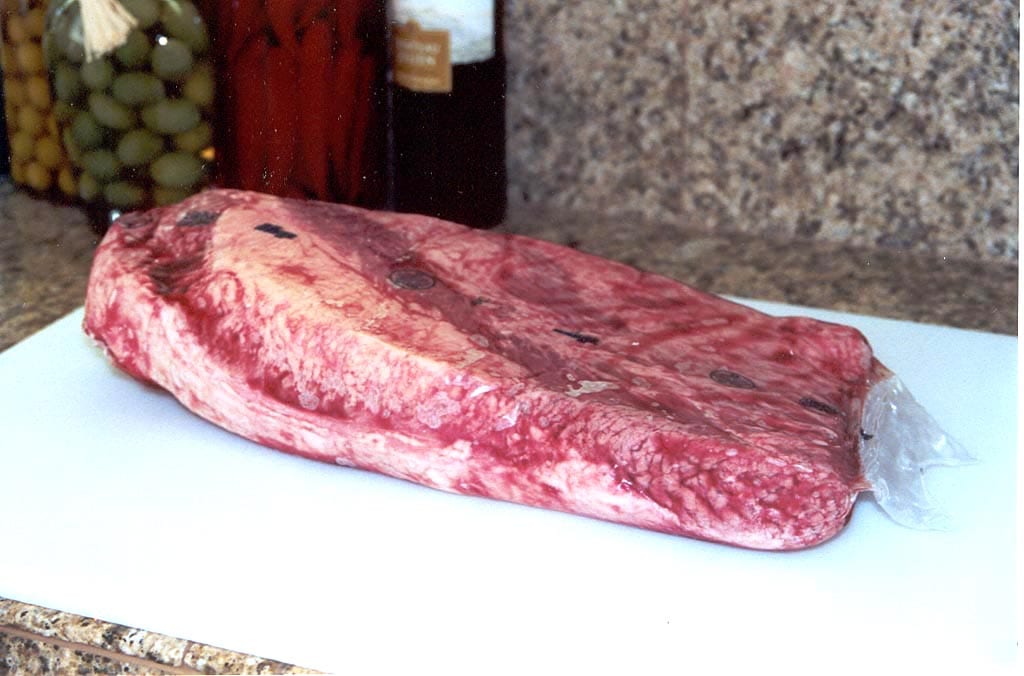 The night before I planned to smoke the brisket, I trimmed the fat side to 1/8″-1/4″ and removed much of the fat around the edges and between the flat and point sections. Just for fun, I weighed the fat—2 pounds exactly.
 Learn more later: Brisket Selection & Preparation
About The Wet Rub
 Here’s the recipe I used for the wet rub on this brisket.
Wet Rub For Brisket
- 3 Tablespoons dark brown sugar, packed
- 2 Tablespoons paprika
- 1 Tablespoon cayenne pepper
- 1 Tablespoon table salt
- 1 Tablespoon onion powder
- 1 Tablespoon freshly ground black pepper
- 1 Tablespoon ground cumin
- 1/2 teaspoon granulated garlic powder
- 4 Tablespoons Worcestershire sauce
- 1 Tablespoon Tabasco sauce
Combine all ingredients thoroughly to form a thick paste. The amount of liquid ingredients can be adjusted to achieve the desired consistency. Substitute 3-4 cloves of crushed fresh garlic for the granulated garlic powder, if you like.
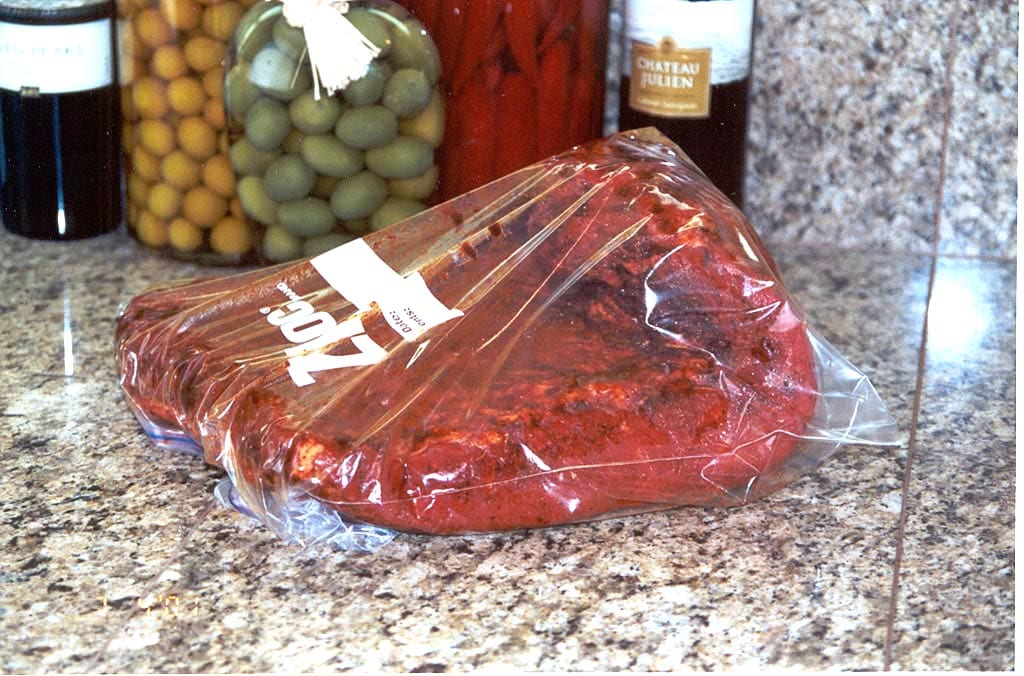
Wearing disposable gloves, I massaged the wet rub all over the brisket and placed it in a 2-gallon Ziploc bag for storage in the refrigerator overnight.
 Let’s Get Started
At about 9:00 am the next day, I fired up the cooker using the Minion Method. I filled the charcoal chamber to the top with Kingsford charcoal and added 20 lit briquettes on top that were started in a Weber chimney starter.
For this cook, I used the Brinkmann water pan featured on the Alternative Water Pans page. Given the 2 gallon capacity of this pan, I would not need to refill it during the cook.
I assembled the cooker, filled the pan with hot water, opened all the bottom vents fully and waited for the temperature to come up to 240-250°F.
By 10:00 am the Weber Bullet reached 248°F and I was ready to cook. In the hopes of getting a larger smoke ring, I did not bring the meat to room temperature before putting it in the cooker. I inserted a probe thermometer into the middle of the brisket’s flat section and put it on the top cooking grate with the fat side up.
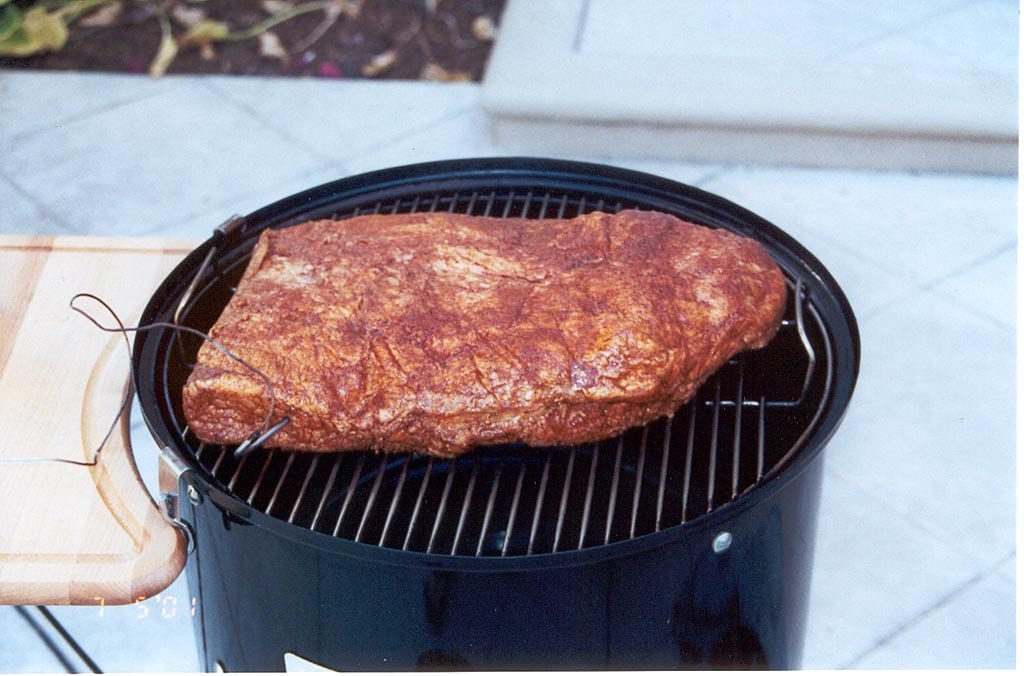
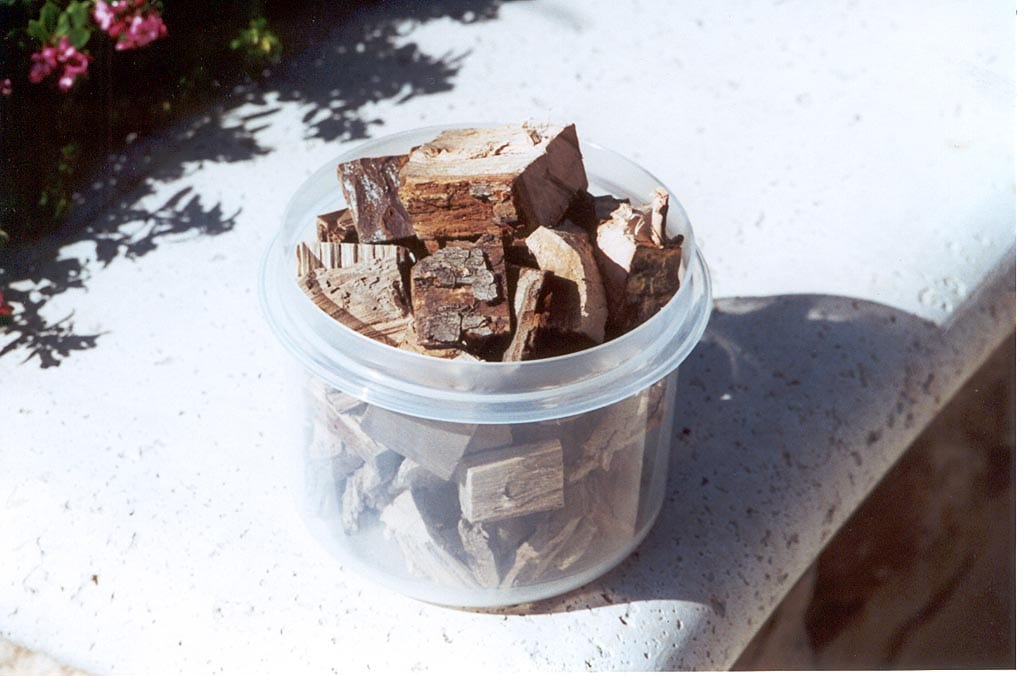
With the meat on, I added 6 cups of small- to medium-sized dry pecan chunks to the charcoal chamber, making sure that some chunks were in contact with burning coals. The deeper Brinkmann water pan made it a bit more difficult to get the chunks into the far side of the chamber, but I got everything situated using a pair of tongs and the brisket was off and running.
 Learn more later: Firing Up Your Weber Bullet
The Cooking Process
For this brisket I used the abbreviated cooking process described on the Brisket – Smoked & Oven Finished page. I smoked the brisket at 225-250°F to an internal temp of 170°F, then removed it from the cooker, wrapped it in foil and baked it in the oven at 300°F to an internal temp of 205°F. This is a great process when you want a tender, moist brisket but can’t afford to spend 12+ hours smoking it.
Here’s how the temperature and vent settings went for this 8 hour cook:
| Time | Lid Temp | Meat Temp | Vent 1 % | Vent 2 % | Vent 3 % |
| 10:00 am | 248 | – | 100 | 100 | 100 |
| 10:15 am | 247 | – | 25 | 25 | 0 |
| 10:30 am | 250 | – | 25 | 25 | 0 |
| 11:00 am | 245 | 112 | 25 | 25 | 0 |
| 11:30 pm | 245 | 135 | 25 | 25 | 0 |
| 12:00 pm | 257 | 146 | 25 | 0 | 0 |
| 12:30 pm | 249 | 156 | 25 | 0 | 0 |
| 1:00 pm | 246 | 162 | 25 | 0 | 0 |
| 1:30 pm | 240 | 166 | 25 | 25 | 0 |
| 2:00 pm (t)(b) | 240 | 168 | 100 | 25 | 0 |
| 2:30 pm | 255 | 165 | 33 | 33 | 33 |
| 3:00 pm | 245 | 167 | 33 | 33 | 33 |
| 3:30 pm | 264 | 169 | 33 | 33 | 33 |
| 4:00 pm (b) | 260 | 170 | 33 | 33 | 33 |
| 5:00 pm | 267 | 172 | 100 | 100 | 100 |
| 5:30 pm (o) | – | 182 | – | – | – |
| 6:00 pm (o) | – | 199 | – | – | – |
| 6:15 pm (o) | – | 205 | – | – | – |
(t) turned meat over and end-for-end
(b) basted with premium apple juice and Gentleman Jack
(o) brisket in the oven at 300°F
Note that the vent percentages represent the way I set the vents at the time indicated.
Basting With AJ & GJ
I estimated the brisket would spend 8 hours in the smoker and 90 minutes in the oven. At the 4 hour halfway mark, I put 10 ounces of Martinelli’s Premium Apple Juice and 2 ounces of Gentleman Jack whiskey in a spray bottle, basted the meat and turned it over and end-for-end.
At the 6 hour mark I basted the meat again. The brisket reached 170°F two hours earlier than I had planned, so I decided to leave it in the cooker for an additional hour and did not turn it. It rose 2°F during that time and at 5:00pm I removed the brisket from the cooker.
Finishing The Brisket
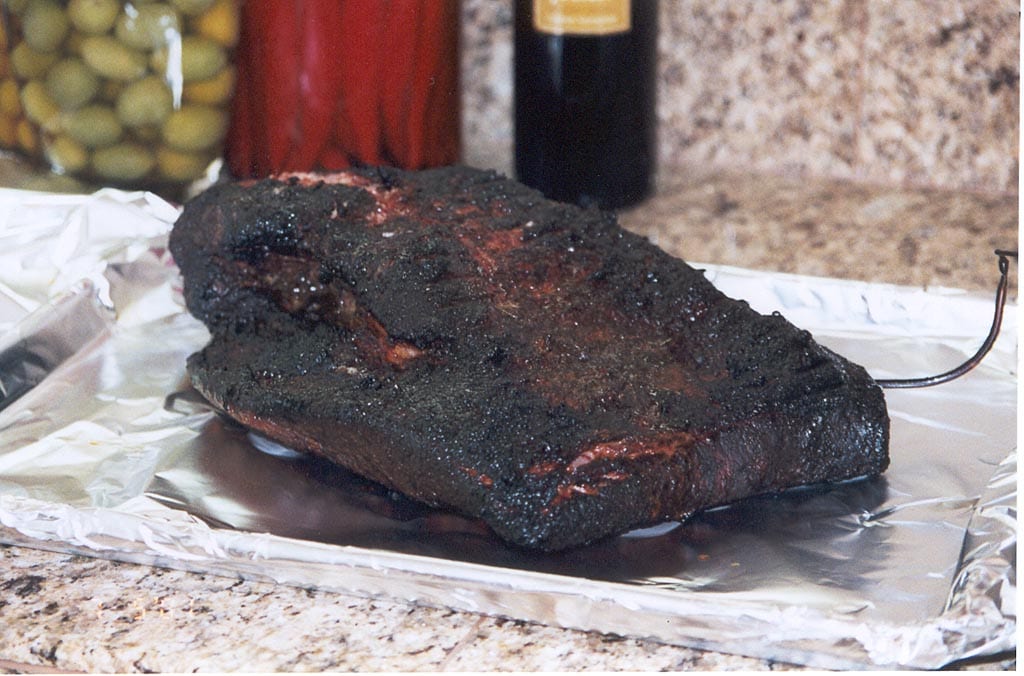
This photo shows how the brisket looked coming out of the cooker. I left the probe thermometer in place and wrapped the brisket in a layer of wide heavy-duty aluminum foil. The brisket went into a 300°F oven on a rimmed baking sheet pan to catch any leaks from the foil package.
 It only took 75 minutes to bring the internal temp to 205°F. I moved the package from the oven to a towel-lined empty cooler where I held the meat until I was ready to cut and serve it.
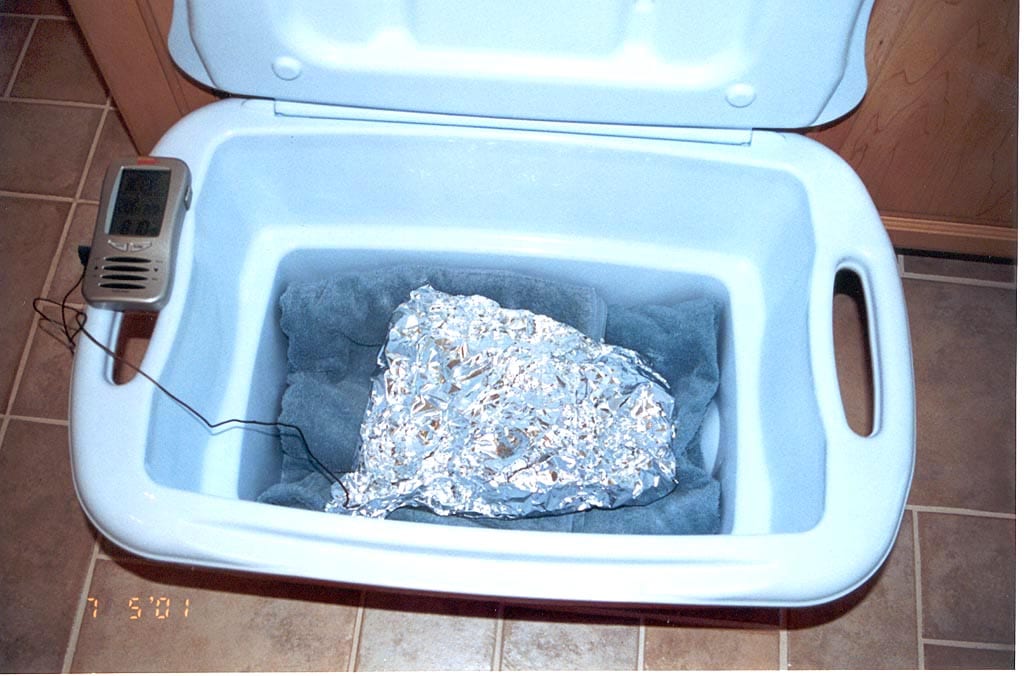 Leaving the probe thermometer in place allows you to monitor the meat temp during this holding time. The cooler keeps the meat well above the 140°F internal temperature required to ensure food safety. Placing towels or crumpled newspaper in the bottom of the cooler will prevent the hot meat from cracking or damaging the cooler lining.
Slicing The Briskie
I held the brisket in the cooler for two hours, and in that time the internal temp dropped from 205°F to 173°F. It’s amazing how that cooler keeps the meat so hot!
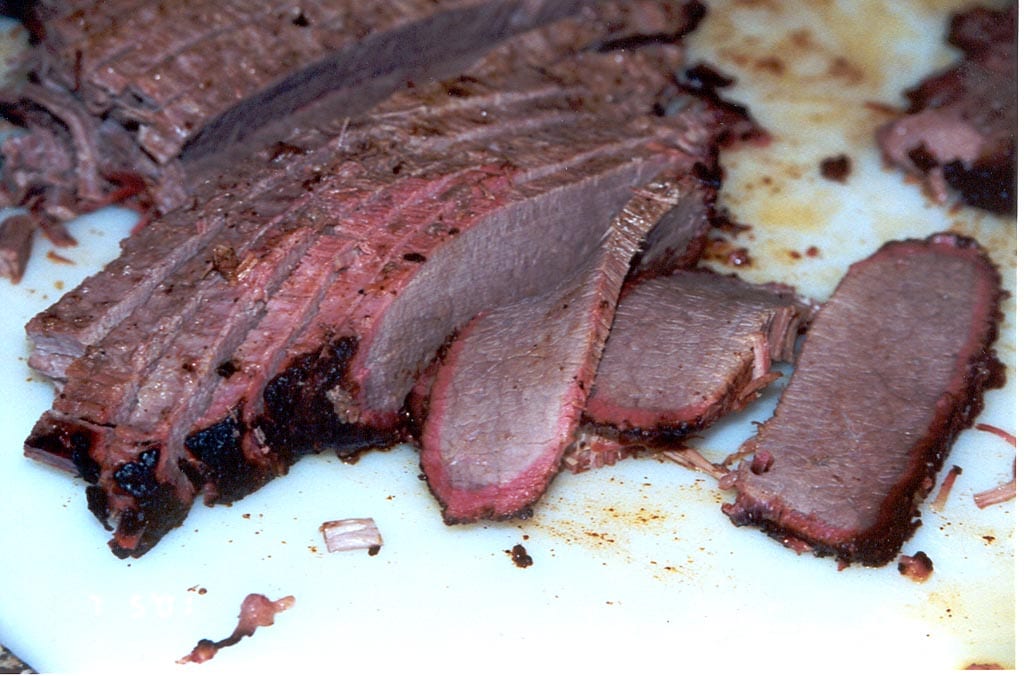
I started by separating the point section from the flat section. In this picture, the flat is on the left and the point on the right.
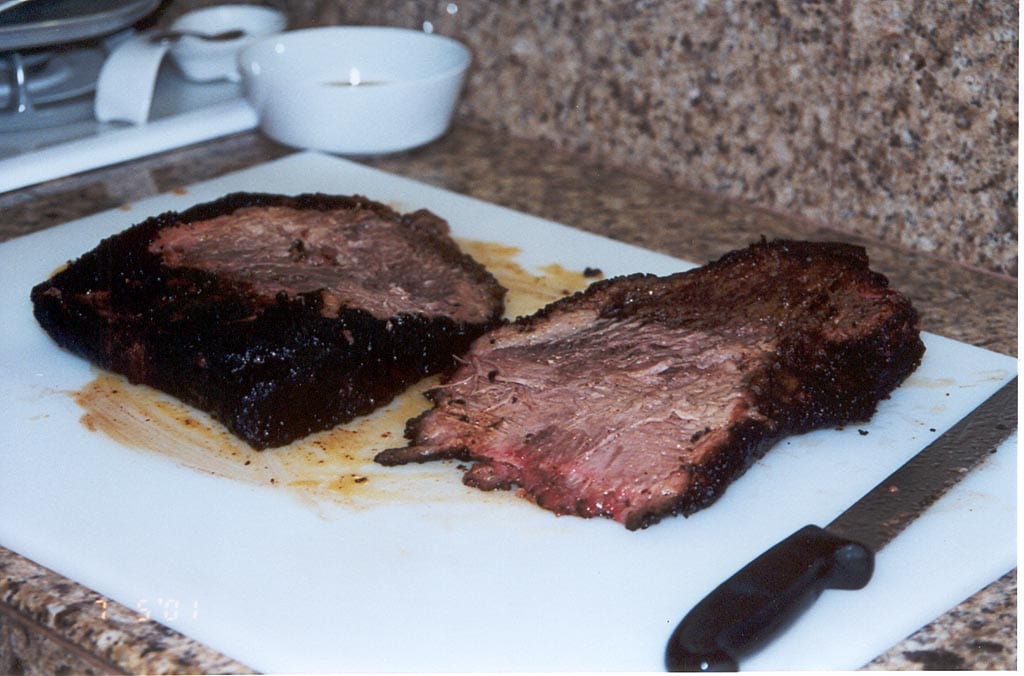 My favorite part is the flat, so I started with that piece, scraping off most of the excess fat and slicing it across the grain. You can see I got a decent smoke ring, but not a monster one.
 To the shredded meat, I added the leftover cutting board bits from slicing the flat section and some of dried-out edges from the brisket flat. I chopped through the meat a few times with a chef’s knife and ended up with the pile you see in the next photo. This picture shows all the chopped meat I got from this brisket. We ate some of the flat before I took the photo, so what you see here is the leftover portion of the flat.
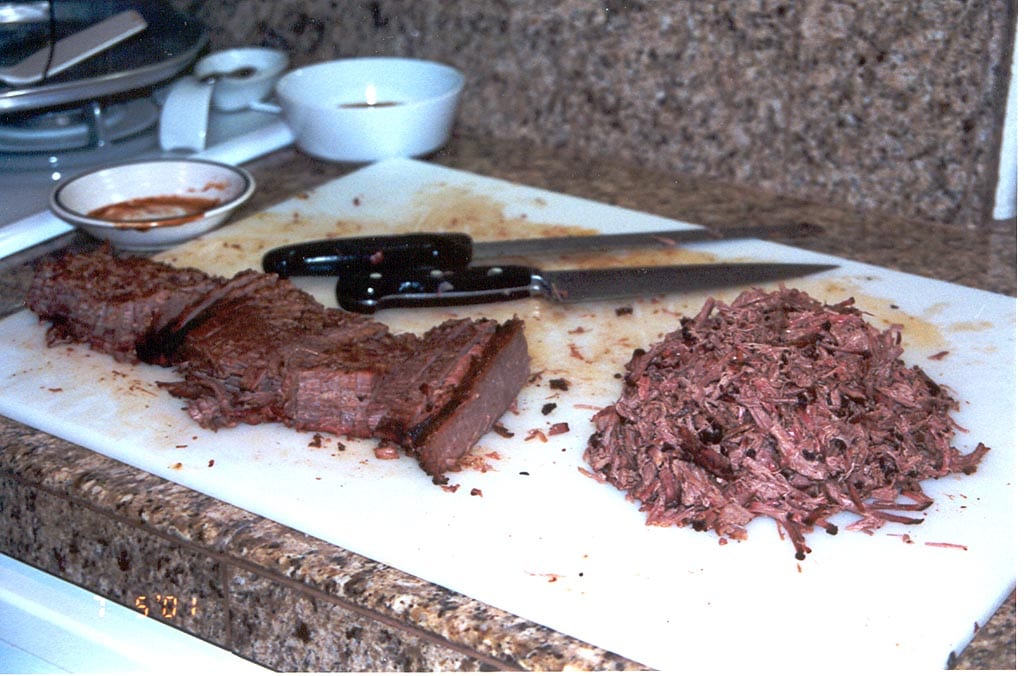 One last thing: the bowl shown in the background of this photo holds the liquid from the bottom of the foil package. Removing the fat renders a tasty juice for drizzling over the sliced brisket flat. There may not be enough liquid to use a fat separator with success, but you can put the liquid in the refrigerator to solidify the fat, then skim it off and reheat the au jus in the microwave.
Wrap-Up
I noted in my cooking log that the exterior appearance of the brisket was good and the smoke ring was 1/8″. The flat was moist and very tender and had to be cut into thick slices to keep the meat together.
The flavor was quite good, but not noticeably different from a dry rub, in my opinion. The outside meat had a nice spicy flavor, and the burnt ends had a bit of heat to them from the concentrated flavor of the wet rub. I know some people don’t like burnt ends, but I think they’re one of the best parts of a brisket!
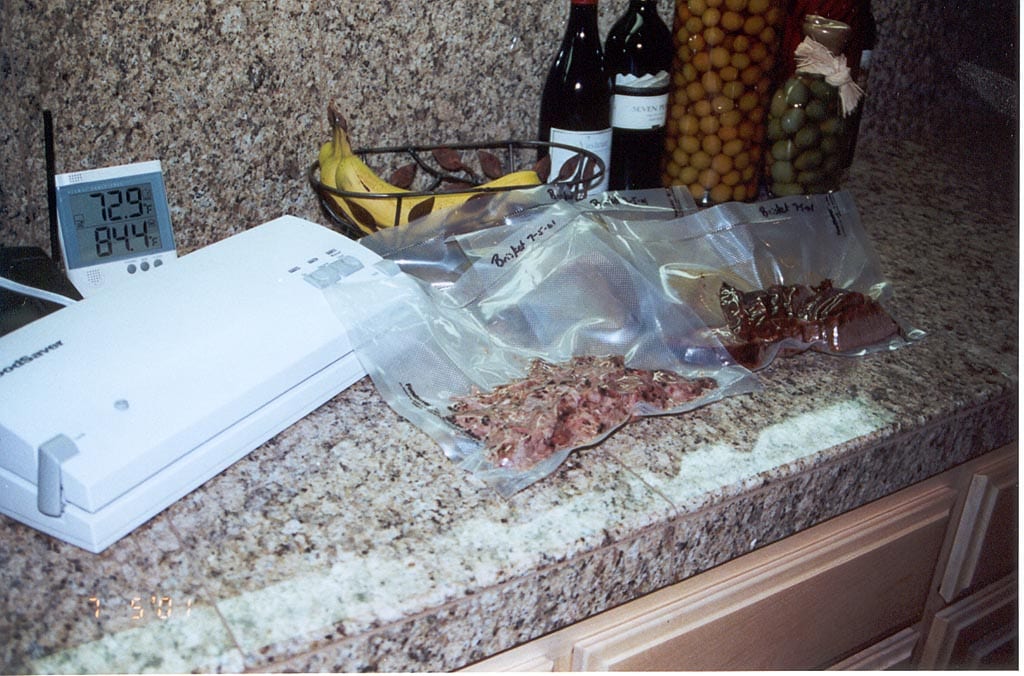
I portioned and vacuum packed the leftovers using a FoodSaver and froze them for later enjoyment.
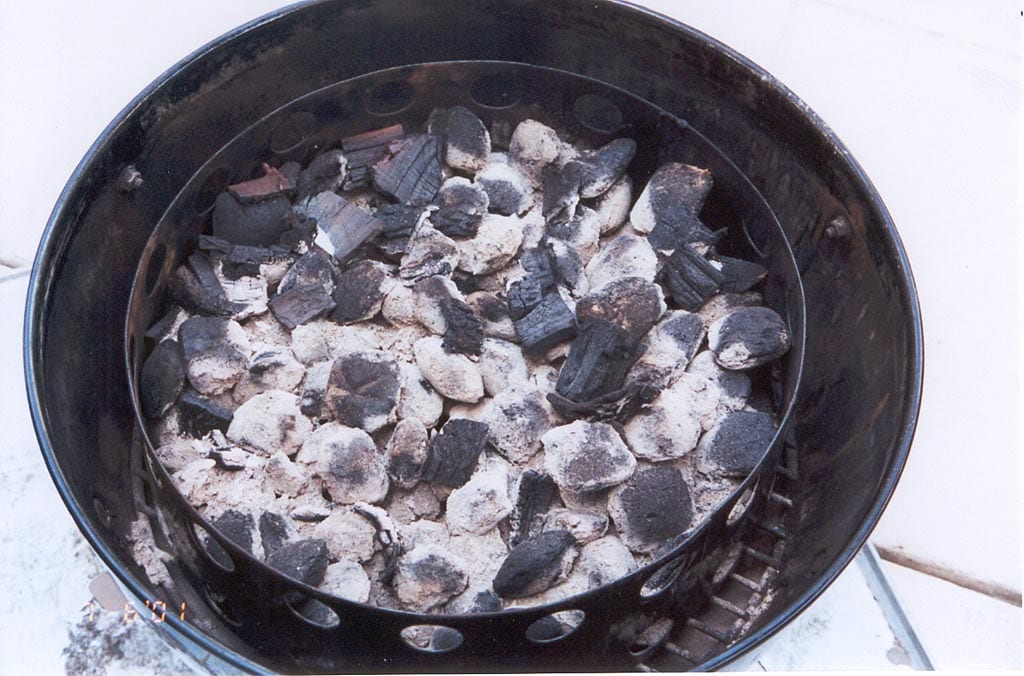
 I’ve also included a picture showing the leftover fuel in the cooker. You can see that I could have gone on smoking for several hours with the remaining charcoal—thanks to the Minion Method!
Postscript
It’s now January 2014—about 12 years after I cooked this brisket—and I’ve got a lot more brisket experience under my belt. Here are a few thoughts as I look back at this article.
- When using the Minion Method, I no longer wait for the cooker to come up to temp before adding the meat. Instead, I put the meat in the cooker immediately after arranging the lit coals on top of the unlit charcoal. Set the top vent to 100% open and leave it that way throughout the entire cooking process. Start with all 3 bottom vents 100% open. As the cooker approaches 250°F, begin to partially close all 3 bottom vents to maintain 225-250°F. Adjust the bottom vents as needed to maintain this temperature range throughout the cooking process.
- I use less smoke wood than I used to. Today, I would use the equivalent of 4 fist-sized chunks of apple wood or other mild smoke wood.
- I don’t turn and baste meat much anymore. If I were doing this brisket again, I’d probably start it fat-side down and leave it that way for the entire time.
More Brisket Links On TVWB
- Brisket – High Heat
- Brisket – Smoked & Oven Finished
- Brisket – Midnight Cook
- Whole Brisket – Central Texas Style Butcher Paper
- Whole Brisket – Competition Trim
- Brisket Flat – Central Texas Style Butcher Paper
- Burnt Ends – Kansas City Style
- Burnt Ends – Smoky, Sticky, Sweet
- Pastrami – Dry Cured
- Quick Pastrami – Smoked Corned Beef Brisket
- Brisket Servings Calculator
- Brisket Selection & Preparation
- Separating Brisket Flat & Point
- Using An Electric Oven To Hold Brisket At Temperature
- Camp Brisket 2020 Trip Report


